
Table of Contents
- 1 Keeping Your Ninja Combi Gleaming: A Practical Guide
- 1.1 1. Safety First, Always! Unplug and Cool Down
- 1.2 2. The Power of the Daily Wipe-Down
- 1.3 3. Tackling the Combi Cooker Pan: Non-Stick Nuances
- 1.4 4. The Bake Tray / Crisper Plate Conundrum
- 1.5 5. Inside the Belly of the Beast: Cleaning the Main Unit Interior
- 1.6 6. The Lid Conundrum: Seals, Vents, and Hidden Grime
- 1.7 7. Dealing with Stubborn Stains and Odors
- 1.8 8. Establishing a Deep Cleaning Routine
- 1.9 9. Maintenance Beyond Cleaning: Extending Appliance Life
- 1.10 10. Tools of the Trade: Your Ninja Combi Cleaning Kit
- 2 Wrapping It Up: The Clean Combi Commitment
- 3 FAQ
Okay, let’s talk about something near and dear to my heart, and maybe occasionally the bane of my existence: the Ninja Combi. As someone who relocated from the Bay Area hustle to the vibrant creative scene here in Nashville, my kitchen became even more of a sanctuary and experimental lab. Luna, my rescue cat, seems to think so too, often supervising my cooking endeavors from a safe distance (mostly). And the Ninja Combi? It’s been a workhorse. Seriously, this thing gets put through its paces – from quick weeknight meals to more ambitious weekend projects. But like any powerful tool, especially one that deals with heat, steam, and, let’s be honest, occasional *splatter*, keeping it clean is paramount. Neglect it, and you’re in for a world of baked-on regret. So, I figured I’d share my hard-won insights, the little tricks and routines I’ve developed for keeping my Ninja Combi looking and performing its best. No magic wands here, just practical advice from my kitchen to yours.
I remember the first time I *really* let it go for a bit too long. Had a busy week, deadlines looming, maybe ordered takeout one too many times. Came back to the Combi wanting to whip up something simple, opened the lid, and was greeted by… well, let’s just say the ghosts of meals past. Baked-on sauce, some greasy residue on the heating element shield, a faint, lingering aroma that wasn’t exactly appetizing. It took some serious elbow grease (and maybe a few muttered curses) to get it back to a state I was happy with. That little episode taught me a valuable lesson: consistency is key. A few minutes of cleaning after each use saves you a massive headache down the line. It’s not just about aesthetics; it’s about performance, food safety, and frankly, not having your current meal taste faintly of last Tuesday’s salmon.
So, what’s the plan? We’re going to break down the cleaning process, piece by piece. From the quick post-meal wipe-downs to the more involved deep cleans. We’ll talk about the different components – the main unit, the pan, the tray, the lid – and the best ways I’ve found to tackle each one. We’ll cover stubborn stains, lingering odors, and the tools that make the job easier. Think of this as your friendly guide, a little bit of shared experience from someone who uses this appliance *a lot*. I’m not claiming perfection here; my process is always evolving, and sometimes life gets in the way. But having a solid routine makes a huge difference. Ready to dive into the nitty-gritty of Ninja Combi cleaning?
Keeping Your Ninja Combi Gleaming: A Practical Guide
1. Safety First, Always! Unplug and Cool Down
Alright, this might seem blindingly obvious, but you’d be surprised. Before you even *think* about introducing water or cleaning solutions, unplug the appliance. Seriously, electricity and water are not friends. It’s easy to forget in the rush to clean up after dinner, but make it a non-negotiable first step. The second, equally important part? Let it cool down. The Ninja Combi gets hot, especially the interior, the pan, and the heating elements. Trying to clean it while it’s still scorching is a recipe for burns, and potentially damaging the surfaces. Hot metal and cold water can cause warping or stress fractures over time, especially on non-stick coatings. Patience is required here. Go pour yourself a glass of water, chat with Luna (or your own furry supervisor), load the dishwasher – give it a good 20-30 minutes, maybe longer depending on how long it was running and at what temperature. You should be able to comfortably touch the interior and components before starting. This cool-down period isn’t just about safety; it also makes cleaning easier as some residues might loosen slightly as they cool.
I learned this the hard way once, not with the Combi, but with an old oven tray. Impatient me decided to rinse it under cold water straight from a hot oven. The resulting *crack* sound was sickening, and the tray warped instantly. Lesson learned. Respect the heat, respect the cool-down. It protects you, and it protects your expensive appliance. Think of it as letting the Combi catch its breath after working hard for you. This simple habit of unplugging and cooling is the foundation of safe and effective cleaning. Don’t skip it. Ever. It’s the essential preliminary step before any actual scrubbing begins, setting the stage for a hassle-free cleaning session where the only thing you need to worry about is the grime itself, not accidental shocks or burns. Plus, a cooled appliance is less likely to have food *bake on even harder* if you accidentally splash water on a hot spot.
2. The Power of the Daily Wipe-Down
This is where that consistency thing really comes into play. The single most effective way to minimize cleaning headaches? A quick wipe-down after every single use (once it’s cooled, of course!). Think of it like wiping down your stovetop. You wouldn’t let splatters sit there for days, right? Same principle applies here. What needs wiping? Focus on the main interior cavity, especially around the edges and the bottom where crumbs or drips might collect. Pay attention to the inside of the lid – condensation mixed with food particles can easily dry on here. A damp microfiber cloth is usually all you need for this daily task. Microfiber is great because it grabs onto particles without being abrasive. Avoid overly saturated cloths; you just want it damp enough to pick up loose debris and minor splatters. You don’t need soap for this quick wipe, just warm water.
This routine takes, what, maybe two minutes? But those two minutes are an investment. They prevent minor spills from becoming baked-on nightmares. If you cooked something particularly splattery, like tomato sauce or something greasy, give those areas a little extra attention. You’re essentially doing preventative maintenance. It keeps the interior looking fresh and prevents the buildup of residues that can eventually affect cooking performance or impart off-flavors. I find that making this part of the immediate post-cooking cleanup ritual – right after transferring the food out – helps solidify the habit. The goal isn’t a deep scrub, it’s simply surface-level maintenance. Catching spills while they’re fresh makes a world of difference compared to tackling them after they’ve been baked on by subsequent cooking cycles. It’s the simplest, yet perhaps most impactful, tip for long-term Ninja Combi care.
3. Tackling the Combi Cooker Pan: Non-Stick Nuances
Ah, the Combi Cooker Pan. This is often the component that bears the brunt of the cooking action, and thus, the cleaning challenge. Most Ninja Combi pans feature a non-stick coating, which is fantastic for cooking and release, but requires careful handling during cleaning. Rule number one: No abrasive cleaners or tools! That means no steel wool, no harsh scouring pads, no abrasive powders. These will scratch and degrade the non-stick surface faster than you can say ‘ruined pan’. Stick to soft sponges or cloths. If you have food stuck on, resist the urge to scrape violently. Your best bet is often to soak. Fill the pan with warm, soapy water (using a mild dish soap) and let it sit for 15-30 minutes. This usually loosens most residues enough that they can be wiped away easily.
For slightly more stubborn spots, a paste of baking soda and water can sometimes work wonders. Apply the paste, let it sit for a bit, and then gently scrub with a soft sponge. Always rinse thoroughly afterwards. Is the pan dishwasher safe? Usually, yes, but I *always* recommend checking your specific model’s manual. However, even if it is, I personally tend to handwash mine most of the time. Why? Dishwasher detergents can sometimes be harsh, and the high heat and prolonged cycles can potentially degrade the non-stick coating over time faster than gentle handwashing. Maybe I’m overly cautious, but I want that pan to last. Ensuring the pan is completely dry before storing it back in the Combi is also crucial to prevent any moisture buildup. Taking care of the non-stick surface is key to the Combi’s cooking performance, so treat it gently during cleanup.
4. The Bake Tray / Crisper Plate Conundrum
Depending on your Combi model and what you’re cooking, you’ll also be dealing with a bake tray or a crisper plate. These often collect grease drips or baked-on bits, especially when air frying or roasting. Much like the main pan, these usually have some sort of coating (check your manual!) that requires careful cleaning. Abrasives are generally a no-go. Again, soaking is your friend here. If it’s particularly greasy, use hot soapy water and let it sit. A good quality dish soap designed to cut through grease is helpful. For really baked-on gunk, sometimes a longer soak is necessary. You might need to gently work at the edges of the burnt bits with a soft sponge or a plastic scraper (designed for non-stick surfaces) after soaking.
Are these parts dishwasher safe? Again, check the manual for your specific model. Many are, often on the top rack. But like the main pan, I sometimes prefer handwashing to potentially prolong the life of any coating. If you do use the dishwasher, make sure any large food particles are scraped off first. One trick I sometimes use for stubborn grease on these trays is to apply a bit of dish soap directly to the greasy spots, add just a little hot water to make it spreadable, and let it sit for 10-15 minutes before scrubbing gently and rinsing. It seems to concentrate the soap’s degreasing power. Always ensure these trays are completely dry before putting them back in the unit. Proper cleaning of the bake tray and crisper plate ensures even cooking and prevents smoke or unpleasant odors during subsequent uses.
5. Inside the Belly of the Beast: Cleaning the Main Unit Interior
Okay, this can feel like the most intimidating part – cleaning the actual inside of the Combi unit itself. Splatters happen, especially on the side walls and sometimes even the ‘ceiling’ near the heating element. That daily wipe-down helps prevent major buildup, but inevitably, some things will get baked on over time. For light grease or food splatters, a damp microfiber cloth with a drop of mild dish soap usually does the trick. Wipe gently, then rinse with a clean damp cloth (making sure not to drip excess water, especially near vents or electrical components), and finally dry with a soft, dry cloth. It’s crucial to avoid spraying cleaning solutions directly into the unit; always apply them to your cloth first.
What about tougher, baked-on spots? This requires more patience. You might try a paste of baking soda and water applied directly to the spot. Let it sit for 15-20 minutes to soften the grime, then gently scrub with a non-abrasive sponge or cloth. Be persistent but gentle. For the area around the heating element (often shielded), extreme care is needed. Never spray liquids directly onto it. Use a slightly damp cloth to wipe around it carefully. Some models might have a removable shield (check your manual!) which makes access easier. If not, work around it cautiously. Another technique some people use is steam cleaning: place a small oven-safe bowl with a cup of water (maybe add some lemon slices for fragrance) inside the Combi, close the lid, and run it on a steam or low-heat setting for 10-15 minutes. Let it cool slightly, then wipe down the interior. The steam can help loosen grime. Always ensure the interior is completely dry before closing the lid or storing.
6. The Lid Conundrum: Seals, Vents, and Hidden Grime
The lid of the Ninja Combi is more complex than it looks. It houses seals, vents, and often parts of the heating or air circulation system. Grime and condensation can accumulate here, especially around the silicone seal. After each use (and cool-down!), wipe the underside of the lid with your damp microfiber cloth. Pay special attention to the silicone gasket or seal. Food particles can get trapped here, leading to odors or affecting the seal’s effectiveness over time. Gently wipe it clean. If it looks greasy, use a cloth slightly dampened with soapy water, followed by a rinse cloth, and then dry thoroughly.
Check any visible vents or openings on the lid. Sometimes tiny particles can get lodged here. A soft brush (like an old toothbrush dedicated to cleaning) can be useful for gently dislodging anything stuck in crevices or around vents. Never poke anything sharp into the vents. If your model has a removable inner lid liner or splatter shield, follow the manufacturer’s instructions for removing and cleaning it – this often allows for more thorough cleaning. Ensuring the lid, especially the seal, is clean and dry is crucial for proper function and preventing unwanted lingering odors. Moisture trapped in the lid can lead to musty smells, so drying is just as important as washing. Take the extra minute to inspect and dry the lid properly; it’s a key part of overall appliance hygiene.
7. Dealing with Stubborn Stains and Odors
Despite your best efforts with daily wipe-downs, sometimes stubborn stains or lingering odors persist. Maybe you cooked fish, or something got a little burnt. What then? For tough stains inside the unit or on the pan/tray (after testing on an inconspicuous area if unsure), the baking soda paste (baking soda + a little water) is often my first go-to. Apply, let sit, gently scrub, rinse. For greasy buildup that resists soap, sometimes leaving the baking soda paste on for longer (30+ minutes) helps. Remember, gentleness is key, especially on non-stick surfaces.
What about odors? First, ensure everything is thoroughly cleaned and dried, especially the lid seal. If a smell lingers, try the steam-cleaning trick mentioned earlier, but add a few tablespoons of white vinegar or some lemon slices to the water. Run a short steam cycle, let it cool, and wipe down. The steam helps distribute the deodorizing properties of the vinegar or lemon. Afterwards, leaving the lid slightly ajar for a few hours can help air things out. Another trick? Place a small bowl of dry baking soda inside the cool, clean Combi and close the lid overnight. Baking soda is excellent at absorbing odors. Just remember to remove it before using the appliance again! Sometimes, simply running a cycle with just water can help flush out residual smells. Tackling stubborn stains and odors might require a bit more effort, but these methods usually do the trick without resorting to harsh chemicals.
8. Establishing a Deep Cleaning Routine
While daily wipe-downs and thorough cleaning after messy meals are essential, establishing a periodic deep cleaning routine is also a good idea. How often? It depends entirely on how frequently you use your Combi and what you cook. For me, maybe once a month or every couple of months feels right, but adjust based on your usage. What does a deep clean involve? It’s about going beyond the surface. Take a closer look at the heating element shield – can it be cleaned more thoroughly? Check the vents again, perhaps using a vacuum cleaner with a brush attachment (carefully!) on exterior vents to remove dust buildup.
Inspect the silicone lid seal closely for any signs of wear, tear, or embedded grime you might miss during quicker cleans. Give the entire interior cavity a very thorough wipe-down, perhaps using the baking soda paste method on any persistent spots. If your model has removable parts you don’t normally remove (like an inner lid liner), take them out and clean them according to the manual. Think of this as a more intensive version of your regular cleaning. It’s also a good time to inspect the power cord and plug for any damage. This periodic deep clean helps catch anything missed during daily upkeep and ensures the long-term health and hygiene of your appliance. Is this frequency perfect? Maybe not for everyone. You might need it more or less often. The key is to pay attention to your appliance and give it this extra TLC when it seems needed.
9. Maintenance Beyond Cleaning: Extending Appliance Life
Okay, technically this isn’t *cleaning*, but proper maintenance is intrinsically linked to keeping your Combi in good shape, which often makes cleaning easier in the long run. Regularly inspect the power cord and plug for any fraying, kinks, or damage. A damaged cord is a safety hazard and should be addressed immediately (usually requiring professional repair or replacement). Ensure the unit is always placed on a stable, level, heat-resistant surface with adequate ventilation around it, as specified in the manual. Blocked vents can affect performance and potentially lead to overheating, which might cause food to burn or stick more easily, making cleaning harder.
Listen to the sounds your Combi makes. Are there any unusual grinding or rattling noises? While some operational noise is normal, significant changes could indicate an issue that needs checking. Keep the exterior clean too – dust and kitchen grease can accumulate on the outside. A simple wipe with a damp cloth is usually sufficient. This kind of preventative care, this holistic appliance maintenance, might seem tangential to cleaning tips, but a well-functioning, properly situated appliance is often an easier-to-clean appliance. Think of it as ensuring the machine is happy, so it cooks well and cleans up without too much fuss. It’s about respecting the tool and ensuring its longevity.
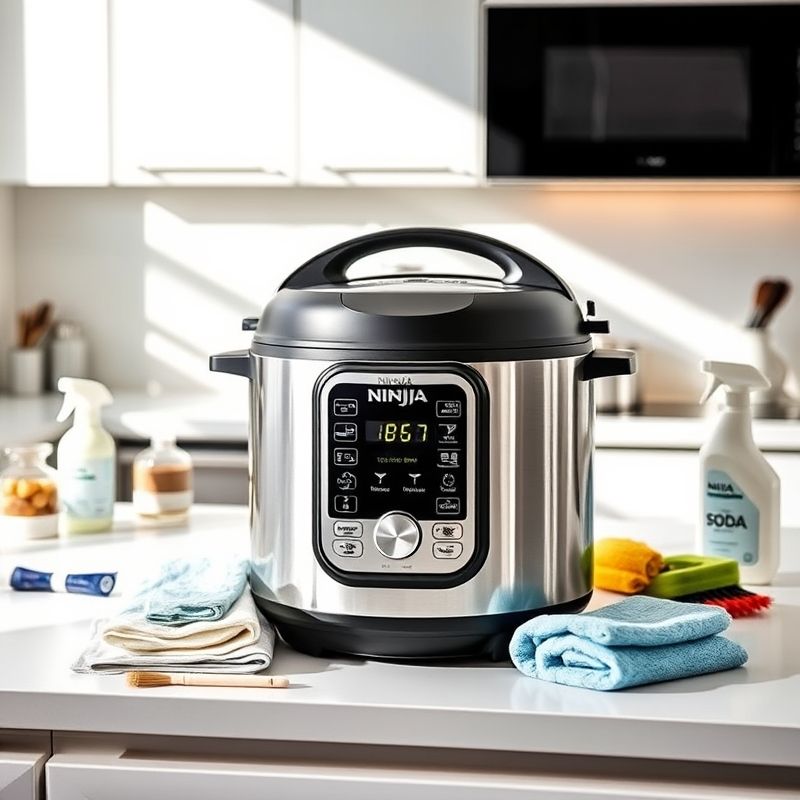
10. Tools of the Trade: Your Ninja Combi Cleaning Kit
Having the right tools makes any job easier, and cleaning your Ninja Combi is no exception. You don’t need anything fancy, but here’s what I keep handy in my personal cleaning arsenal: Microfiber cloths (several – some for washing, some for rinsing, some for drying), a good quality, non-abrasive sponge (the kind with a softer scrubbing side), a soft-bristled brush (like that dedicated toothbrush), mild dish soap (preferably one good at cutting grease), baking soda, and white vinegar (used sparingly and carefully). Sometimes, a plastic or silicone scraper designed for non-stick cookware can be useful for gently dislodging really stubborn bits after soaking.
What to avoid? Steel wool, abrasive scouring pads, harsh chemical cleaners (like oven cleaner – definitely not!), abrasive powders, and sharp utensils for scraping. These will damage the surfaces, especially the non-stick coatings and potentially the interior walls or seals. Having these simple, effective cleaning supplies readily available makes it much easier to stick to those quick wipe-downs and tackle messes promptly. Keep them stored conveniently near your sink or cleaning station. Is this the definitive kit? Maybe not, you might find other gentle tools that work for you, but this forms a solid foundation for keeping your Combi clean without causing damage. It’s about having the right weapons for the battle against grime!
Wrapping It Up: The Clean Combi Commitment
So, there you have it – my collected thoughts and routines for keeping the Ninja Combi clean. It might seem like a lot when laid out like this, but honestly, it boils down to consistency and using the right (gentle) techniques. That quick wipe after each use makes the biggest difference, preventing small splatters from turning into archaeological digs later on. Treating the non-stick surfaces with care, utilizing soaking power, and having a few basic tools like microfiber cloths and baking soda on hand covers most situations. It’s not about achieving pristine perfection every single time – sometimes life is messy, and kitchens reflect that. But aiming for regular maintenance keeps the appliance working well, ensures your food tastes like it should, and saves you from those daunting, marathon cleaning sessions.
Ultimately, the Ninja Combi is a fantastic piece of kitchen technology, a true multi-tasker. But like any relationship, it requires a little effort to maintain harmony. Investing those few minutes in cleaning is an investment in delicious future meals and a longer lifespan for your appliance. Maybe the real challenge isn’t the cleaning itself, but building the habit? I challenge you (and myself, let’s be real) to try incorporating just one new tip from this list into your routine this week. Maybe it’s being more diligent about the immediate wipe-down, or finally tackling that lingering odor with the vinegar steam trick. Small changes add up. Will you always feel like cleaning it immediately? Probably not. But knowing how to do it efficiently and effectively makes the task less dreadful. Here’s to many more clean and delicious meals from our Combis!
FAQ
Q: Is the Ninja Combi pan really dishwasher safe?
A: Most Ninja Combi pans and trays are listed as dishwasher safe (top rack recommended), BUT always check the specific manual for your model. Many users, myself included, prefer handwashing non-stick components with mild soap and a soft sponge to potentially extend the life of the coating, as harsh dishwasher detergents and high heat can degrade it over time.
Q: How do I get rid of strong smells like fish or curry from my Ninja Combi?
A: First, ensure all parts are thoroughly cleaned and dried, especially the lid seal. If odors persist, try steam cleaning with a cup of water and either a few tablespoons of white vinegar or lemon slices added. Run a short steam cycle, let cool, wipe down, and air it out. Placing a bowl of dry baking soda inside the cool unit overnight can also absorb lingering smells.
Q: Can I clean the heating element inside the Ninja Combi?
A: You should never spray cleaners directly onto the heating element or immerse it in water. Carefully wipe *around* the element and its shield (if applicable) with a slightly damp cloth once the unit is completely cool and unplugged. Avoid excessive moisture. If the shield is removable according to your manual, you can clean it more easily once removed.
Q: How often should I deep clean my Ninja Combi?
A: There’s no single answer, as it depends heavily on usage frequency and what you cook. A good guideline is roughly once a month or every couple of months for average users. If you use it daily or cook particularly greasy or splattery foods often, you might need to do it more frequently. Pay attention to buildup and odors as indicators.
You might also like
- Best Practices for Combi Oven Maintenance
- Choosing the Right Multi-Cooker for Small Kitchens
- Effective Kitchen Degreasing Techniques
@article{ninja-combi-cleaning-tips-keeping-your-multi-cooker-spotless,
    title   = {Ninja Combi Cleaning Tips: Keeping Your Multi-Cooker Spotless},
    author  = {Chef's icon},
    year    = {2025},
    journal = {Chef's Icon},
    url     = {https://chefsicon.com/ninja-combi-cleaning-tips/}
} 

