
Table of Contents
- 1 Mastering Knife Maintenance: Cleaning and Storage Essentials
- 1.1 Section 1: Why Proper Knife Care is Non-Negotiable
- 1.2 Section 2: The Cardinal Sin: Knives and Dishwashers
- 1.3 Section 3: Gathering Your Gentle Cleaning Arsenal
- 1.4 Section 4: The Safe Hand-Washing Dance
- 1.5 Section 5: The Crucial Step: Immediate and Thorough Drying
- 1.6 Section 6: Safe Havens: Exploring Knife Storage Options
- 1.7 Section 7: The Classic Choice: Decoding Knife Blocks
- 1.8 Section 8: The Magnetic Appeal: Wall Strips Explored
- 1.9 Section 9: Hidden Gems: In-Drawer Trays and Sheaths
- 1.10 Section 10: Beyond the Basics: Special Cases and Long Haul Care
- 2 Bringing It All Together: Your Knife Care Commitment
- 3 FAQ
Alright, let’s talk knives. It sounds simple, right? Wash ’em, dry ’em, put ’em away. But honestly, there’s a bit more to it if you want those trusty blades to last and, more importantly, keep you safe. I learned this the hard way, like many things in life and especially in the kitchen. Back in my early cooking days – way before Nashville, maybe even before the Bay Area stint – I treated my first ‘good’ chef’s knife like any other utensil. Chucked it in the sink, sometimes even the dishwasher (I know, I know, culinary sacrilege!), and then wondered why it got dull so fast and even developed weird spots. It wasn’t just about the money wasted, though that stung; it was about the frustration of using a tool that wasn’t performing its best.
Learning how to properly clean and store your kitchen knives isn’t just some fussy chef thing; it’s fundamental kitchen craft. Think about it: your knives are arguably the most used, most essential tools in your culinary arsenal. They touch almost everything you prepare. Giving them the proper care ensures they stay sharp, work efficiently, and don’t become a safety hazard. A dull knife, ironically, is far more dangerous than a sharp one because you need to apply more force, increasing the chance of slipping. And a knife stored improperly? That’s just asking for a nasty cut when you reach into a drawer.
So, stick with me here. We’re going to break down the dos and don’ts, the why’s and how’s of knife care. It’s not complicated, I promise, but being mindful about these steps makes a world of difference. From the quick rinse after slicing an apple to the deep clean after butchering, and figuring out the best place to keep them when they’re not in use – we’ll cover it. Consider this an investment in your tools, your cooking, and your fingers. Plus, there’s a certain satisfaction, isn’t there, in maintaining your equipment well? Maybe it’s the marketer in me, but it feels like good ‘brand management’ for your kitchen tools. Let’s get into it.
Mastering Knife Maintenance: Cleaning and Storage Essentials
Section 1: Why Proper Knife Care is Non-Negotiable
Okay, let’s really drill down on *why* this matters so much. It seems basic, but skipping proper care has real consequences. First and foremost: kitchen safety. As I mentioned, a dull knife requires more pressure, making slips far more likely. Bad storage – like tossing knives loose into a drawer – is practically an invitation for accidental cuts when rummaging around. Keeping knives sharp through proper care (which includes cleaning that doesn’t damage the edge) and storing them securely protects your hands. Secondly, there’s blade integrity and longevity. Good knives aren’t cheap! Exposing them to harsh dishwasher detergents, high heat, prolonged moisture, or letting them bang against other metal objects will dull the edge, corrode the metal (yes, even stainless steel can rust or pit), and damage the handle material, whether it’s wood, plastic, or composite. Proper cleaning and storage preserves the microscopic edge alignment and protects the materials, extending the knife’s useful life significantly. Think of it as preventative maintenance; a little effort now saves you from needing premature replacement or extensive repair later. It’s about respecting the tool. Lastly, performance. A well-maintained knife simply works better. It glides through food with less effort, makes cleaner cuts (which can affect cooking and presentation), and makes the entire prep process more efficient and enjoyable. Neglect leads to frustration, plain and simple. Investing a few minutes after each use ensures your knife is always ready for the task at hand. It’s a cornerstone of effective knife maintenance.
Section 2: The Cardinal Sin: Knives and Dishwashers
I need to dedicate a whole section to this because it’s probably the most common mistake I see. Let me be crystal clear: Do NOT put your good kitchen knives in the dishwasher. Ever. I don’t care if the manufacturer *implies* it might be okay (they usually don’t for quality knives), just don’t do it. The environment inside a dishwasher is incredibly hostile to a finely honed blade edge. The combination of highly corrosive detergents, excessively high temperatures, and the potential for the blade to knock against racks or other utensils is a recipe for disaster. Those detergents are designed to strip away everything, and they can be abrasive on metal and harsh on handle materials, especially wood, causing it to swell, crack, or loosen over time. The heat can affect the temper of the steel, potentially making it more brittle or less able to hold an edge. And the physical jostling? That’s just death to a sharp blade edge. Even a slight tap against a ceramic plate or another piece of metal can create micro-chips or roll the edge, making it dull instantly. It might seem convenient, I get it, washing up after a big meal is a drag. But the convenience is short-lived when you’re constantly needing to sharpen your knives or dealing with handles falling apart. This is the number one rule of dishwasher damage prevention for your knives. Trust me on this one. Hand washing is the only way to go.
Section 3: Gathering Your Gentle Cleaning Arsenal
So, if the dishwasher is out, what *should* you use? Thankfully, it’s simple and you likely already have everything you need. The key is gentle effectiveness. You’ll want a mild detergent – your regular dish soap is usually perfectly fine. Avoid anything with harsh chemicals, bleach, or abrasive additives. The goal is to remove food particles and oils, not to strip the metal or damage the handle. Next, you need something to apply the soap with. A soft cloth or a sponge is ideal. Crucially, use the soft side of the sponge, not the abrasive green or blue scouring pad! Those scrubby sides are designed to remove baked-on gunk from pans, and they will absolutely scratch your knife blade and potentially damage the handle finish. Think gentle. A dedicated soft sponge or microfiber cloth just for knives isn’t a bad idea, actually, to avoid transferring abrasive particles from other dishes. Is that overkill? Maybe for some, but if you’ve invested in good knives, it’s a small step. Finally, you need warm water. Not scalding hot, not ice cold. Warm water is effective enough to help the soap break down grease and food residue without being harsh on the knife materials or your hands. So, to recap: mild soap, non-abrasive sponge or cloth, warm water. That’s your basic toolkit for proper cleaning technique. No steel wool, no scouring powder, no harsh chemicals needed.
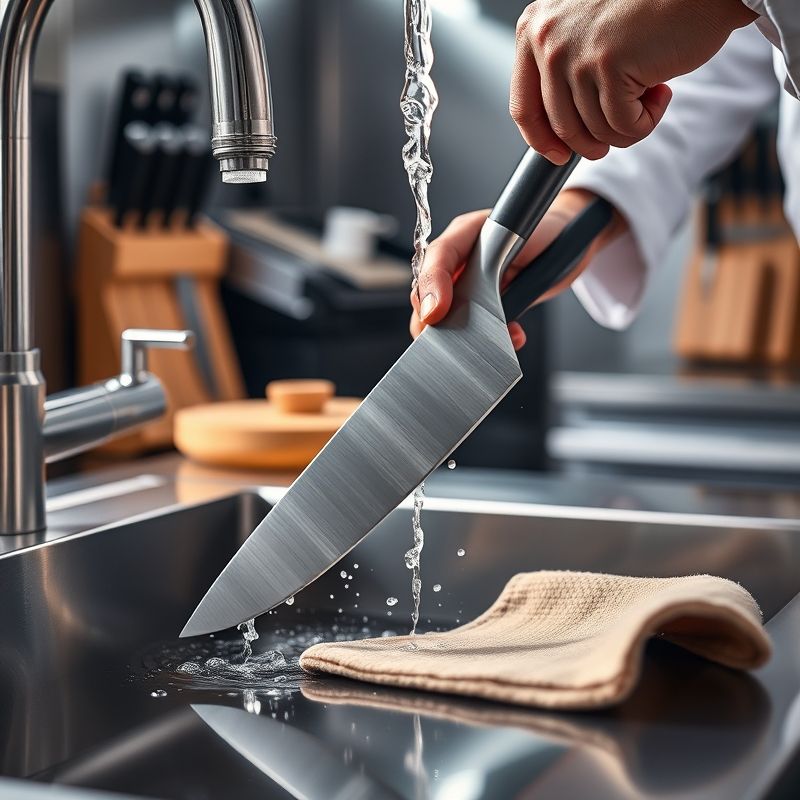
Section 4: The Safe Hand-Washing Dance
Okay, you’ve got your supplies. Now, how do you actually wash the knife without slicing your sponge (or worse, your hand) to ribbons? It requires a bit of mindful technique. First, always handle the knife one at a time. Don’t try to juggle multiple sharp objects while washing. Hold the knife firmly by the handle, with the blade edge facing *away* from your hand and body. Wet the knife and your sponge/cloth under warm running water. Apply a small amount of mild detergent to the sponge. Now, carefully wipe the blade from the spine (the dull top edge) towards the sharp edge, and from the heel (near the handle) towards the tip. Never wipe *along* the sharp edge or towards the spine – always move away from the cutting edge. Wash one side of the blade thoroughly, then carefully turn it over (keeping the edge away from you) and wash the other side. Pay special attention to the area where the blade meets the handle (the bolster, if it has one), as food particles can sometimes get trapped here. This is key for proper bolster cleaning. Once the blade is clean, wash the handle. Rinse the knife thoroughly under warm running water, ensuring all soap residue is gone. Again, keep that edge pointed away from you. The whole process should only take 15-30 seconds per knife once you get the hang of it. It’s all about controlled, deliberate movements. This careful washing technique ensures both cleanliness and blade safety.
Section 5: The Crucial Step: Immediate and Thorough Drying
If hand washing is Rule #1, then immediate drying is Rule #1a. Seriously, this step is just as critical and often overlooked. Letting knives air dry, or leaving them wet in a dish rack or on the counter, is asking for trouble. Water is the enemy of metal, even stainless steel care requires attention here. While stainless steel is resistant to rust, it’s not completely immune, especially certain types of steel used in high-quality knives. Prolonged exposure to moisture can lead to spotting, pitting, and eventually rust, particularly along the delicate cutting edge. And for carbon steel knives? Air drying is practically a death sentence – rust can form incredibly quickly. Beyond the blade, moisture is also bad for handles, particularly natural wood handles which can absorb water, swell, warp, crack, or become breeding grounds for bacteria. So, the moment you finish rinsing, grab a clean, soft, absorbent towel. A dedicated microfiber towel or a soft cotton dish towel works best. Carefully pat the knife completely dry. Don’t just give it a quick wipe; make sure you dry the entire blade (both sides), the handle, the bolster area, and any crevices. Pay attention! Ensure it’s *bone dry* before you even think about storing it. This single step of immediate drying is perhaps the most effective measure for rust prevention and preserving the overall condition of your knife for years to come. Don’t skip it!
Section 6: Safe Havens: Exploring Knife Storage Options
Alright, your knife is sparkling clean and bone dry. Now where does it live? Tossing it into a drawer full of other utensils is arguably the worst possible option. Every time that drawer opens or closes, or you rummage around, the knife blade bangs against other metal objects, dulling the edge and potentially chipping it. Plus, it’s a serious safety hazard reaching into that jumble. So, what are the *good* options? Generally, you want storage that protects the edge and keeps the knife secure. The most common solutions are: Knife blocks (the countertop kind), magnetic strips (wall-mounted), in-drawer storage systems (specifically designed for knives), and individual knife guards or sheaths. Each has its pros and cons. Blocks are classic and keep knives contained, but can take up counter space and potentially harbor bacteria if not cleaned. Magnetic strips save counter space and display your knives nicely, making them easy to grab, but require careful placement/removal to avoid damaging the edge and might not be ideal in households with curious kids or pets (Luna, my cat, thankfully seems uninterested). In-drawer trays keep knives hidden and safe, provided they have individual slots, but obviously require drawer space. Sheaths are excellent for protecting blades, especially if you *must* store them in a drawer without a dedicated tray or if you transport your knives. We’ll dive deeper into these main options next, but the key takeaway is: any storage method that prevents the blade edge from contacting other hard objects and keeps the knife securely in place is a massive improvement over the dreaded loose-in-the-drawer scenario.
Section 7: The Classic Choice: Decoding Knife Blocks
The countertop knife block is probably what most people picture when thinking about knife storage. They come in various materials – traditional wooden knife block styles, bamboo, plastic, stainless steel, and even ‘universal’ blocks with densely packed rods or fibers that allow you to insert knives anywhere. Wood and bamboo look great and are generally kind to knife edges, but they *can* absorb moisture if wet knives are inserted (which you shouldn’t be doing anyway, see Section 5!). They also require occasional cleaning *inside* the slots, which people often forget. Compressed air can blow out dust and crumbs, and some recommend thin pipe cleaners or specialized brushes. Ensuring slots are completely dry after cleaning is crucial to prevent mold or bacteria. Plastic or steel blocks are easier to wipe down, but might be slightly less forgiving if you jam a knife in carelessly. Universal block types offer flexibility in placement but can sometimes dull edges slightly faster depending on the rod material and how densely packed they are. A potential downside to *all* blocks is that they take up valuable counter space, which can be a major factor in smaller kitchens like mine sometimes feels. Also, inserting knives requires a bit of care – aim for the spine to touch the slot edge, not the sharp cutting edge, to minimize dulling over time. Overall, a good quality, well-maintained block is a solid storage solution, but block maintenance is key to its effectiveness and hygiene.
Section 8: The Magnetic Appeal: Wall Strips Explored
I have to admit, I have a soft spot for magnetic knife strips. They offer excellent wall-mounted storage, freeing up counter and drawer space, which is a huge plus. They keep your knives visible and easily accessible – you can instantly grab the exact knife you need. Plus, let’s be honest, a neat row of gleaming knives can look pretty cool, like a professional setup. However, they’re not without considerations. First, magnet strength is critical. You need a strip with strong enough magnets to hold your heaviest knives securely without any chance of them slipping or falling (which would be incredibly dangerous). Cheaping out here is not advisable. Second, and this is important, you need to learn the proper technique for placing and removing knives to ensure blade protection. Don’t just slap the blade flat against the magnet or pull it straight off. The best way is to present the spine (the dull back edge) to the magnet first, then gently rotate the rest of the blade flat against the strip. To remove it, reverse the process: rotate the blade away from the magnet starting with the sharp edge, lifting the spine off last. This prevents the sharp edge from scraping against the magnetic surface, which can dull or even chip it over time. Installation needs to be secure, ideally screwed into wall studs or using very robust anchors. And as I pondered earlier, you do need to consider household traffic – are they mounted where someone might bump them, or within reach of children or curious pets? While I love the aesthetics and space-saving, they require a bit more mindfulness in use compared to a block. Is the convenience worth the required technique? For me, usually yes, but it’s a personal call.
Section 9: Hidden Gems: In-Drawer Trays and Sheaths
If counter space is prime real estate and wall strips aren’t your style (or feasible), drawer organizers designed specifically for knives are an excellent alternative. I’m not talking about the generic utensil dividers where knives still slide around; I mean dedicated knife trays, often made of wood, bamboo, or plastic, with individual slots or compartments sized for different blades. These keep the knives securely separated, protecting the edges from clanking against each other and protecting your fingers when you reach in. They keep the kitchen looking uncluttered, which definitely appeals to my sense of order. The main downside is that they consume drawer space, which might also be limited. You also need to ensure the drawer depth accommodates the handles. Complementary to this, or useful on their own, are individual knife sheaths or blade guards. These are simple sleeves, typically made of plastic, wood, or sometimes leather or Kydex, that slide over the blade. They provide excellent edge protection, making it much safer to store sheathed knives even in a shared drawer (though a dedicated tray is still better) or to transport them in a knife roll or bag. When choosing sheaths, ensure they fit snugly but aren’t so tight they scratch the blade, and that they cover the entire edge. Plastic guards are inexpensive and easy to clean, while wood or felt-lined options might offer slightly gentler contact for very high-end blades. Using sheaths in combination with a drawer tray offers double protection and peace of mind.
Section 10: Beyond the Basics: Special Cases and Long Haul Care
Most of the advice so far applies to standard stainless steel kitchen knives. But what about outliers and long-term upkeep? Carbon steel knives, prized by many chefs for their edge retention and ease of sharpening, require extra diligence. They are highly reactive and will rust very quickly if left wet. Immediate, thorough drying is non-negotiable. They will also develop a patina, a blue-grey or dark discoloration, over time. This is normal and actually helps protect the steel, so don’t scrub it off! Just keep them dry and maybe apply a tiny wipe of food-grade mineral oil after drying if storing for longer periods. Handles also need care. Wooden handle care often involves occasional oiling with food-grade mineral oil or a specialized handle wax to prevent drying, cracking, and water absorption. How often depends on the wood and your climate, but if it looks dry, give it some oil. Serrated knife cleaning can be tricky. Food particles get stuck in the serrations. A soft brush (like a toothbrush dedicated to kitchen use) can help dislodge debris during washing. For storage, the same rules apply – protect the teeth! Finally, maintenance isn’t just cleaning and storing. Regular use of a honing steel helps *realign* the microscopic edge of the blade, keeping it performing well between sharpenings. Honing doesn’t remove metal; it just straightens the edge. Actual sharpening, which *does* remove metal to create a new edge, is needed less frequently – maybe once or twice a year for home cooks, depending on use and knife quality. Knowing the difference is key to long-term care. Don’t be afraid to seek professional sharpening if you’re not comfortable doing it yourself; it’s often worth the investment.
Bringing It All Together: Your Knife Care Commitment
So, we’ve covered a lot of ground, from the absolute necessity of hand washing and immediate drying to the nuances of different storage methods like blocks, magnetic strips, and drawer inserts. It might seem like a lot of rules for something as simple as a knife, but truly, these practices become second nature very quickly. It’s about building good habits that protect your investment, ensure your tools perform optimally, and most importantly, keep you safe in the kitchen. Think of the few extra seconds spent carefully washing and drying as a moment of respect for the tool, a small ritual that pays dividends in the long run.
Ultimately, the ‘best’ storage solution depends on your kitchen layout, your collection of knives, and your personal workflow. Maybe a magnetic strip works perfectly for your main knives, while a drawer insert holds the less-used ones. Perhaps a classic block feels right for you. The key isn’t finding the one single ‘perfect’ method, but choosing a *safe* method and sticking to the core principles: keep them clean, keep them dry, and keep the edges protected. Is this the most glamorous part of cooking? Definitely not. But it’s foundational.
Here’s a little challenge, if you’re up for it: Pick just one thing from this article you haven’t been doing consistently – maybe it’s the immediate drying, or finally ditching the dishwasher temptation, or upgrading from that loose drawer situation – and commit to doing it for the next week. See how it feels. I suspect you’ll find a little more satisfaction in using your knives, knowing you’re giving them the care they deserve. What will your first step be?
FAQ
Q: Can I really not put *any* knives in the dishwasher, even cheap ones?
A: While the damage might be less heartbreaking on inexpensive knives, the dishwasher environment is still harsh. It will dull the edges faster, can still cause corrosion or spotting, and may damage handles over time. For safety and performance, hand washing is always recommended for any knife you actually use for cutting.
Q: How often should I oil the wooden handles on my kitchen knives?
A: There’s no strict schedule, as it depends on the type of wood, the humidity in your environment, and how often you use and wash the knife. A good rule of thumb is to apply a light coat of food-grade mineral oil (or a specialized handle conditioner) whenever the wood starts to look or feel dry or lighter in color. Maybe once a month, or every couple of months, is a reasonable starting point for regularly used knives.
Q: What’s the actual difference between honing and sharpening a knife?
A: Honing uses a honing steel (that rod that often comes in knife blocks) to realign the existing microscopic edge of the blade, which gets slightly bent or wavy with normal use. It doesn’t remove significant metal and should be done frequently (even before each use) to maintain sharpness. Sharpening actually grinds away a small amount of metal to create a completely new, sharp edge. This is done less often, only when honing no longer brings the edge back to sharpness, using whetstones, electric sharpeners, or professional services.
Q: My carbon steel knife has turned grey/blue. Is it ruined?
A: No, that’s likely a patina! Carbon steel reacts with acids and moisture in food, developing a layer of oxidation (patina) that typically looks grey, blue, or black. This patina actually helps protect the steel underneath from red/orange rust (which *is* bad and should be removed immediately). Many chefs intentionally cultivate a patina. Just keep the knife clean and very dry after each use to prevent active rust from forming.
You might also like
- Choosing the Right Chef’s Knife For Your Needs
- Honing vs. Sharpening: Understanding Knife Maintenance
- Essential Guide to Different Types of Kitchen Knives
@article{how-to-properly-clean-and-store-kitchen-knives-for-longevity,
    title   = {How to Properly Clean and Store Kitchen Knives for Longevity},
    author  = {Chef's icon},
    year    = {2025},
    journal = {Chef's Icon},
    url     = {https://chefsicon.com/how-to-properly-clean-and-store-your-kitchen-knives/}
} 

