
Table of Contents
- 1 Unraveling the Dough: Your Journey to Homemade Pasta
- 1.1 Section 1: So, Why Even Bother with Fresh Pasta?
- 1.2 Section 2: The Building Blocks – Essential Pasta Ingredients
- 1.3 Section 3: Tools of the Trade – Do You Need All That Gear?
- 1.4 Section 4: The Hands-On Approach – Making Dough the Traditional Way
- 1.5 Section 5: A Little Mechanical Help – Using a Stand Mixer
- 1.6 Section 6: The All-Important Rest – Patience is a Virtue (and a Key Ingredient)
- 1.7 Section 7: Rolling and Cutting – The Path to Pasta Perfection
- 1.8 Section 8: Shaping Up – Fun Beyond Basic Strands
- 1.9 Section 9: To Dry or Not To Dry – Storing Your Pasta Creation
- 1.10 Section 10: The Grand Finale – Cooking Your Fresh Pasta
- 2 From Flour to Feast: Your Pasta Adventure Awaits
- 3 FAQ: Fresh Pasta Ponderings
Hey everyone, Sammy here from Chefsicon.com, reporting live from my Nashville kitchen, where the aroma of something good is usually wafting through the air (much to Luna’s, my rescue cat’s, delight). Today, we’re diving headfirst into a topic that I find incredibly satisfying and, honestly, a bit therapeutic: making fresh pasta at home. I know, I know, for some, it sounds like one of those culinary Mount Everests – daunting, complicated, best left to Italian nonnas or fancy chefs. But I’m here to tell you, it’s more like a really pleasant hill, a rewarding climb that results in something truly delicious. Trust me on this.
I remember my first real attempt at fresh pasta. This was years ago, back when I was still in the Bay Area, long before Nashville’s vibrant food scene completely won me over. I’d bought a little hand-crank pasta machine, convinced I was about to unlock some ancient Italian secret. What I mostly unlocked was a mess. Flour dusted every conceivable surface, the dough was either too sticky or too dry (never just right, it seemed), and my early batches of fettuccine looked more like abstract dough art. But then, there was that one batch. The one where it all sort of clicked. The texture was perfect, it cooked up beautifully, and the taste… oh, the taste was worlds away from the dried stuff in a box. It was a revelation! That experience, despite the initial chaos, hooked me. It taught me that with a few key insights and a bit of practice, anyone can master this.
So, if you’ve been teetering on the edge, wondering if you should give homemade pasta a whirl, this is your sign. We’re going to break it down, step by step. I’ll share my favorite techniques, the little tricks I’ve picked up along the way, and hopefully demystify the whole process. We’ll cover everything from the essential ingredients and equipment (you might not need as much as you think!) to kneading, rolling, cutting, and cooking. By the end of this, I’m hoping you’ll feel confident enough to roll up your sleeves and create some pasta magic of your own. It’s not just about the end product; it’s about the joy of creation, the connection to your food, and yeah, impressing your friends and family just a little bit. Let’s get to it!
Unraveling the Dough: Your Journey to Homemade Pasta
Section 1: So, Why Even Bother with Fresh Pasta?
Okay, let’s start with the big question: with so many decent dried pasta options out there, why go through the trouble of making it fresh? For me, it boils down to a few key things. First and foremost, texture and taste. Fresh pasta, especially egg pasta, has a tender, delicate bite and a rich, eggy flavor that you just can’t replicate with dried pasta. It’s silkier, more luxurious. When you coat fresh pasta with a simple sauce, it absorbs the flavors in a way that’s just sublime. It’s the difference between a good meal and an *experience*. Think about those special occasion restaurant meals where the pasta was clearly homemade – it elevates everything, doesn’t it?
Then there’s the satisfaction factor. There’s something incredibly grounding and rewarding about taking simple ingredients like flour and eggs and transforming them into beautiful strands or delicate filled shapes. It’s a hands-on process, a bit of a kitchen meditation. In our fast-paced, digitally-driven lives, taking the time to create something tangible with your own hands can be incredibly fulfilling. I find kneading dough, for instance, to be surprisingly stress-relieving. Plus, you get to control exactly what goes into your food – no weird additives or preservatives, just pure, wholesome ingredients. And let’s be honest, there’s a certain pride in saying, “Oh, this pasta? I made it from scratch.” It’s a bit of a culinary flex, and why not? You’ve earned it!
Finally, it’s about versatility and creativity. Once you get the hang of a basic dough, a whole world of pasta shapes and flavors opens up. You can experiment with different flours, add spinach for green pasta, squid ink for black pasta, or even cocoa powder for a dessert pasta (yes, it’s a thing!). You can make shapes that are hard to find in stores. It’s a fantastic way to get creative in the kitchen and tailor your pasta perfectly to your sauce or your mood. Is it a weeknight staple for me? Not always. But for a weekend project or when I want to make a meal extra special, it’s absolutely worth the effort. The process itself becomes part of the enjoyment, not just a means to an end.
Section 2: The Building Blocks – Essential Pasta Ingredients
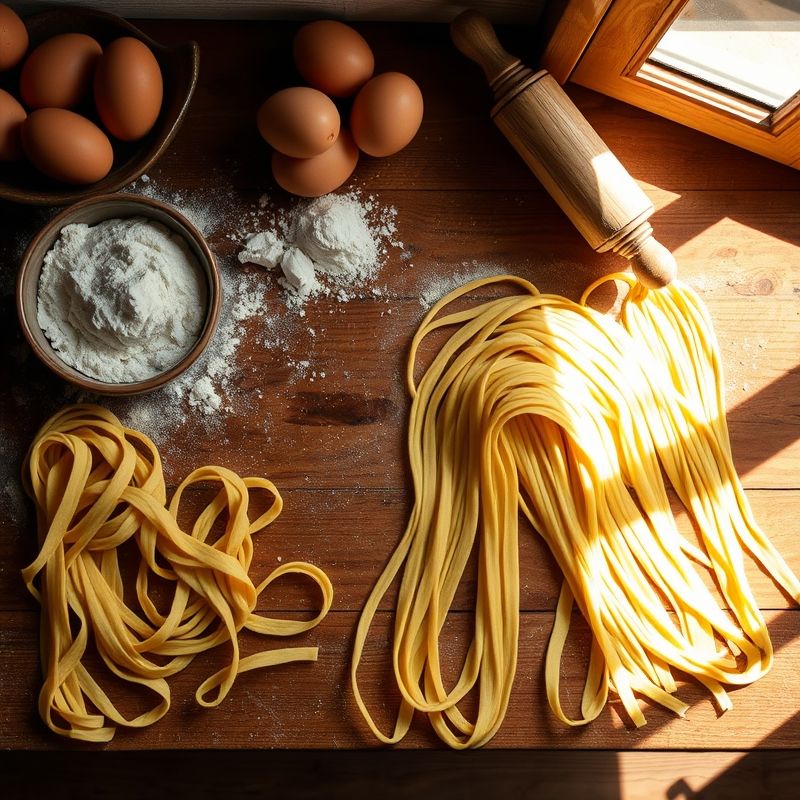
At its heart, pasta dough is beautifully simple. For a classic egg pasta, you’re primarily looking at two main stars: flour and eggs. But, as with many simple things, the quality and type of these ingredients can make a noticeable difference. Let’s talk flour first. The gold standard for many pasta makers is “00” flour (doppio zero). This Italian flour is very finely milled, and it typically has a moderate protein content, which results in a silky, tender pasta. It’s my personal favorite for most applications. Then there’s semolina flour (semola di grano duro rimacinata), which is made from durum wheat. It’s coarser, higher in protein, and gives pasta a more robust, chewier texture and a lovely golden hue. It’s traditionally used for extruded shapes and for pasta made without eggs in southern Italy. Some people, myself included, like to use a blend of “00” and semolina to get the best of both worlds – tenderness from the “00” and a bit of bite and structure from the semolina. And what about good old all-purpose flour? Can you use it? Absolutely! Especially when you’re starting out. Your pasta might not be quite as refined as with “00” flour, but it will still be delicious and miles better than store-bought dried pasta. Don’t let not having fancy flour stop you.
Next up, eggs. Large, fresh eggs are your best bet. The yolks contribute richness, color, and flavor, while the whites provide moisture and protein for structure. Some recipes call for whole eggs, others for just yolks, or a combination. Using more yolks will result in a richer, more golden, and more tender pasta. I often go with whole eggs for simplicity, but if I’m feeling decadent, I’ll swap out a whole egg for a couple of extra yolks. You might also see recipes calling for a touch of olive oil or water. Olive oil can add a little flavor and softness, while water is often used in eggless doughs or if your dough feels too dry. And don’t forget salt! A pinch of fine sea salt in the dough itself enhances the flavor. It’s not strictly necessary if you’re heavily salting your cooking water (which you absolutely should be), but I like to add it.
The traditional ratio to start with is often 100 grams of flour per large egg. This is a good guideline, but you’ll quickly learn that pasta making is more about feel than rigid measurements. Factors like the humidity in your kitchen, the size of your eggs, and the absorbency of your flour can all affect how much liquid you need. So, start with the basic ratio, but be prepared to adjust by adding a tiny bit more flour if it’s too sticky, or a few drops of water if it’s too dry. It’s a learning process, and your hands will become your best guide. I remember stressing so much about exact measurements at first, but now I mostly go by how the dough looks and feels. It’s more intuitive, you know?
Section 3: Tools of the Trade – Do You Need All That Gear?
When you first think about making pasta, you might envision a kitchen kitted out with all sorts of specialized gadgets. And while some tools definitely make the process easier and more consistent, you can absolutely make fantastic fresh pasta with very minimal equipment. Let’s start with the bare essentials. A clean work surface is non-negotiable. A large wooden board is traditional and lovely because it has a bit of texture for the dough to grip, but a smooth countertop works fine too. You’ll need a bowl for mixing if you’re not doing the traditional flour well method directly on the counter, a fork for whisking eggs, and your hands – your most important tools!
For rolling, a good old-fashioned rolling pin (a nonna-style long, thin one is great, but any sturdy one will do) is perfectly capable of producing beautiful pasta sheets. It takes a bit more elbow grease and practice to get the sheets uniformly thin, but it’s incredibly satisfying. A bench scraper is also a surprisingly useful tool – great for portioning dough, cleaning flour off your work surface, and even helping to bring the initial shaggy dough together. And for cutting? A sharp knife or a pizza cutter can easily turn your pasta sheets into fettuccine, tagliatelle, or pappardelle. So, if you’re on a budget or just want to try it out without investing much, these basics are all you truly need. My first few successful batches were made with just these, and they were amazing.
Now, if you find yourself falling in love with pasta making (and I suspect you might), then investing in a pasta machine can be a game-changer. These typically clamp onto your counter and have rollers to flatten the dough and cutters for specific shapes like spaghetti or fettuccine. Manual hand-crank machines are relatively affordable and very effective. They take out a lot of the effort of rolling and help you achieve consistent thickness, which is key for even cooking. There are also electric pasta machines, including extruder types that mix, knead, and push out various shapes. These are pricier and more of a commitment. I personally have a trusty hand-crank Atlas machine that I’ve used for years. It’s simple, reliable, and does the job beautifully. Another useful, though not strictly essential, item is a pasta drying rack. This allows your freshly cut pasta to dry a bit without sticking together before cooking or storing. You can get creative with DIY solutions too, like clean coat hangers or the backs of chairs, but a dedicated rack is convenient. Is all this gear necessary from day one? Definitely not. Start simple, see if you enjoy the process, and then decide if you want to upgrade your toolkit. The goal is delicious pasta, not a showroom kitchen.
Section 4: The Hands-On Approach – Making Dough the Traditional Way
There’s something deeply satisfying about making pasta dough entirely by hand, the way it’s been done for generations. It’s a tactile experience that connects you directly to your food. The traditional method involves creating a flour well, or a ‘volcano,’ directly on your clean work surface. You’ll mound your flour (say, 200 grams of “00” flour for a two-person serving), create a wide, sturdy crater in the center, and crack your eggs (2 large ones) into it. Add a pinch of salt to the eggs. Then, using a fork, you gently whisk the eggs, gradually incorporating small amounts of flour from the inner walls of the well. You want to do this slowly and carefully to prevent the egg from breaching the flour wall and making a run for it – though, let’s be honest, a little leakage happens to the best of us sometimes, especially when you’re starting out. Don’t panic, just try to scoop it back in.
As you incorporate more flour, the mixture in the center will thicken into a shaggy paste. Once it’s too thick to mix with the fork, it’s time to get your hands dirty. Start bringing the remaining flour from the outside walls into the center, working it into the eggy mass. The dough will be sticky and messy at first – this is normal. Just keep working it, folding and pressing, until it comes together into a cohesive, shaggy ball. Use your bench scraper to help gather any dry bits of flour and incorporate them. Now, the real work begins: kneading. Dust your work surface lightly with flour if needed (but try not to add too much extra, as this can make your pasta tough). Knead the dough by pushing it away from you with the heel of your hand, then folding it over and giving it a quarter turn. Repeat this rhythmic motion for a good 8-10 minutes. You’re looking for the dough to transform from rough and sticky to smooth, elastic, and firm, but still pliable. It should spring back slowly when you poke it. It’s a bit of a workout, but it’s crucial for developing the gluten, which gives the pasta its structure and texture.
How do you know when it’s perfectly kneaded? Well, aside from the visual (smooth surface, maybe a few tiny blisters under the skin) and the poke test, it just *feels* right. It’s hard to describe, but with practice, you’ll develop an intuition for it. It should feel like a firm earlobe, some say. I think it feels like a well-loved stress ball, resilient but yielding. Don’t skimp on the kneading time; it’s probably the most important step for achieving great texture. Once you’re satisfied with your kneading, shape the dough into a ball, wrap it tightly in plastic wrap or a damp cloth, and let it rest. We’ll talk more about resting next, but for now, pat yourself on the back – you’ve just made pasta dough the old-fashioned way! It’s a skill that feels good to have, a little bit of kitchen magic.
Section 5: A Little Mechanical Help – Using a Stand Mixer
While I genuinely love the meditative process of making pasta dough by hand, there are days when I’m short on time, or perhaps my wrists are feeling a bit tired (all that typing for Chefsicon.com, you know!). On those occasions, my trusty stand mixer with a dough hook attachment is a fantastic assistant. It can take a lot of the physical effort out of the initial mixing and kneading, and it’s a great option if you have any mobility issues or just prefer a more hands-off approach. Does it produce pasta that’s *exactly* the same as hand-kneaded? Some purists might argue there’s a subtle difference, but honestly, I think you can get excellent results with a mixer, and it’s certainly better than not making fresh pasta at all!
The process is pretty straightforward. You’ll typically add your flour and salt to the mixer bowl. Then, with the mixer on a low speed (using the flat beater or paddle attachment initially, some prefer), gradually add your lightly beaten eggs (and any other wet ingredients like olive oil or water). Mix until the dough just starts to come together into a shaggy mass. At this point, you’ll switch to the dough hook. Continue to mix on a low to medium-low speed. The dough will look a bit messy at first, but keep it going. The hook will work its magic, gathering the dough and kneading it. This usually takes about 5-8 minutes in the mixer. You’re looking for the same visual and textural cues as with hand kneading: the dough should clean the sides of the bowl, become smooth, and feel elastic.
One thing to keep an eye on when using a stand mixer is the dough consistency. Because you’re not feeling it directly with your hands as much during the initial incorporation, it can be a little trickier to judge if it’s too wet or too dry. Be prepared to make small adjustments. If the dough seems too sticky and isn’t pulling away from the sides of the bowl, add a tablespoon of flour at a time. If it looks too dry and crumbly and isn’t coming together, add a teaspoon of water at a time, waiting a minute or so between additions to see how it incorporates. Sometimes, I find I still need to give the dough a quick hand-knead for a minute or two on a lightly floured surface after it comes out of the mixer. This just helps to bring it all together perfectly and allows me to get a final feel for its texture. Is this step strictly necessary? Maybe not, but I find it gives me a little more control and connection to the dough. Then, just like with hand-made dough, wrap it up and let it rest. So, if the thought of all that kneading has been putting you off, remember your stand mixer can be your best pasta-making friend!
Section 6: The All-Important Rest – Patience is a Virtue (and a Key Ingredient)
So, you’ve kneaded your dough, whether by hand or with a mixer, and it’s looking pretty good. You might be tempted to dive right into rolling and cutting. But hold your horses! There’s a crucial, often underestimated step that comes next: resting the dough. This isn’t just about giving yourself a break (though that’s nice too); it’s essential for the pasta itself. When you knead dough, you’re working the gluten proteins, creating a strong, elastic network. This network is what gives your pasta its structure and chew. However, right after kneading, that gluten network is all tensed up, like a coiled spring. If you try to roll out the dough immediately, it will fight you. It will be tough to roll thin, and it will tend to spring back. Sound familiar from other baking projects? It’s the same principle.
Resting allows the gluten to relax. During this rest period, the flour also has more time to fully hydrate, absorbing the moisture from the eggs or water. This results in a dough that is much more pliable, easier to roll out (whether by hand or machine), and ultimately, a more tender finished pasta. Think of it as letting the dough chill out and find its happy place. How long should you rest it? A minimum of 30 minutes at room temperature is generally recommended. I often aim for an hour if I have the time. You need to wrap the dough tightly in plastic wrap or place it in an airtight container or a sealed bag. Some people prefer a damp kitchen towel. The key is to prevent it from drying out and forming a skin, which would make it difficult to work with later and could result in dry flecks in your pasta. If you’re planning to rest it for longer than an hour or two, it’s best to pop it in the refrigerator. Chilled dough can be rested for up to 24 hours, which is great if you want to make the dough ahead of time. Just be sure to let it come back to room temperature for about 30-60 minutes before you try to roll it, as cold dough can be quite stiff.
I’ve definitely made the mistake of being impatient in the past and cutting the rest time short. The difference is noticeable. The dough is springier, harder to work with, and the resulting pasta can be a bit tougher. So, take my word for it: don’t skip the rest! Use that time to clean up your floury workspace, plan your sauce, or just pour yourself a glass of wine. Your patience will be rewarded with a dough that’s a dream to handle and pasta that has a superior texture. It’s one of those little things that makes a big difference, a testament to how sometimes the best action is inaction. It’s a lesson Luna, my cat, seems to understand perfectly when she’s napping in a sunbeam.
Section 7: Rolling and Cutting – The Path to Pasta Perfection
After its well-deserved rest, your pasta dough should feel beautifully supple and ready for the spotlight. Now comes the part where it transforms from a humble ball into elegant sheets and strands: rolling and cutting. Whether you’re going old-school with a rolling pin or using a pasta machine, the goal is the same: to achieve thin, evenly rolled sheets. Take your dough and cut off a manageable portion – usually about a quarter of it at a time if you made a standard batch. Keep the rest of the dough well-wrapped so it doesn’t dry out while you work. Lightly flour your work surface and the piece of dough. If you’re using a rolling pin, start rolling from the center outwards, giving the dough a quarter turn frequently to help maintain an even shape and thickness. This takes patience and a bit of muscle. You’re aiming for a sheet that’s thin enough to almost see through, especially for delicate pastas like tagliatelle or ravioli. For heartier shapes, you might leave it a touch thicker. It’s a bit of an art, and your arms will get a workout!
If you’re using a pasta machine, the process is more controlled. Flatten your piece of dough with your palm or a rolling pin so it’s about a quarter-inch thick and can easily fit into the machine’s rollers at their widest setting. Pass the dough through. Fold it into thirds, like a letter, and pass it through the widest setting again. I usually do this folding and passing process 2-3 times; it helps to further knead the dough and makes it smoother and more elastic. Then, start incrementally decreasing the thickness setting on your machine, passing the dough through once (or maybe twice if it’s a bit unruly) at each setting. Don’t skip settings, or you might tear the dough. Lightly dust the dough with flour if it starts to feel sticky at any point. Continue until you reach your desired thickness. For fettuccine or tagliatelle, I usually go down to setting 5 or 6 on my Atlas machine (which typically goes up to 7 or 9, depending on the model, with higher numbers being thinner). For ravioli, you’ll want it even thinner, perhaps a 7. You’ll get a feel for what works best for different pasta types.
Once you have your beautiful sheets of pasta, it’s time to cut them. If you hand-rolled, you can gently fold your sheet (after letting it dry for just a few minutes so it’s not too sticky) and then use a sharp knife to cut strips of your desired width: thin for tagliolini, medium for fettuccine, wide for pappardelle. If you used a machine, most come with cutter attachments for spaghetti and fettuccine. Simply feed your pasta sheet through the appropriate cutter. As the strands emerge, catch them gently and toss them with a little semolina flour or “00” flour to prevent sticking. You can then either cook them immediately, lay them flat on a lightly floured baking sheet, or hang them on a pasta drying rack. The sight of those freshly cut strands is always so rewarding. It’s like, wow, I actually made that! It’s a far cry from my first lumpy attempts, that’s for sure.
Section 8: Shaping Up – Fun Beyond Basic Strands
While long strands like fettuccine and spaghetti are classic and wonderful, part of the joy of homemade pasta is venturing into the world of different shapes. It doesn’t have to be super complicated to produce some really charming and delicious results. One of the easiest and most satisfying shaped pastas to try is farfalle, or bow-ties. You simply cut your pasta sheet into small rectangles or squares (about 1.5 by 1 inch), then pinch the center of each piece together firmly. Voila! Instant bow-ties. Kids often love helping with this one. They might not all be perfectly uniform, but that’s part of the homemade charm, isn’t it?
Then there’s the realm of simple filled pasta, like ravioli or tortellini. This might sound intimidating, but basic ravioli are quite straightforward. You’ll need two thin sheets of pasta. On one sheet, place small dollops of your chosen filling (ricotta and spinach is a classic, but you can get creative with meat, cheese, or vegetable purees) spaced about an inch or two apart. Lightly brush the pasta around the filling with a little water or egg wash – this acts as a glue. Then, carefully lay the second sheet of pasta on top, pressing down gently around the filling to seal the two layers and push out any air pockets (trapped air can cause ravioli to burst when cooking). You can then use a fluted pastry wheel, a ravioli cutter, or even just a knife to cut out your individual ravioli squares. Making sure they are well-sealed is key. It takes a little practice to get them neat, but even rustic-looking homemade ravioli taste incredible. My first ravioli were definitely… unique in shape, but they tasted amazing with just a simple sage and butter sauce.
If you’re feeling a bit more adventurous, you could try making shapes like orecchiette (“little ears”), which are traditionally made by dragging a small piece of dough across a textured surface with your thumb or a knife. Or perhaps cavatelli, which are small, shell-like shapes. These often require a bit more dexterity and practice, but there are tons of great tutorials online. You don’t need special molds for many of these, just your hands and maybe a simple tool like a gnocchi board or the back of a fork for texture. The beauty of it is the exploration. Start with what feels approachable. Maybe one weekend you master farfalle, and the next you try your hand at a simple cheese ravioli. Each new shape you learn adds to your culinary repertoire and makes the process even more engaging. It’s a slippery slope, though – once you start, you’ll want to try them all!
Section 9: To Dry or Not To Dry – Storing Your Pasta Creation
So you’ve made a beautiful batch of fresh pasta. Now what? Your storage options depend on when you plan to cook it. If you’re going to cook it within an hour or two, you can simply lay the pasta out in a single layer on a lightly floured baking sheet, or drape it over a pasta drying rack or even clean coat hangers. Dust it lightly with semolina or “00” flour to prevent sticking. This brief drying period helps it firm up slightly and makes it less likely to clump together when you cook it. This is my usual approach if I’m making pasta for dinner the same day.
For slightly longer storage, say, if you want to cook it later the same day or the next, you can arrange the pasta in loose nests on a floured baking sheet, let it air dry for about 30 minutes to an hour until it’s no longer sticky to the touch but still pliable, and then refrigerate it in an airtight container. It should keep well in the refrigerator for 1-2 days. Be mindful that egg pasta is perishable, so you don’t want to leave it at room temperature for too long or refrigerate it for an extended period if it’s not sufficiently dried.
What about long-term storage? You have two main options: fully drying or freezing. To fully dry pasta, you’ll need to let it hang on a rack or lay flat in a single layer in a well-ventilated area until it’s completely brittle. This can take anywhere from 12 to 24 hours, or even longer, depending on the humidity and the thickness of your pasta. Once completely dry, it can be stored in an airtight container at room temperature for several weeks, much like store-bought dried pasta. However, homemade dried pasta can sometimes be more fragile. My preferred method for longer storage, especially for delicate egg pastas or filled pastas, is freezing. To freeze, let the pasta air dry for about 30 minutes to an hour (so it doesn’t stick together), then arrange it in a single layer on a baking sheet and place it in the freezer until solid (about 15-30 minutes). Once frozen solid, you can transfer the pasta to freezer bags or airtight containers. It will keep well in the freezer for up to 2-3 months. The best part? You can cook it directly from frozen; just add an extra minute or two to the cooking time. This is super convenient for having homemade pasta on hand for a quick meal. I often make a big batch on a weekend and freeze half of it. Future Sammy always thanks past Sammy for that!
Section 10: The Grand Finale – Cooking Your Fresh Pasta
You’ve put in the effort, and now it’s time for the delicious payoff: cooking your fresh pasta. This part is actually much quicker and simpler than cooking dried pasta, but there are a few key things to keep in mind for a perfect result. First, and this is crucial for any pasta, fresh or dried: use a large pot with plenty of water. Pasta needs room to move around freely as it cooks, otherwise it can stick together and cook unevenly. Aim for at least 4-6 quarts of water for every pound of pasta. Second, salt the water generously. The old Italian saying is that pasta water should taste like the sea. This means adding at least 1-2 tablespoons of coarse salt to your boiling water. This is your primary opportunity to season the pasta itself from the inside out. Don’t skimp on the salt; it makes a huge difference in the final flavor. Wait until the water is at a rolling boil before adding the salt, and then wait for it to return to a rolling boil before adding your pasta.
When you add your fresh pasta to the boiling water, give it a gentle stir to prevent it from sticking together. Now, here’s where fresh pasta differs significantly from dried: cooking time. Fresh pasta cooks much, much faster, usually in just 2-5 minutes, depending on its thickness and how dry it is. It’s done when it floats to the surface and is tender but still has a slight bite – that perfect al dente texture. The best way to know if it’s done is to taste it. Start testing a minute or two after it floats. You definitely don’t want to overcook fresh pasta, as it can become mushy very quickly. Its delicate nature is part of its charm, but it also means you need to be vigilant.
Before you drain your pasta, don’t forget to save a cup or so of the starchy pasta water! This cloudy, starchy water is liquid gold. It’s an excellent emulsifier and can be used to help your sauce cling to the pasta, adjust its consistency, and add flavor. Once the pasta is cooked to your liking, drain it (but not too thoroughly; a little clinging water is good) and ideally, add it directly to your warmed sauce in a pan. Toss it gently to coat, adding a splash of that reserved pasta water as needed to create a beautifully emulsified sauce that clings perfectly to every strand. This final step of finishing the pasta in the sauce is really key to a restaurant-quality dish. Serve it immediately, garnished with fresh herbs, cheese, or whatever your heart desires. That first bite of perfectly cooked, homemade pasta with your favorite sauce? Pure bliss. It makes all the effort worthwhile, every single time.
From Flour to Feast: Your Pasta Adventure Awaits
Well, there you have it – a pretty thorough rundown of my journey and tips for making fresh pasta at home. We’ve gone from simple flour and eggs to delicious, silky strands ready for your favorite sauce. It might seem like a lot of information, but honestly, the core process is quite straightforward. The real magic, I think, comes from the subtle nuances you pick up with practice – the feel of the dough, the right thickness for rolling, the exact moment the pasta is perfectly al dente. It’s a craft, and like any craft, it gets more intuitive and enjoyable the more you do it. Remember my initial flour-dusted disaster in the Bay Area? It’s a far cry from the (usually) smooth operations in my Nashville kitchen now, often with Luna watching my every move from her perch on the counter stool, probably judging my kneading technique.
Is it always going to be perfect from the first try? Maybe not. You might have a batch that’s a bit too thick, or a bit sticky. That’s okay. That’s part of learning. Don’t let the pursuit of perfection stop you from the joy of trying. The most important ingredients, beyond flour and eggs, are patience and a willingness to experiment. I still have days where my dough feels a little off, or I get distracted and roll it unevenly. It happens. But even imperfect homemade pasta is pretty darn good.
So, here’s my challenge to you, if you haven’t already embarked on this adventure: give it a try. Pick a weekend, put on some good music, and get your hands a little floury. Start simple with a basic egg dough and some hand-cut fettuccine. Or, if you’re feeling bold, try those ravioli! What’s the worst that can happen? You’ll learn something, you’ll have a bit of fun, and you’ll most likely end up with a delicious meal. And who knows, you might just discover a new passion. Will homemade pasta become a weekly ritual in your house? Perhaps. Or maybe it’ll be that special treat you make when you want to slow down and savor the process. Either way, I think it’s an experience every food lover should have.
FAQ: Fresh Pasta Ponderings
Q: Can I make fresh pasta without a pasta machine?
A: Absolutely! A rolling pin and a sharp knife are all you truly need to make beautiful flat pastas like fettuccine, tagliatelle, or pappardelle. It takes a bit more effort to roll the dough thinly and evenly, but it’s very traditional and satisfying. The machine just makes it quicker and more consistent, especially for larger batches.
Q: Why is my homemade pasta tough or chewy?
A: There could be a few culprits. One common reason is not kneading the dough enough – proper kneading develops the gluten and makes it elastic. Another is adding too much flour during the kneading or rolling process, which can dry out the dough. Resting the dough for at least 30 minutes after kneading is also crucial; this allows the gluten to relax, resulting in a more tender pasta. Finally, overcooking can also make it mushy, not tough, but undercooking slightly might leave it too chewy. Aim for that perfect al dente.
Q: How much flour and egg should I use per person?
A: A good general rule of thumb is 100 grams of flour per large egg, per person for a main course serving. So, for two people, you’d use 200 grams of flour and 2 large eggs. However, appetite varies, and if pasta is the star of the show with a light sauce, you might want a bit more. It’s always better to make a little extra; leftover fresh pasta is rarely a problem! You’ll also find that the exact hydration can vary with your flour and egg size, so be prepared to adjust slightly by feel.
Q: What’s the best type of flour for making fresh pasta?
A: Many pasta enthusiasts swear by Italian “00” flour for its fine milling, which creates a silky, tender pasta. Semolina flour, made from durum wheat, adds a lovely golden color and a more robust, chewier texture; it’s often used for eggless pastas or blended with “00”. All-purpose flour can also work, especially when you’re starting out, though the texture might be slightly less refined. I often enjoy using a blend, perhaps 75% “00” and 25% semolina, for a good balance of tenderness and bite. Experiment and see what you like best!
@article{fresh-pasta-at-home-my-go-to-tips-tricks,
    title   = {Fresh Pasta At Home: My Go-To Tips & Tricks},
    author  = {Chef's icon},
    year    = {2025},
    journal = {Chef's Icon},
    url     = {https://chefsicon.com/making-fresh-pasta-at-home-tips-tricks/}
} 
