
Table of Contents
- 1 Deconstructing ‘Eco-Friendly’: What Are We Really Talking About?
- 1.1 Beyond the Buzzwords: Core Principles of Green Cleaning
- 1.2 The Pantry Powerhouses: Your Basic DIY Cleaning Toolkit
- 1.3 All-Purpose Cleaner Recipes That Actually Work (Promise!)
- 1.4 Tackling Kitchen Grease Naturally (The Real Test!)
- 1.5 Sparkling Sinks and Faucets Without Harsh Chemicals
- 1.6 DIY Dish Soap and Dishwasher Detergent – Is It Worth It?
- 1.7 Floor Cleaners for Different Kitchen Surfaces
- 1.8 Natural Solutions for Odor Control (Beyond Baking Soda in the Fridge)
- 1.9 Essential Oils in DIY Cleaners: Benefits and Cautions
- 1.10 Storing Your DIY Cleaners Safely and Effectively
- 2 The Ripple Effect of a Cleaner Kitchen (and Conscience)
- 3 FAQ
Hey folks, Sammy here, broadcasting from my cozy Nashville kitchen, where Luna (my ever-watchful rescue cat) is currently judging my coffee-making skills. Today, we’re diving into something that’s been on my mind a lot lately – DIY eco-friendly kitchen cleaning solutions. For years, I was that guy grabbing whatever brightly colored bottle promised to obliterate grime in seconds. Bay Area living, you know? Fast-paced, always looking for the quickest fix. But since moving to Nashville and embracing a slightly, shall we say, more *considered* pace of life, I’ve started questioning what’s *really* in those bottles. It’s not just the unpronounceable ingredients; it’s the plastic waste, the harsh fumes, and the general disconnect from what we’re bringing into our homes.
My journey into DIY cleaning wasn’t some grand eco-epiphany, more like a slow burn. It started with a particularly stubborn stain on my countertop and a quick Google search that led me down a rabbit hole of vinegar and baking soda. Skeptical? Absolutely. I mean, could these humble pantry staples *really* compete with the chemical arsenal I had under my sink? Turns out, in many cases, yes. And honestly, there’s a certain satisfaction in knowing exactly what you’re using, especially with Luna padding around. The thought of her walking on chemical-laden floors and then meticulously cleaning her paws… well, it was a pretty strong motivator. Plus, let’s be real, some of those commercial cleaners smell so aggressive, they practically declare war on your nostrils.
So, if you’re curious about ditching the harsh stuff, reducing your environmental footprint, and whipping up some surprisingly effective, earth-kind cleaners, you’re in the right place. We’re gonna break down the basics of eco-friendly cleaning, explore the powerhouse ingredients likely already in your pantry, share some killer recipes for everything from all-purpose sprays to grease busters, and maybe even figure out if this whole DIY thing is actually practical for busy lives. I think it is, mostly. It’s about making informed choices, not achieving perfection. There are still times I reach for a specialized store-bought cleaner for a super specific, gnarly job, not gonna lie. But for 90% of kitchen messes? DIY has been a revelation. Let’s get into it, shall we?
Deconstructing ‘Eco-Friendly’: What Are We Really Talking About?
Alright, before we start mixing potions like a culinary mad scientist, let’s talk about what “eco-friendly” even means in the context of kitchen cleaning. It’s a term that gets thrown around a lot, sometimes genuinely, sometimes… less so. You’ve seen it, right? Green leaves on the label, words like “natural” or “earth-derived.” As a marketing guy, I can tell you, that’s often more about appealing to our good intentions than actual, verifiable eco-credentials. This is where my analytical side kicks in. We need to look past the pretty packaging.
Beyond the Buzzwords: Core Principles of Green Cleaning
When I think about truly eco-friendly cleaning, a few core principles come to mind. First, ingredient safety. This means using substances that are non-toxic, biodegradable, and don’t persist in the environment causing harm to wildlife or ecosystems. Think simple, recognizable ingredients rather than complex chemical compounds that sound like they belong in a sci-fi movie. Second, reduced packaging and waste. DIY shines here because you’re often reusing spray bottles and buying ingredients in bulk or in recyclable/compostable packaging. Less plastic ending up in landfills or our oceans? Big win. Third, resource conservation. This can mean using less water, or opting for ingredients that have a lower overall environmental impact in their production. It’s a whole lifecycle thing, really.
I also consider the impact on indoor air quality. So many conventional cleaners release volatile organic compounds (VOCs), which can contribute to respiratory issues and generally pollute the air inside our homes. My home office is right off the kitchen, so I’m breathing that air all day. Switching to DIY cleaners has noticeably improved the air quality, it just *feels* fresher, you know? Luna seems to appreciate it too; fewer sneezes from her corner. It’s not just about the planet ‘out there’; it’s about the micro-environment ‘in here’. And sometimes I wonder, are we just trading one set of problems for another? Like, is large-scale vinegar production *really* that much better? It’s complex, but I lean towards simpler, fewer ingredients being generally a step in the right direction. The key is transparency and understanding what you’re using, rather than blindly trusting a label.
The Pantry Powerhouses: Your Basic DIY Cleaning Toolkit
So, you’re ready to embark on this DIY cleaning adventure? Awesome. The good news is, you probably already have most of what you need. Your kitchen pantry is about to become your cleaning arsenal. Let’s break down the MVPs (Most Valuable Products, haha, see what I did there?).
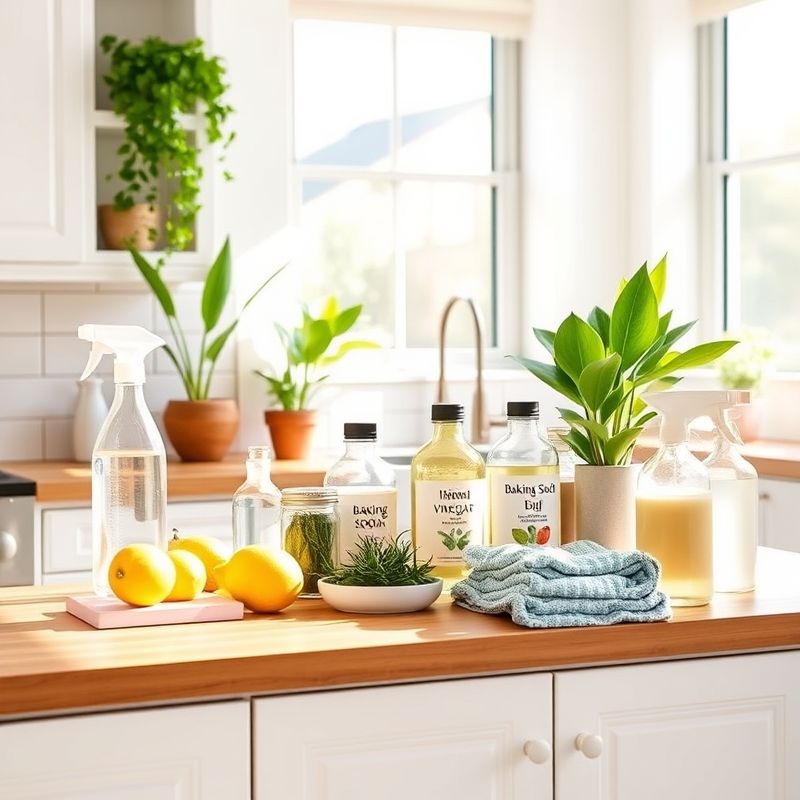
First up, distilled white vinegar. This stuff is a workhorse. Its acetic acid content makes it great for cutting grease, dissolving mineral deposits (hello, showerheads and faucets!), and disinfecting. It’s cheap, readily available, and surprisingly effective. Just a heads up, don’t use it on natural stone like granite or marble, as the acid can etch the surface. I learned that the hard way on a tiny corner of a previous apartment’s counter. Oops. Next, baking soda (sodium bicarbonate). This is your gentle abrasive and deodorizer. It’s fantastic for scrubbing sinks, stovetops, and even inside the oven. Mix it with a little water to make a paste, and you’ve got serious scrubbing power without the scratches. I find it oddly satisfying to watch it fizz when it reacts with vinegar – kitchen science!
Then there’s lemon juice. Similar to vinegar, its acidity helps cut grease and disinfect, but it comes with a much more pleasant, fresh scent. Great for shining faucets and making your cutting boards smell citrusy clean. And don’t forget salt! Coarse salt can be a great scrubbing agent, especially when paired with half a lemon to clean wooden cutting boards. We’re not talking fancy Himalayan pink salt here; your basic table or kosher salt will do. Lastly, consider Castile soap. This is a vegetable oil-based soap that’s super versatile. It’s gentle yet effective for creating all-purpose sprays and even dish soap. Dr. Bronner’s is a popular brand, but there are others. These five ingredients form the backbone of so many DIY recipes, its amazing what you can accomplish with them.
All-Purpose Cleaner Recipes That Actually Work (Promise!)
Okay, let’s get practical. The all-purpose cleaner is probably the one you’ll reach for most often, so it needs to be effective and easy to make. I’ve experimented with a few concoctions, and here’s my go-to. It’s simple, but it gets the job done on countertops (not stone, remember!), spills, and general kitchen grime.
Sammy’s Super Simple All-Purpose Spray:
- 1 part distilled white vinegar
- 1 part water
- (Optional) 10-15 drops of essential oil for scent (lemon, orange, or tea tree are great choices – more on essential oils later)
Just combine these in a reusable spray bottle, give it a good shake, and you’re ready to go. For the water, I use filtered water from my fridge pitcher, just because Nashville water can be a bit hard, and I figure it might prevent mineral buildup in the sprayer itself. Maybe that’s overkill? I don’t know, but it makes me feel better. This solution is fantastic for wiping down surfaces after cooking, cleaning the inside of the microwave (just spray, let it sit for a minute, then wipe), and even cleaning glass in a pinch, though sometimes it can be a bit streaky on glass compared to a dedicated glass cleaner. But for everyday messes, it’s a champ. Remember to label your bottle clearly! You don’t want anyone accidentally seasoning their food with cleaning spray. Trust me, it’s a mistake you only make once.
If you’re not a fan of the vinegar smell (it dissipates quickly, but some people are sensitive), you can try a Castile soap-based version. Something like: 1-2 teaspoons of liquid Castile soap mixed with 2 cups of warm water, plus optional essential oils. This one is gentler and better for surfaces where you want to avoid acidity. The key is experimenting a little to find what works best for your surfaces and your nose. It’s not an exact science, which is kind of freeing, isn’t it? No more feeling locked into one specific brand or formula. You’re the creator here!
Tackling Kitchen Grease Naturally (The Real Test!)
Ah, kitchen grease. The bane of every cook’s existence. It gets on the stovetop, the backsplash, the range hood… everywhere. This is where many people, myself included, used to think only heavy-duty chemical degreasers could prevail. But I’ve been pleasantly surprised by what natural solutions can do. It might take a little more elbow grease, pun intended, but the results are worth it, and your kitchen won’t smell like a chemical plant afterwards.
For everyday stovetop grease, that vinegar and water spray can often do the trick if you wipe it up fairly quickly. But for more stubborn, baked-on grease, you’ll need to bring out the big guns – relatively speaking. A paste of baking soda and water (or even baking soda and a little Castile soap) is excellent. Slather it on the greasy area, let it sit for 15-30 minutes to break down the grime, then scrub with a non-scratch sponge or cloth. For really tough spots, I’ve found that sprinkling baking soda directly onto the grease, then spraying it with vinegar, creates a fizzy reaction that helps lift it. It’s like a mini volcano cleaning your stove! Just be careful with that combo on aluminum surfaces, as it can cause discoloration. Always test in an inconspicuous area first – that’s my mantra.
The range hood filter is another grease magnet. Many can be cleaned by soaking them in a sink full of very hot water and a generous squirt of dish soap (a good eco-friendly one, or your DIY version if you’re brave). Some people add a cup of vinegar to the hot water too. Let it soak for at least 30 minutes, then scrub. For oven grease, a thick paste of baking soda and water, left overnight, can work wonders. It’s messy to clean up, I won’t lie, but it’s better than inhaling those caustic oven cleaner fumes. It requires patience. That’s the trade-off sometimes with natural cleaners; they might need more dwell time than their chemical counterparts. But I just set it and forget it, then tackle the scrubbing the next morning with my coffee. It’s a small price to pay for a less toxic kitchen.
Sparkling Sinks and Faucets Without Harsh Chemicals
My stainless steel sink. I love it, but boy, does it show water spots and fingerprints. For years, I used specialized stainless steel cleaners, which worked, but the smell always bothered me, and I worried about residue. Now, my routine is much simpler and, dare I say, more satisfying?
For daily cleaning of a stainless steel sink, a sprinkle of baking soda and a good scrub with a damp sponge usually does the trick. It gently lifts grime and food particles. Then, I rinse thoroughly. To get that shine back and tackle water spots, I spray it lightly with my vinegar-water solution, wipe it down, and then dry it with a microfiber cloth. The drying part is key to preventing new spots. Some people swear by rubbing a tiny bit of olive oil or mineral oil onto the clean, dry sink to polish it and repel water, but I find that a bit too fussy for everyday. Maybe for a deep clean before guests arrive?
For faucets, whether chrome or stainless steel, vinegar is your friend again for removing hard water stains and soap scum. An old toothbrush dipped in vinegar can get into all those nooks and crannies. If you have really stubborn buildup around the base of the faucet, you can soak a cloth or paper towel in vinegar, wrap it around the affected area, and let it sit for an hour or so before scrubbing. For porcelain sinks, baking soda is still a great gentle abrasive. If you have rust stains, a paste of lemon juice and salt can be effective. Apply it to the stain, let it sit for a while, then scrub. It’s amazing how these simple things work, isn’t it? Makes you wonder why we ever got so reliant on complex chemical formulas for such basic tasks. I guess it’s the power of marketing and the promise of instant results. But a little patience and a few pantry staples can often achieve the same, or even better, outcome.
DIY Dish Soap and Dishwasher Detergent – Is It Worth It?
Okay, this is where I confess I’m a little more on the fence. DIY dish soap and dishwasher detergent… it’s a noble goal, but the results can be mixed, and the effort level is a bit higher. Let’s be honest here. I’ve tried a few recipes for handwashing dish soap, usually involving liquid Castile soap, water, and maybe some glycerin or washing soda. Some were okay for light washing, but when faced with really greasy pans, they sometimes fell short of the grease-cutting power of a good commercial eco-friendly dish soap. It often required more soap and hotter water to get the same clean. Is this the best approach for everyone? I’m not entirely convinced for this specific task, if I’m being brutally honest. I think this is an area where finding a really good, biodegradable, plant-based store-bought option might be a more practical compromise for many, myself included sometimes.
Dishwasher detergent is even trickier. Dishwashers are complex machines, and the wrong DIY concoction can potentially lead to buildup, residue on dishes, or even damage to the appliance. Many DIY recipes involve ingredients like washing soda, borax (which has its own debates about safety, so research it carefully if you consider it), citric acid, and salt. Some people have great success, reporting sparkling clean dishes. Others, not so much. I tried one popular recipe, and while my dishes came out mostly clean, there was a definite film, especially on glasses. It might depend on your water hardness, your dishwasher model, a whole host of factors. My take? If you’re keen to try, do thorough research, start with small batches, and pay close attention to how your dishwasher and dishes respond. For me, this is one area where the convenience and reliability of a high-quality, eco-friendly commercial dishwasher detergent currently wins out. Maybe I just haven’t found the magic recipe yet, or maybe some tasks are just better suited to specialized formulations. It’s okay to not DIY everything, right?
Floor Cleaners for Different Kitchen Surfaces
Kitchen floors see a lot of action – spills, crumbs, muddy paw prints (thanks, Luna, especially after a Nashville rain shower!). Keeping them clean without resorting to harsh chemicals is definitely achievable. The key is knowing your floor type, because what works for tile might not be great for hardwood.
For ceramic or porcelain tile floors, a simple solution of 1/4 to 1/2 cup of distilled white vinegar in a gallon of warm water works wonders. The vinegar helps cut through grime and disinfects. Just mop as usual and let it air dry. The vinegar smell dissipates quickly. If your tile grout is looking dingy, you can make a paste of baking soda and water, apply it to the grout lines, let it sit for a bit, then scrub with a stiff brush (an old toothbrush is perfect for this). This takes some effort, but the results can be pretty dramatic. I usually put on a good podcast and make an afternoon of it every few months.
If you have hardwood floors in or near your kitchen (like I do in my dining area that’s open to the kitchen), you need to be much more cautious with water and vinegar. Too much moisture can damage wood, and vinegar can be too acidic for some wood finishes over time. For sealed hardwood, a very well wrung-out mop with just a few drops of pH-neutral soap (like Castile soap) in water is often sufficient. Or, even better, a specialized wood floor cleaner that’s plant-based. Some people use a very dilute vinegar solution (like 1 tablespoon of vinegar per gallon of water) very sparingly, but I’d patch test that extensively. Honestly, for my hardwoods, I mostly stick to sweeping/vacuuming and spot cleaning with a damp cloth and a wood-specific cleaner. Better safe than sorry with expensive flooring!
For linoleum or vinyl floors, the vinegar and water solution is generally safe and effective. Again, avoid overly soaking the floor. It’s always a good idea to check the manufacturer’s cleaning recommendations for your specific flooring if you’re unsure. The goal is clean and safe, not accidentally stripping the finish off your floors!
Natural Solutions for Odor Control (Beyond Baking Soda in the Fridge)
Ah, kitchen odors. Yesterday’s fish dinner, the lingering scent of onions, that mysterious smell from the depths of the crisper drawer… we’ve all been there. While an open box of baking soda in the fridge is a classic for a reason, there are other natural ways to keep your kitchen smelling fresh, not just masking odors but neutralizing them.
One of my favorite tricks is to simmer a pot of water on the stove with some fragrant natural ingredients. Sliced lemons or oranges, a few cinnamon sticks, some cloves, or even a sprig of rosemary can make your whole kitchen (and much of your house) smell amazing. This is especially nice in the fall and winter. It humidifies the air a bit too, which is a bonus when the heating is on. Another simple tip for a smelly garbage disposal is to grind up a few lemon or orange peels in it. The citrus oils help clean and deodorize. You can also freeze vinegar in an ice cube tray and run a few of those through the disposal, followed by cold water. This helps sharpen the blades and clean it out.
For general air freshening, instead of those aerosol sprays packed with artificial fragrances and propellants, consider a simple DIY room spray. Mix about 1/2 cup of distilled water with 1/2 cup of witch hazel or vodka (the alcohol helps the essential oils disperse and evaporate) and 15-20 drops of your favorite essential oils in a spray bottle. Lavender, peppermint, lemon, or a blend like orange and clove can be lovely. Shake well before each use. And don’t forget the power of ventilation! Simply opening a window, when weather permits, is one of the best ways to clear out cooking odors and freshen the air. Sometimes the simplest solutions are the most effective, aren’t they? I often just crack a window while I’m cooking, even in cooler weather, just for a few minutes to keep things from getting too… pungent.
Essential Oils in DIY Cleaners: Benefits and Cautions
Essential oils are super popular in the DIY cleaning world, and for good reason. They can add lovely natural fragrances to your homemade concoctions, and many also boast antimicrobial, antibacterial, or antifungal properties. Think tea tree oil, lavender oil, lemon oil, eucalyptus oil, and peppermint oil. Adding a few drops to your all-purpose spray or floor cleaner can give it an extra cleaning boost and make the task a bit more pleasant.
However, it’s important to use essential oils with a bit of knowledge and caution. First, quality matters. Opt for pure, high-quality essential oils from reputable brands. Cheaper oils might be adulterated or synthetic, which defeats the purpose of going natural. Second, they are potent. A little goes a long way. Using too much won’t necessarily make your cleaner better and can be overwhelming or even irritating. Third, and this is a big one for me as a cat owner, many essential oils are toxic to pets, especially cats. Cats lack a specific enzyme in their liver to properly metabolize certain compounds found in essential oils. Tea tree, pine, citrus (in large amounts), peppermint, cinnamon, and wintergreen are just a few that can be problematic. This means if you have pets, you need to be super careful. I personally avoid using most essential oils in spray cleaners that might leave residue where Luna walks or lounges. If I do use them, it’s in very small, well-diluted amounts in something like a mopping solution where the floor dries quickly, and I make sure Luna is out of the room. Or I stick to pet-safe options or simply omit them. Always research the specific oils you plan to use if you have furry family members. Their safety comes first, always.
Also, some people can have skin sensitivities to certain essential oils, so if you’re making a cleaner you’ll be in direct contact with, it might be wise to do a patch test or wear gloves. The allure of a nice smell is strong, but safety and efficacy should always be the primary concerns. Is this the best approach for every cleaner? Probably not if pets are a concern, but for some applications, used mindfully, they can be a nice addition.
Storing Your DIY Cleaners Safely and Effectively
So you’ve whipped up a batch of amazing, eco-friendly kitchen cleaner. Fantastic! Now, where do you put it, and how long will it last? Proper storage is key to maintaining the effectiveness and safety of your homemade solutions.
First off, choose the right containers. Glass spray bottles are a great option, especially if you’re using essential oils, as some oils can degrade plastic over time. Amber or blue colored glass bottles are even better because they help protect light-sensitive ingredients (like some essential oils) from degrading. If you’re reusing plastic spray bottles from commercial cleaners, make sure to wash them out *thoroughly* to remove any residue from the previous contents. You don’t want any unintended chemical reactions! I have a collection of dedicated glass bottles for my various concoctions. It feels a bit like an old-timey apothecary, which I secretly enjoy.
Label everything clearly! This is so, so important. Write down the ingredients, the date you made it, and what it’s used for. You might think you’ll remember, but a few weeks down the line, when you have three similar-looking spray bottles, you’ll be glad you labeled them. Permanent marker on the bottle or a waterproof label works well. This is also a crucial safety step, especially if you have kids or other people in the household who might not know what’s what. My labels are pretty straightforward: “All-Purpose Vinegar Spray – Counters/Spills – Made May 8, 2025.”
As for shelf life, most DIY cleaners made with water don’t have the same long list of preservatives as commercial products, so they won’t last indefinitely. For water-based solutions (like vinegar and water, or Castile soap and water), it’s generally best to make smaller batches that you’ll use within a few weeks to a month. If you notice any change in smell, color, or clarity, or if it starts to look cloudy or funky, it’s time to discard it and make a fresh batch. Cleaners that are primarily vinegar or alcohol (like a rubbing alcohol-based disinfectant) will last longer. Store your DIY cleaners in a cool, dark place, away from direct sunlight and heat, and out of reach of children and pets, just as you would with commercial cleaning products. A little common sense goes a long way in keeping your green cleaning routine safe and effective.
The Ripple Effect of a Cleaner Kitchen (and Conscience)
So, we’ve journeyed through the world of DIY eco-friendly kitchen cleaning solutions, from understanding what ‘eco-friendly’ truly means to whipping up potions for every greasy, grimy corner of the kitchen. It might seem like a small change, swapping out a bottle of blue stuff for a homemade vinegar spray, but I’ve found the effects ripple outwards. It’s not just about a cleaner kitchen; it’s about a healthier home environment, less plastic waste, and a deeper connection to the products we use everyday. There’s a certain empowerment that comes from knowing exactly what’s in your cleaning caddy and knowing you made it yourself. It’s a bit like growing your own herbs or baking your own bread – a small act of self-reliance that feels pretty good in our hyper-consumerized world.
Is it always perfect? No. Are there times when a particularly stubborn mess has me eyeing a heavy-duty commercial cleaner? Occasionally, yes. But those instances are becoming rarer. For me, the shift has been more about a mindset change. It’s about asking, “Can I do this more simply, more naturally?” And more often than not, the answer is a resounding yes. My challenge to you, if you’re feeling inspired, is to pick just one recipe from this article – maybe the all-purpose spray or the baking soda scrub – and give it a try this week. See how it feels. You might be surprised at how effective it is, and how good it feels to take one small step towards a greener, cleaner kitchen. Who knows, you might even find yourself, like me, geeking out a little over the fizzy reaction of baking soda and vinegar. Or maybe that’s just me and Luna judging from afar.
What happens when we collectively start making these small changes? Does it truly make a dent in the larger environmental issues we face? I like to think so. It’s a vote with our actions, a conscious choice to reduce our chemical load and our waste. And if nothing else, it makes our own little corners of the world – our kitchens, our homes – a bit healthier and more pleasant to be in. And that, in itself, is a pretty worthwhile endeavor, don’t you think?
FAQ
Q: Are DIY eco-friendly cleaners as effective as commercial chemical cleaners?
A: For many everyday cleaning tasks, yes! Ingredients like vinegar (acetic acid) and baking soda (a mild abrasive) are powerful cleaners and disinfectants. They might sometimes require a bit more dwell time or elbow grease for very tough, set-in stains compared to harsh chemical cleaners, but they can be surprisingly effective for general kitchen cleaning, grease, and grime. The key is using the right DIY solution for the specific mess.
Q: How long do homemade kitchen cleaners last, and how should I store them?
A: Because they don’t contain strong preservatives, most water-based DIY cleaners are best used within a few weeks to a month. Store them in clearly labeled (with ingredients and date!) glass or appropriate plastic containers, in a cool, dark place, away from children and pets. If you notice any change in smell, color, or clarity, it’s best to discard it and make a fresh batch.
Q: Can I use any essential oils in my DIY cleaners?
A: While many essential oils like tea tree, lemon, lavender, and peppermint can add scent and antimicrobial properties, it’s crucial to be cautious. Use pure, high-quality oils. Importantly, many essential oils are toxic to pets, especially cats. If you have pets, thoroughly research pet-safe oils or consider omitting them. Always dilute essential oils properly and be mindful of potential skin sensitivities.
Q: Is it really cheaper to make my own kitchen cleaners?
A: Generally, yes! Core ingredients like white vinegar, baking soda, and salt are very inexpensive, especially when bought in larger quantities. While there might be a small initial investment if you need to buy spray bottles or a specific essential oil, the per-use cost of DIY cleaners is typically much lower than commercial products. Plus, you’re reducing packaging waste, which has its own value.
@article{diy-eco-kitchen-cleaners-sammys-nashville-guide,
    title   = {DIY Eco Kitchen Cleaners: Sammy’s Nashville Guide},
    author  = {Chef's icon},
    year    = {2025},
    journal = {Chef's Icon},
    url     = {https://chefsicon.com/diy-eco-friendly-kitchen-cleaning-solutions/}
} 
