
Table of Contents
- 1 Unpacking the Kitchen Work Triangle: More Than Just Geometry
- 1.1 1. Understanding the Classic Kitchen Work Triangle
- 1.2 2. Beyond the Basics: Adapting the Triangle for Modern Kitchens
- 1.3 3. Ideal Distances and Dimensions: The Nitty-Gritty
- 1.4 4. The Refrigerator Zone: First Point of the Triangle
- 1.5 5. The Sink and Cleanup Zone: The Workhorse
- 1.6 6. The Cooking Zone: Stove, Oven, and More
- 1.7 7. Kitchen Islands and Peninsulas: Triangle Enhancers or Obstacles?
- 1.8 8. Work Zones vs. The Triangle: A Modern Approach
- 1.9 9. Common Triangle Mistakes and How to Avoid Them
- 1.10 10. Personalizing Your Triangle: It’s YOUR Kitchen!
- 2 Bringing It All Home: Your Kitchen, Your Flow
- 3 FAQ
Hey everyone, it’s Sammy, your friendly neighborhood marketing guy and food enthusiast, tuning in from my cozy home office here in Nashville. Luna, my rescue cat, is currently napping on a pile of (hopefully clean) laundry, so it’s the perfect quiet moment to dive into a topic that’s near and dear to my heart – and probably yours too if you spend any amount of time in the kitchen: the kitchen work triangle. It sounds kinda technical, maybe a bit old-fashioned, but trust me, understanding and optimizing this concept can make a world of difference in how your kitchen feels and functions. I’ve been thinking a lot about kitchen flow lately, especially after helping a friend sketch out ideas for their kitchen remodel. It got me wondering, how many of us are just… putting up with inefficient layouts without even realizing there’s a better way? We get used to the extra steps, the awkward reaches, the countertop clutter. But what if we didn’t have to?
When I moved to Nashville from the Bay Area, one of the first things I obsessed over in my new place was the kitchen. It wasn’t terrible, but it wasn’t… intuitive. I found myself doing this weird little shuffle between the fridge, the stove, and the sink, like a poorly choreographed dance. And as someone who genuinely loves to cook, from whipping up a quick weekday meal to attempting something more ambitious on the weekends, that inefficiency started to grate. It’s funny, in marketing, we talk a lot about user experience and customer journeys. Well, your kitchen has a user experience too, and you’re the primary user! So, this article is all about that – sharing some kitchen-work-triangle-optimization-tips that I’ve picked up, thought about, and frankly, experimented with. We’re going to break down what the work triangle is, why it still matters (mostly), and how you can tweak your own space, big or small, to make your culinary adventures smoother and more enjoyable. No more kitchen gymnastics, okay? Let’s aim for a graceful ballet, or at least a comfortable stroll.
So, what will you get out of this? We’ll explore the classic concept, sure, but also how it applies to modern kitchens with all our gadgets and gizmos. We’ll talk dimensions, common pitfalls (I’ve seen a few!), and how to personalize your layout because, let’s be real, a kitchen for a solo cook like me is different from one for a bustling family. My goal here isn’t to give you a rigid set of rules you *must* follow, because where’s the fun in that? Instead, I want to give you a framework, a way of thinking about your space, so you can make informed decisions that truly work for *you*. It’s about making your kitchen a partner in your cooking, not an obstacle course. Think of it as optimizing your personal culinary command center. Sound good? Alright, grab a coffee (or a glass of sweet tea, we are in Nashville after all), and let’s get into it.
Unpacking the Kitchen Work Triangle: More Than Just Geometry
1. Understanding the Classic Kitchen Work Triangle
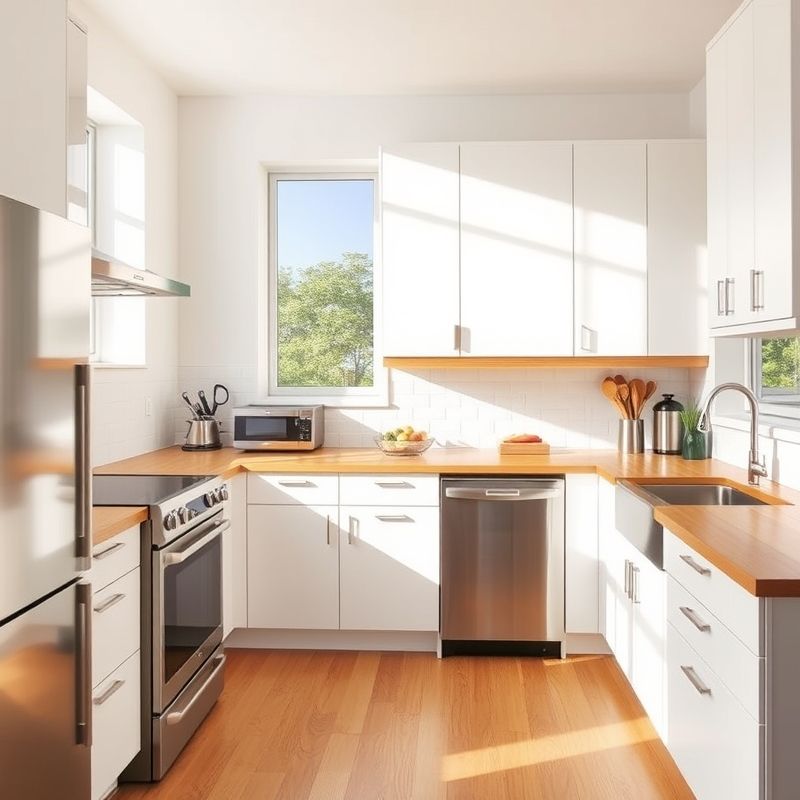
Alright, let’s start with the basics. What exactly *is* this kitchen work triangle everyone talks about? In its purest form, it’s an imaginary triangle that connects the three primary work areas in a kitchen: the refrigerator (for food storage), the sink (for cleaning and prep), and the stove or cooktop (for cooking). The idea, which actually has roots in the early 20th century, specifically some efficiency studies done, I think, at the University of Illinois School of Architecture back in the 1940s, was to create the most efficient layout for a homemaker to minimize steps and effort. Think about it – it’s a logical flow: take food from the fridge, wash/prep it at the sink, then cook it on the stove. It’s all about ergonomics and creating a compact workspace where you’re not trekking miles just to make dinner. The goal was to reduce wasted motion and make kitchen tasks less fatiguing. And honestly, even with all our modern advancements, the core principle of connecting these three key points still holds a lot of water. It’s a fundamental concept that, when applied thoughtfully, can dramatically improve your kitchen’s efficiency. It’s not just about looking good; it’s about working good. I often find myself analyzing spaces this way, almost subconsciously now – it’s like a little mental checklist when I walk into a kitchen.
2. Beyond the Basics: Adapting the Triangle for Modern Kitchens
Now, here’s where it gets interesting. Is the classic triangle, born in an era of simpler kitchens, still the be-all and end-all for today’s culinary havens? My take? Yes, and no. The core idea of efficient movement between key zones is timeless. But our kitchens have evolved, haven’t they? We now have microwaves, dishwashers (thank goodness!), often dedicated prep sinks, coffee stations, air fryers taking up counter space… the list goes on. So, the rigid three-point triangle needs a bit of adaptability. You might have a ‘prep zone’ that incorporates the sink and some counter space, a ‘cooking zone’ with the stove and microwave, and a ‘storage zone’ with the fridge and pantry. The triangle can still exist within this, or perhaps it morphs into more of a ‘work polygon’ if you have multiple key stations. Different kitchen layouts – L-shape, U-shape, galley, or those glorious open-plan kitchens with massive islands – also require different interpretations. For example, an island can be a fantastic way to incorporate one point of the triangle, like a cooktop or a prep sink, making the triangle more compact. Or, it can completely obstruct it if not planned correctly. The key is to think about your personal workflow and how *you* use your modern appliances. It’s less about strictly adhering to an old diagram and more about applying the *principles* of efficiency to your unique setup. I sometimes think the term ‘work triangle’ is a bit restrictive; maybe ‘efficiency pathways’ is more accurate for some of the more complex, multi-functional kitchens we see today. It’s about connecting the dots in a way that makes sense for the modern cook.
3. Ideal Distances and Dimensions: The Nitty-Gritty
Okay, so if we’re talking triangles, we gotta talk numbers, right? There are some generally accepted guidelines for the dimensions of the kitchen work triangle, and they exist for good reason. Typically, each leg of the triangle – the distance between any two of the three points (fridge, sink, stove) – should be between 4 feet (about 1.2 meters) and 9 feet (about 2.7 meters). Any shorter, and you’ll feel cramped, constantly bumping into things. Any longer, and you’re essentially doing a mini-workout every time you prepare a meal. I’ve been in kitchens where the fridge is so far from the stove, you practically need to pack a lunch for the journey. The total sum of the three leg lengths should ideally fall between 13 feet (about 4 meters) and 26 feet (about 7.9 meters). These aren’t iron-clad laws, mind you, but they’re excellent starting points for ensuring good traffic flow and a comfortable level of compactness without being restrictive. The aim is to minimize unnecessary steps while still allowing enough room to work safely and comfortably, and for more than one person to be in the kitchen without a major collision. When planning, I always suggest people actually measure out these distances in their current space or a potential new layout. Use painter’s tape on the floor if you have to! It really helps visualize how the space will feel and function. It’s one thing to see it on paper, quite another to experience it, even in a mock-up.
4. The Refrigerator Zone: First Point of the Triangle
Let’s break down the points, starting with the refrigerator. This is often the first stop in the cooking process, right? You grab your ingredients. So, its placement is pretty critical. Ideally, you want the fridge to be easily accessible, perhaps near an entrance to the kitchen so you can unload groceries without trekking through the entire space. This is something I really appreciate in my current setup; the fridge is just a few steps from my back door. Another consideration for refrigerator placement is its proximity to both the main prep area (often around the sink) and the eating area if you have one in or near the kitchen – makes grabbing a drink or a condiment much easier. One thing people often overlook is the fridge door swing. Seriously, make sure it doesn’t bang into an island or block a major walkway when open! Most fridge doors are reversible these days, which helps, but it’s still a crucial detail. And crucially, you need landing space next to the refrigerator – a bit of countertop where you can temporarily place items you’re taking out or putting in. Trying to juggle a milk carton, a head of lettuce, and a jar of pickles while holding the fridge door open with your hip? Not fun. Aim for at least 15 inches of counter space on the handle side of the fridge, or on either side if it’s a French door model. This small detail makes a huge difference in accessibility and everyday convenience.
5. The Sink and Cleanup Zone: The Workhorse
Ah, the sink. Often the unsung hero and the most frequently visited point in the kitchen triangle. It’s not just for washing dishes; it’s for washing hands, rinsing vegetables, filling pots… it’s a true workhorse. Because of this, sink placement is super important. Ideally, it should be located between the refrigerator and the stove, creating a natural flow for food preparation. If you have a window with a nice view, placing the sink there is a classic for a reason – it makes a sometimes tedious task a bit more pleasant. I don’t have a window over my sink, but I do have good lighting, which is the next best thing. When thinking about the sink, you also have to consider dishwasher integration. The dishwasher should almost always be right next to the sink – on the left or right, depending on your dominant hand and workflow. And again, think about the door swing! Can you open the dishwasher fully without blocking access to the sink or other key areas? Then there’s the cleanup zone aspect: trash and recycling bins. Having these close to the sink is a game-changer for efficient food prep and cleanup. Pull-out bins integrated into cabinetry near the sink are a fantastic solution. This whole area really forms the core of your prep area, so ensuring it’s well-lit, has ample counter space on both sides, and easy access to essentials will make your kitchen life so much smoother. I think I spend more time at my sink than anywhere else, even if it’s just for a quick rinse or hand wash.
6. The Cooking Zone: Stove, Oven, and More
Next up is the cooking zone, centered around your stove, cooktop, and oven. This is where the magic happens, right? But it also needs careful planning for safety and functionality. Firstly, cooktop safety is paramount. Avoid placing your cooktop in a major traffic path where someone could accidentally bump into hot pans. Also, make sure there’s enough clearance so pot handles don’t stick out into the walkway. Just like with the fridge and sink, landing space is crucial here too. You need at least 12-15 inches of heat-resistant counter space on both sides of the cooktop for placing hot pans, ingredients, and stirring spoons. This is non-negotiable for me. Good ventilation is another key factor influencing placement. Your range hood needs to be effective, and its ducting requirements might impact where the cooktop can go. And don’t forget storage! You’ll want your pots, pans, baking sheets, and common cooking utensils stored conveniently near the cooking zone. Drawers for pots and pans under or next to the cooktop, and a utensil crock or drawer nearby, can save you a lot of running around. My current setup has deep drawers for pans right below my induction cooktop, and it’s just incredibly convenient. It makes me wonder how I ever managed with them stacked in a high cabinet. It’s these little things that add up to a big difference in daily use.
7. Kitchen Islands and Peninsulas: Triangle Enhancers or Obstacles?
Kitchen islands and peninsulas are incredibly popular, and for good reason. They can add valuable counter space, storage, seating, and even become a focal point of the kitchen. But how do they interact with our trusty work triangle? Well, they can be huge enhancers or major obstacles, depending on how they’re integrated. An island can brilliantly incorporate one point of the triangle, like a prep sink or a cooktop, effectively tightening the triangle and creating a very efficient work core. This is especially useful in larger L-shaped or U-shaped kitchens. However, an improperly placed island can become a barrier, forcing you to walk around it constantly to get between the fridge, sink, and stove. This is a classic design mistake. You need to ensure there’s adequate pathway clearance around the island – generally, at least 36 inches, but 42-48 inches is often better, especially in multi-cook households or if appliance doors open into the pathway. Islands can also be wonderfully multi-functional, serving as a breakfast bar, a homework station, or a buffet server when entertaining. But their primary role in relation to the work triangle should be to support, not hinder, the flow. I’ve seen some beautiful islands that just break all the rules of good flow, and it makes me wince a little. It’s form over function, and in a kitchen, function really needs to be king, or at least co-ruler.
8. Work Zones vs. The Triangle: A Modern Approach
So, we’ve talked about adapting the triangle. This leads naturally to the concept of work zones, which is another way, perhaps a more modern way, to think about kitchen layout, especially in larger kitchens or for households with multiple cooks. Instead of just three points, you might design dedicated zones for specific tasks: a prep zone (with sink, cutting boards, knives, compost bin), a cooking zone (stove, oven, microwave, spices, pots), a baking zone (mixer, baking supplies, perhaps a lower counter), and a cleanup zone (main sink, dishwasher, trash). The work triangle can still exist within this framework – for example, your primary prep sink, fridge, and cooktop might form a tight triangle – but the zonal approach allows for more specialization and can prevent cooks from getting in each other’s way. Is this a better way to think about it? I’m torn. I think the triangle is a fantastic foundational principle, a sort of ‘golden rule’ for core efficiency. But for complex needs, zonal planning definitely offers a more nuanced approach to kitchen functionality. Perhaps the triangle is the fundamental building block, and zones are how you arrange those blocks for a larger structure. It’s not necessarily an either/or situation. You could have a primary work triangle for the main cook, with secondary zones or mini-triangles for other activities. The goal remains the same: efficiency and ease of use. For my own, relatively compact kitchen, the triangle works well. But if I had a huge space and often cooked with others, I’d be looking very seriously at a zonal layout.
9. Common Triangle Mistakes and How to Avoid Them
Knowing the principles is one thing, but avoiding common mistakes is another. I’ve seen (and, ahem, maybe even made in past rental kitchens with limited options) a few blunders when it comes to the work triangle. One of the biggest is allowing major traffic to flow directly through the triangle. If people are constantly walking between the sink and stove to get to another room, it’s not just annoying, it’s a safety hazard. Another common issue is obstructions. A poorly placed island, as we discussed, or a door (like a pantry or powder room door) that swings into the work area can be a real pain. Then there are the distance problems: legs of the triangle that are too long, making you walk excessively, or too short, leading to a cramped, inefficient workspace. And a surprisingly frequent oversight is forgetting adequate landing spaces next to the fridge, sink, and cooktop. You need places to put things down! These layout flaws can often be avoided with careful planning. Sketching your layout to scale, using painter’s tape on the floor to mark out appliances and clearances, and even doing a ‘walk-through’ of common tasks can help you spot these planning pitfalls before you commit to a design or renovation. It’s always easier (and cheaper) to fix a mistake on paper than in reality. I always advise friends to live with their paper plans for a few days, imagining daily routines. It’s amazing what you notice.
10. Personalizing Your Triangle: It’s YOUR Kitchen!
Finally, and this is perhaps the most important tip: your kitchen work triangle (or work zones) should be tailored to *you*. It’s about personalization. Think critically about your cooking style. Do you bake frequently? You might want your oven and mixer in a slightly different configuration than someone who mostly stir-fries. Do you entertain a lot? Maybe an island that faces the living area is key. Consider your household size and the needs of everyone who uses the kitchen. Are there multiple cooks? Are there kids who need safe access to the fridge or microwave? Even something as seemingly minor as whether you’re left-handed or right-handed could subtly influence where you prefer your dishwasher or main prep space, though that’s perhaps getting into super-fine details. But the point is, while the guidelines for distances and clearances are based on general ergonomics, the ultimate layout should support your specific lifestyle fit. Don’t just copy a layout from a magazine because it looks pretty. Analyze how *you* move, how *you* cook, and what makes *you* feel comfortable and efficient. Sometimes, the mathematically ‘perfect’ triangle might not feel right, while a slightly ‘imperfect’ one that caters to your quirks is just chef’s kiss. It’s about creating a space that has a good subjective comfort, a space that invites you in and makes the process of creating food a joy, not a chore. After all, a kitchen is more than just a collection of appliances; it’s the heart of the home for many of us, including me and Luna (who mostly enjoys the results of my cooking, not the process).
Bringing It All Home: Your Kitchen, Your Flow
So, there you have it – a pretty deep dive into the world of kitchen work triangle optimization. We’ve gone from its historical roots to its modern applications, from ideal dimensions to the importance of personalization. It might seem like a lot to consider, and maybe it is. But I truly believe that putting a bit of thought into your kitchen layout, specifically how your main work areas connect, can profoundly impact your daily life. It’s not just about saving a few steps; it’s about reducing friction, increasing enjoyment, and creating a space that truly supports your culinary endeavors, whether you’re a gourmet chef or a microwave maestro. My own journey with kitchen layouts, from cramped city apartments to my current Nashville setup, has taught me that efficiency and joy in the kitchen are often intertwined. When your space flows well, cooking feels less like a task and more like a creative outlet.
Perhaps the challenge now is to look at your own kitchen with fresh eyes. Sketch it out. Measure the distances between your fridge, sink, and stove. Observe your own movement patterns as you prepare a meal. Are there bottlenecks? Are you constantly backtracking? Is there a simple tweak, like reorganizing a cabinet or adding a small rolling cart for extra landing space, that could make a difference? Or if you’re planning a bigger renovation, these principles can be your guiding stars. Is the ‘perfect’ triangle an absolute, unchangeable law? I don’t think so. I think it’s a powerful guideline, a starting point for creating a kitchen that’s uniquely, wonderfully, and efficiently yours. What if the ultimate goal isn’t to achieve some abstract geometric ideal, but to craft a space that intuitively understands and supports the way *you* live and cook? That, to me, sounds like a recipe for success.
FAQ
Q: What if my kitchen is too small for a traditional work triangle?
A: If you’re dealing with a really compact space, like a galley kitchen or a tiny apartment kitchen, the traditional triangle might be very tight or even a straight line! In these cases, focus on hyper-efficient placement of each element. Minimize steps as much as possible, ensure there’s landing space (even if small) next to each key appliance, and think vertically for storage. Multi-functional items and smart organization are your best friends. The core principle of easy access between fridge, sink, and stove still applies, even if the ‘triangle’ is a bit squished.
Q: Does the work triangle concept apply to outdoor kitchens?
A: Absolutely! The principles of workflow efficiency are universal. For an outdoor kitchen, your key elements might be the grill (instead of a stove), a small outdoor refrigerator, and a sink or prep area. You’ll still want these to be arranged in a way that minimizes steps and makes it easy to move between them, especially when you’re juggling food, tools, and potentially dealing with the elements. Landing space next to the grill is just as crucial as it is next to an indoor cooktop.
Q: How important is it to have a professional design my kitchen layout?
A: This really depends on the scope of your project and your own comfort level with design. For a major renovation or a new build, a professional kitchen designer or architect can be invaluable. They have experience with building codes, ergonomics, material selection, and can often see possibilities or pitfalls you might miss. However, for smaller tweaks, or if you have a good grasp of design principles and are willing to do the research, you can certainly achieve a great layout on your own. Understanding concepts like the work triangle yourself is a fantastic starting point, even if you do end up hiring a pro, as it helps you articulate your needs and preferences.
Q: My kitchen island seems to get in the way sometimes. How can I fix this without a major remodel?
A: This is a common issue! If a full remodel to resize or relocate the island isn’t feasible, consider a few things. First, is the island cluttered? Simply clearing its surface and ensuring items stored on/in it are essential can sometimes free up visual and actual space, making pathways feel more open. If it’s a movable island or cart, experiment with repositioning it slightly – even a few inches can make a difference. If it’s fixed, analyze *how* it’s obstructing flow. Is it blocking direct access between two points of the triangle? Could you change your workflow slightly to minimize the need to cross that path? Sometimes, improving storage solutions around the perimeter of the kitchen can reduce reliance on the island, making its presence less intrusive.
@article{smart-kitchen-work-triangle-optimization-tips,
    title   = {Smart Kitchen Work Triangle Optimization Tips},
    author  = {Chef's icon},
    year    = {2025},
    journal = {Chef's Icon},
    url     = {https://chefsicon.com/kitchen-work-triangle-optimization-tips-hyphens-instead-of-spaces/}
} 

