
Table of Contents
- 1 My Approach to Conquering Kitchen Grease
- 1.1 Understanding Grease: The Sticky Nemesis
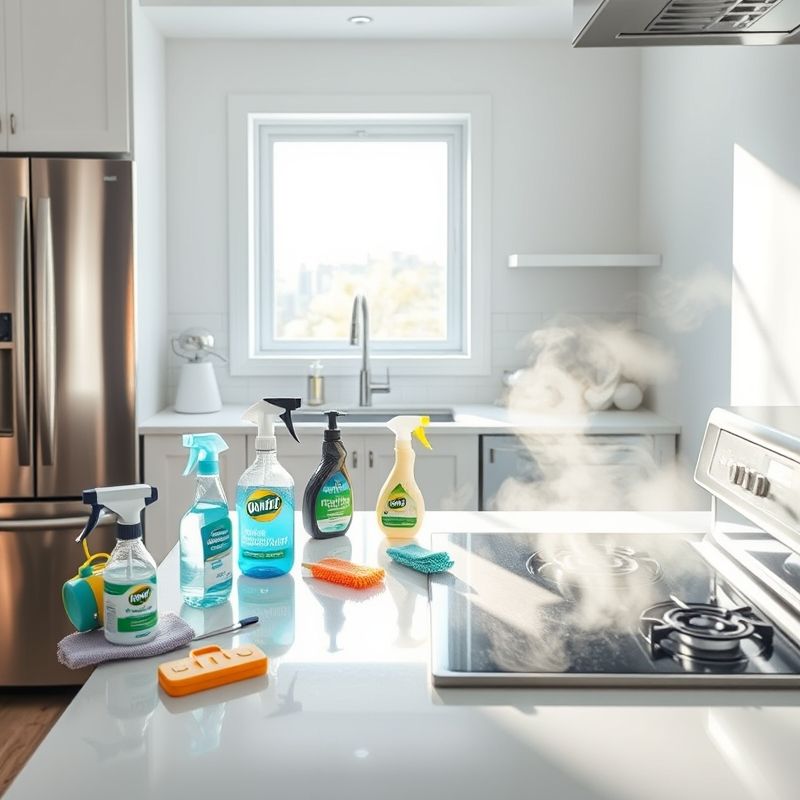
- 1.2 The Essential Degreasing Toolkit: Arming Yourself for Battle
- 1.3 Natural Degreasers: The Eco-Friendly Frontline
- 1.4 Commercial Degreasers: Calling in the Reinforcements
- 1.5 Tackling the Stovetop: Ground Zero
- 1.6 The Oven Interior: A Greasy Cauldron
- 1.7 Range Hoods and Filters: The Unsung Grease Traps
- 1.8 Walls, Backsplashes, and Cabinets: The Splash Zone
- 1.9 Floors and Other Surfaces: The Downward Drift
- 1.10 Prevention and Maintenance: The Best Defense is a Good Offense
- 2 Final Whisk: Keeping Your Kitchen Gleaming
- 3 FAQ: Your Grease-Related Quandaries Answered
Alright, let’s get real for a minute. If there’s one villain in my Nashville kitchen, a relentless foe that seems to regenerate overnight, it’s grease. You know what I’m talking about – that sticky, stubborn film that coats stovetops, backsplashes, and somehow even the tops of cabinets you swear you never touch. As someone who spends a *lot* of time experimenting with recipes (and occasionally making a glorious mess), I’ve had my fair share of battles with the greasy grime. I remember this one time, shortly after moving from the Bay Area, I was trying to recreate a particularly ambitious deep-fried dish I’d loved. Let’s just say the aftermath looked like a small oil slick had occurred, and my then-new kitchen bore the brunt. Even Luna, my rescue cat, seemed to give the stove a wide berth for days. It was a wake-up call; I needed to up my game on effective-kitchen-degreasing-techniques.
Over the years, through trial, error, and a fair bit of research (my marketing brain loves to analyze a problem!), I’ve discovered some seriously effective ways to tackle this universal kitchen woe. It’s not just about aesthetics; a greasy kitchen can be a fire hazard, attract pests, and honestly, it just doesn’t feel good to cook in. So, in this post, I’m going to lay out my go-to strategies, from gentle, natural solutions to the heavy-duty stuff for when things get really dire. We’ll cover the tools you need, specific methods for different surfaces, and most importantly, how to make the whole process less of a soul-crushing chore. Maybe, just maybe, we can even find some satisfaction in restoring that clean gleam. Are these the *only* ways? Probably not, but they’re what work for me, a regular guy trying to keep his kitchen functional and, dare I say, pleasant.
We’re going to dive deep into understanding what grease actually is (sounds boring, but trust me, it helps!), the arsenal of tools and cleaners you should consider, and then break down the attack plan area by area. From the splattered stovetop to the often-neglected range hood, no greasy surface will be safe. I’ll share some of my personal preferences, what I’ve found to be surprisingly effective, and where I think it’s worth investing a bit more effort or a specific product. My goal here isn’t just to list a bunch of cleaning tips; it’s to empower you with knowledge and practical approaches so you can conquer kitchen grease like a pro. Or at least, like someone who’s learned the hard way many, many times. So grab a coffee, maybe take a quick glance at your own kitchen’s current grease situation for motivation, and let’s get started.
My Approach to Conquering Kitchen Grease
Understanding Grease: The Sticky Nemesis
So, first things first, what exactly *is* this stuff we call kitchen grease? At its core, it’s a lovely concoction of fats and oils that become airborne during cooking – think sizzling bacon, frying chicken, or even just sautéing vegetables in olive oil. These tiny particles float around and then gleefully settle on any available surface. Over time, especially with heat, these fats can undergo a process called polymerization, where they basically transform into a hard, varnish-like coating. This is why old, baked-on grease is so incredibly tough to remove; it’s chemically different from the fresh stuff. It’s not just one uniform enemy either; animal fats tend to be more solid at room temperature and can be a bit more stubborn than some plant-based oils, though all can become problematic. The key takeaway here is that the longer you leave it, the harder it becomes to clean. It builds up in layers, each one polymerizing and bonding to the one beneath. It’s a sneaky, persistent foe, and understanding its nature is the first step in defeating it. I used to think all grease was the same, but realizing the science behind it, well, it made me approach cleaning with a bit more strategy rather than just brute force. Sometimes I wonder if there’s a direct correlation between how delicious a meal is and how much grease it generates. Probably.
The Essential Degreasing Toolkit: Arming Yourself for Battle
Alright, before you charge into the kitchen like a warrior, you need the right weapons. And by weapons, I mean cleaning supplies. Trust me, having the right tools makes all the difference between a frustrating scrub-fest and a satisfying clean. My go-to arsenal includes a variety of microfiber cloths – they’re great for trapping grease and grime without just smearing it around. I also keep a few non-scratch scouring pads for tougher spots, and a good old-fashioned scrub brush with stiff bristles. A plastic scraper (like a bowl scraper or an old credit card) is invaluable for gently lifting off thicker, caked-on grease without damaging surfaces. For applying cleaners, a couple of sturdy spray bottles are a must. And please, please, wear rubber gloves! Your hands will thank you. Degreasers can be harsh on the skin. Sometimes, if I’m dealing with particularly stubborn oven grease or using strong commercial cleaners, I’ll even pop on some safety glasses. It might seem like overkill, but getting a splash of potent degreaser in your eye is no fun at all. An old toothbrush is also surprisingly handy for getting into tight corners and around fixtures. It’s not about having the most expensive gear, but the right selection for various tasks. I’ve learned that trying to scrub hardened grease with a flimsy paper towel is a recipe for pure frustration.
Natural Degreasers: The Eco-Friendly Frontline
I’m a big fan of trying natural solutions first, especially for everyday cleaning. They’re often cheaper, better for the environment, and generally safer to have around the house, especially with pets like Luna prowling about. My number one natural degreaser is white vinegar. Its acetic acid content is fantastic at cutting through grease. I usually dilute it with an equal amount of hot water in a spray bottle. It’s great for countertops, backsplashes (test on inconspicuous area first, especially on natural stone!), and even for a quick stovetop wipe-down after dinner. Then there’s baking soda – a mild abrasive that also helps to neutralize odors. I often make a paste with a little water and use it to scrub away more stubborn spots, especially on stainless steel sinks or inside the oven. The classic combination of vinegar and baking soda, with its satisfying fizz, can also help lift grease, though the primary cleaning action comes from each individually. Lemon juice, with its citric acid, is another good one for cutting grease and leaves a fresh scent, which is a nice bonus. And never underestimate the power of plain boiling water or steam! Carefully pouring boiling water over greasy oven racks (in the sink, of course) or using a steam cleaner can loosen a surprising amount of grime before you even introduce another cleaner. Are these always enough for, say, a range hood filter that hasn’t been cleaned in a year? Maybe not. But for regular maintenance, they’re fantastic. I find myself reaching for the vinegar spray multiple times a day.
Commercial Degreasers: Calling in the Reinforcements
Sometimes, despite our best eco-friendly efforts, we encounter grease situations that require something a bit more… potent. This is where commercial degreasers come into play. There are generally two types you’ll find: alkaline cleaners and solvent-based cleaners. Alkaline cleaners work by reacting with the grease to turn it into a soap-like substance (saponification), making it easier to rinse away. Solvent-based degreasers dissolve the grease. Both can be incredibly effective, but they also require more caution. Always, and I mean *always*, read the label and follow the instructions. This includes wearing gloves, ensuring good ventilation (open those windows!), and patch testing in an inconspicuous area, especially on painted surfaces or delicate materials. I’ve learned this the hard way, once leaving a strong degreaser on a painted cabinet too long and ending up with a discolored patch. Oops. When I use these, I tend to go for the least aggressive option that will still do the job, and I make sure to rinse the surfaces thoroughly afterward to remove any residue. These are the products I reserve for the really tough jobs, like the inside of a neglected oven or those truly caked-on range hood filters. They have their place, but I treat them with respect. Is this the best approach for every single tough spot? Perhaps some patience and more natural methods could work, but sometimes, time is also a factor.
Tackling the Stovetop: Ground Zero
The stovetop is often the epicenter of grease accumulation. It’s where the action happens, and it shows. Cleaning techniques will vary a bit depending on what type of stovetop you have. For gas stovetops, you’ve got the grates, burner caps, and the surface underneath. I usually soak the grates and burner caps in hot, soapy water with a good squirt of degreaser (either a natural one like vinegar or a mild commercial one). While they’re soaking, I tackle the stovetop surface. For electric coil stovetops, you can often lift the coils (once cooled and unplugged!) to clean underneath. Drip pans can usually be soaked or replaced if they’re beyond saving. For ceramic or glass cooktops, you need to be more careful to avoid scratching. A specialized glass cooktop cleaner and a scraper designed for these surfaces are your best friends. Never use abrasive powders or steel wool on these! For any type, pre-soaking or applying a cleaner and letting it sit for 10-15 minutes can make a huge difference. That dwell time allows the cleaner to start breaking down the grease, meaning less elbow grease for you. Burnt-on food and grease are particularly challenging. Here, a paste of baking soda and a little water, left to sit, can work wonders before gentle scrubbing. And don’t forget the knobs and control panel – they get surprisingly greasy from our hands. A cloth dampened with a mild degreaser usually does the trick for those.
The Oven Interior: A Greasy Cauldron
Ah, the oven. That dark box where culinary magic happens, and also where grease splatters go to bake on and become one with the metal. Many modern ovens have a self-cleaning function. My opinion on these is a bit mixed. They can be effective, but they also tend to generate a lot of smoke and strong odors, and they lock your oven for hours. Plus, sometimes they don’t get *everything*. If I use it, I always make sure to ventilate the kitchen extremely well. For manual cleaning, a common approach is using a baking soda paste. Slather it on the interior (avoiding heating elements), let it sit overnight if possible, and then wipe/scrape it out. It’s messy but effective and non-toxic. For really baked-on horror shows, a commercial oven cleaner might be necessary. These are powerful chemicals, so follow the safety precautions to the letter: gloves, eye protection, and serious ventilation are non-negotiable. I remember using one in my first apartment and nearly gassing myself out because I didn’t open enough windows. Lesson learned. Oven racks can often be soaked in the bathtub with hot water and dish soap or a degreaser, or some people have success putting them through a dishwasher cycle, though I’d check your dishwasher’s manual first. The oven door glass can be a pain. I’ve had good luck with a baking soda paste or a razor blade scraper (held at a low angle) for the baked-on bits. It’s a grimy job, no doubt, but a clean oven just performs better and doesn’t smoke up your kitchen.
Range Hoods and Filters: The Unsung Grease Traps
If your stovetop is ground zero, your range hood and its filters are the first line of defense against airborne grease. And boy, do they collect it. Cleaning these is absolutely crucial, not just for hygiene but also for fire safety and the efficiency of the hood. A clogged filter can’t do its job properly. There are generally two types of filters: mesh and baffle. Mesh filters are made of layers of aluminum mesh and are notorious for trapping grease. The best way I’ve found to clean these is to soak them in a sink or tub filled with very hot water and a strong degreasing solution – a good dose of Dawn dish soap works surprisingly well, or a dedicated commercial degreaser. Let them soak for at least 30 minutes, then scrub gently with a brush if needed, rinse thoroughly, and let them dry completely before reinstalling. Some mesh filters claim to be dishwasher safe, but I’ve found they can sometimes discolor or get damaged, so I prefer handwashing. Baffle filters, common in more commercial-style hoods, are usually made of stainless steel and are much easier to clean. They often come apart and can usually go straight into the dishwasher. The exterior of the hood itself also needs attention. Stainless steel hoods can be tricky, as they show every streak. I use a stainless steel cleaner or a microfiber cloth dampened with vinegar, always wiping with the grain. This is one area I try to clean fairly regularly, maybe once a month, because built-up grease on filters is a serious pain to remove.
Walls, Backsplashes, and Cabinets: The Splash Zone
Grease doesn’t just stay on the appliances; it splatters onto walls, backsplashes, and somehow even makes its way onto and into cabinets. The key here is knowing what your surfaces are made of before you start spraying cleaners willy-nilly. For painted walls, a mild solution of dish soap and water, or diluted vinegar, applied with a soft sponge or cloth is usually safe. Avoid harsh abrasives that can damage the paint. For tile backsplashes, you can usually be a bit more aggressive. A good degreasing spray and a scrub brush will typically handle greasy grout lines and tiles. For wooden cabinets, you need to be careful. Harsh chemicals can strip the finish. I often use a very mild Murphy Oil Soap solution or a specialized wood cabinet cleaner. A paste of baking soda and water can sometimes be used for stubborn spots, but test it first. Laminate cabinets are generally more resilient and can handle mild all-purpose cleaners or degreasers. One area that often gets overlooked is the tops of kitchen cabinets. This can become a sticky, dusty nightmare. My trick? After a thorough cleaning, I line the tops with newspaper or wax paper. Every few months, I just carefully roll up the liner and replace it. So much easier than scrubbing! The areas around cabinet handles and knobs also tend to get grimy quickly from frequent touching. A quick wipe-down of these high-contact spots during your regular cleaning can prevent major buildup.
Floors and Other Surfaces: The Downward Drift
Gravity, my friends, ensures that grease doesn’t just stay airborne or on vertical surfaces; it eventually finds its way down to the floor and onto other miscellaneous items. Kitchen floors, especially the area right in front of the stove and sink, can develop a sticky film that’s surprisingly hard to see but definitely easy to feel (usually when your sock sticks). The cleaning method depends heavily on your floor type. For tile or vinyl floors, a good mopping with a degreasing floor cleaner or hot water with a splash of vinegar usually does the trick. For sealed hardwood floors, you need to be more cautious with water; use a damp mop and a cleaner specifically designed for wood. I once made the mistake of using too much water on an old hardwood floor in a rental, and the boards were not happy. Small appliances also fall victim to grease. The microwave interior can get splattered; steaming a bowl of water with lemon slices inside for a few minutes helps loosen grime before wiping. Toasters, coffee makers, and stand mixers can all benefit from a wipe-down with a cloth dampened with a mild degreaser. Don’t forget to unplug them first! Even light fixtures above cooking areas can accumulate a greasy film that dulls their shine. It’s these little details that contribute to an overall cleaner feeling kitchen. It’s not just about the big appliances, it’s the whole ecosystem.
Prevention and Maintenance: The Best Defense is a Good Offense
Okay, we’ve talked a lot about cleaning up grease, but an even better strategy? Preventing it from building up in the first place. This is where a little bit of consistent effort can save you a *lot* of scrubbing later. The absolute golden rule is to wipe up spills immediately. Fresh grease is infinitely easier to clean than old, polymerized grease. When you’re cooking, especially frying or sautéing, use a splatter screen on your pans. It’s a simple tool, but it makes a noticeable difference in how much grease escapes onto your stovetop and backsplash. Turning on your range hood *every time* you cook, even if it’s just boiling water, helps to capture airborne grease particles before they can settle. I’m also a big believer in the “clean as you go” philosophy, though I’ll admit, I’m not always perfect at it. Wiping down the stovetop after dinner each night, rather than letting it accumulate, takes just a few minutes. Establishing a regular cleaning schedule helps too. Maybe you wipe down cabinet fronts once a week, clean your microwave weekly, and tackle the range hood filter monthly. It’s less daunting than facing a year’s worth of grime all at once. Does this mean your kitchen will always be spotless? Probably not if you actually cook in it. But it will make those deep cleaning sessions much less frequent and far less intimidating. I still have days where I just can’t be bothered after a long day, but I know future Sammy will thank present Sammy for even minimal effort.
Final Whisk: Keeping Your Kitchen Gleaming
So there you have it – my deep dive into the world of kitchen degreasing. From understanding the enemy to deploying the right tools and techniques, we’ve covered a lot of ground. It might seem like a daunting task, the perpetual war against grease, but armed with a bit of knowledge and a consistent approach, it’s definitely winnable. Remember, it’s not about achieving an unrealistic level of pristine perfection 24/7, especially if your kitchen is a hub of activity like mine. It’s about creating a cleaner, safer, and more pleasant environment to cook and live in. The satisfaction of seeing a greasy surface transform back to its clean state is, I find, quite rewarding in its own right.
My biggest piece of advice? Don’t try to tackle everything at once if it feels overwhelming. Pick one area – maybe that particularly grimy spot on the backsplash or the inside of the microwave – and conquer that. Small victories build momentum. And try to incorporate some preventative measures into your daily routine; it truly makes a world of difference. Perhaps the real challenge isn’t just about cleaning grease, but about cultivating habits that keep it from becoming a monster in the first place. What’s one greasy spot in your kitchen you’re now motivated to tackle? I’d love to hear if these tips help you out!
FAQ: Your Grease-Related Quandaries Answered
Q: How often should I deep clean my kitchen for grease?
A: This really depends on how much you cook and what types of cooking you do. For an active kitchen, a thorough degreasing of key areas like the stovetop, oven, and range hood might be needed every 1-3 months. Lighter, regular cleaning should be done weekly or even daily for high-use surfaces. If you fry food often, you’ll likely need to degrease more frequently.
Q: Can I use regular dish soap as a degreaser?
A: Yes, many dish soaps, especially those marketed as “grease-fighting” (like Dawn), are excellent at breaking down fresh grease. They work by emulsifying the fat, allowing it to be rinsed away with water. For light to moderate grease, dish soap and hot water can be very effective. For heavy, baked-on grease, you might need something stronger or a more abrasive technique in conjunction.
Q: What’s the safest way to dispose of used cooking oil?
A: Never pour used cooking oil down the drain! It can solidify and cause major plumbing blockages and contribute to sewer problems. The best way is to let it cool completely, then pour it into a sealable, non-recyclable container (like an old milk carton or a jar with a lid) and dispose of it in your regular trash. Some municipalities have collection programs for used cooking oil, so check with your local waste management service.
Q: Are “all-natural” degreasers as effective as chemical ones?
A: For many everyday grease situations, natural degreasers like vinegar, baking soda, and lemon juice can be very effective, especially if the grease isn’t heavily baked on or polymerized. They work well for maintenance and fresh spills. However, for extremely stubborn, old, or thick grease buildup, commercial chemical degreasers are often more powerful and faster-acting due to their specific chemical formulations designed to break down hardened fats and oils. It’s often a case of matching the cleaner to the severity of the grease. I usually start with natural options and escalate if needed.
@article{seriously-effective-kitchen-degreasing-techniques-i-swear-by,
    title   = {Seriously Effective Kitchen Degreasing Techniques I Swear By},
    author  = {Chef's icon},
    year    = {2025},
    journal = {Chef's Icon},
    url     = {https://chefsicon.com/effective-kitchen-degreasing-techniques/}
} 

