
Table of Contents
- 1 Decoding Your Walk-In Cooler Needs
- 1.1 Understanding Your Actual Space Needs (Beyond Just Cubic Feet)
- 1.2 The Nitty-Gritty of Sizing: Calculating Your Requirements
- 1.3 Location, Location, Location: Where Will This Beast Live?
- 1.4 Decoding Refrigeration Systems: Remote vs. Self-Contained
- 1.5 Insulation Matters More Than You Think: Panels and R-Value
- 1.6 Doors: Not Just an Entry Point
- 1.7 Flooring Options: Durability and Sanitation
- 1.8 Essential Features and Nice-to-Haves
- 1.9 Considering Energy Efficiency: Long-Term Savings
- 1.10 Installation and Maintenance: Don’t Skimp Here!
- 2 Final Thoughts on Your Cool Investment
- 3 FAQ
Hey everyone, Sammy here from Chefsicon.com, tuning in from my home office here in Nashville – where Luna, my rescue cat, is currently supervising my every keystroke, probably judging my coffee intake. Today, we’re diving deep into something that might not sound glamorous but is absolutely critical for so many food businesses: choosing the right walk-in cooler size and features. Get this wrong, and you’re looking at spoiled inventory, sky-high energy bills, or a cramped, inefficient workspace. Get it right, and it’s like having a silent, super-efficient partner in your kitchen. It’s a big ticket item, a cornerstone of your operations, so a little (okay, a lot) of forethought goes a long, long way.
I remember back in my early days consulting for a bustling little bistro – great food, passionate chefs, but they were constantly battling their walk-in. It was too small, poorly organized, and the refrigeration unit sounded like a dying walrus. Every delivery day was a stressful game of Tetris, and they were losing product to spoilage more often than they wanted to admit. It was a hard lesson for them, and a real eye-opener for me about just how foundational this piece of equipment is. It’s not just a cold box; it’s the heart of your perishable inventory management. So, let’s try to save you some of that potential heartache and wasted cash, shall we?
Over the years, I’ve seen trends come and go, from fancy combi ovens to sous-vide everything, but the need for reliable cold storage? That’s timeless. What has changed is the technology, the efficiency, and the sheer number of options available, which can be kinda overwhelming. We’re going to break down how to figure out the size you actually need (it’s more than just cubic feet, trust me), what features are non-negotiable, which ones are nice-to-haves, and how to think about this investment strategically. By the end of this, you should feel a whole lot more confident navigating the cool, cool world of walk-ins. Luna just yawned, so I better make this interesting.
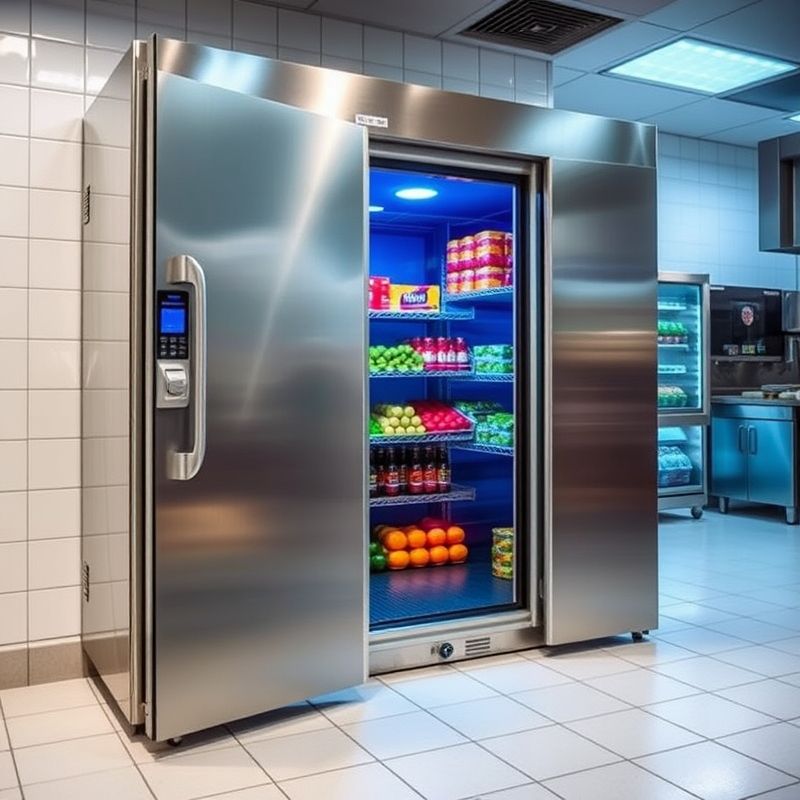
Decoding Your Walk-In Cooler Needs
Understanding Your Actual Space Needs (Beyond Just Cubic Feet)
Alright, so the first thing everyone thinks about is size, usually in cubic feet. And yeah, that’s a starting point, but it’s far from the whole story. What you really need to focus on is usable storage space. A 10×10 walk-in might sound huge, but once you factor in shelving, aisle space for people to actually move and, you know, retrieve things without performing acrobatics, and necessary airflow around your products, that usable space can shrink considerably. Think about the types of containers you use – are they bulky boxes, shallow pans, tall buckets? Your shelving system needs to accommodate these efficiently. If you’ve got deep shelves but mostly store small items, you’re wasting vertical space or you’ll end up with items buried and forgotten in the back – a recipe for spoilage and violating FIFO (First-In, First-Out), which is just a cardinal sin in inventory management.
Then there’s the airflow consideration. You can’t just pack a walk-in to the gills like you’re trying to win a stuffing contest. Cold air needs to circulate freely around all your products to maintain consistent temperatures and prevent hot spots. This means leaving space between items, between items and the walls, and ensuring your shelving doesn’t obstruct the evaporator fans. I’ve seen folks try to cram an extra case of lettuce in, blocking an air return, and then wonder why half their cooler is warmer than the other. It’s physics, people! Proper airflow is also crucial for energy efficiency; if the unit has to work harder to cool things down because of poor circulation, your energy bills will reflect that. So, when you’re sketching out your needs, visualize your inventory, how it’s stored, and how your team will interact with it. It’s less about the raw volume and more about how intelligently that volume can be utilized.
The Nitty-Gritty of Sizing: Calculating Your Requirements
So, how do you actually calculate the size you need? This is where it gets a bit more specific to your operation. Key factors include the type of your business – a busy restaurant with a large, diverse menu will have different needs than a small bakery or a florist. The sheer volume and variety of ingredients you need to store is paramount. Then there’s your delivery frequency. If you get deliveries daily, you might be able to get away with a slightly smaller unit than if you get bulk deliveries once or twice a week. Think about your peak seasons too. If you’re a restaurant in a tourist town, your summer demand might be triple your winter demand. Do you size for the absolute peak, or have a contingency plan? It’s a tough question. Some old-school folks use rules of thumb, like needing a certain number of cubic feet per meal served daily, or per dollar of weekly food purchases. These can be a rough guide, but honestly, I find them a bit too generic. Every operation is unique.
My advice? Start by meticulously listing out all the perishable items you need to store, their typical quantities on hand, and the dimensions of their storage containers. Then, think about your ordering cycles. How much buffer stock do you need? And – this is a big one – future growth. Are you planning to expand your menu, increase your covers, or add a catering arm to your business in the next 3-5 years? It’s often more cost-effective to invest in a slightly larger walk-in now than to face the massive disruption and expense of replacing an undersized unit later. I generally lean towards erring on the side of slightly too big rather than slightly too small, within reason of course. You don’t want a cavernous, half-empty cooler sucking up energy unnecessarily either. It’s a balancing act, for sure. Maybe look into modular units if you’re really unsure about future expansion; some can be expanded later, though it’s not always a simple process. The goal is to find that sweet spot that accommodates your current needs comfortably with a little wiggle room for your peak demand forecasting and modest growth.
Location, Location, Location: Where Will This Beast Live?
Okay, you’ve got a rough idea of size. Now, where are you going to put this thing? The location of your walk-in cooler is a massively important decision that impacts workflow, installation costs, and even the longevity of the unit. The primary choice is usually between an indoor or outdoor installation. Indoor units are often preferred for convenience, keeping them close to prep areas and protected from the elements. However, they take up valuable interior space, and the heat generated by the condensing unit (if it’s self-contained) can make your kitchen even hotter. Outdoor units save interior space and vent heat outside, which is great. But they need to be built to withstand weather – rain, snow, harsh sun – meaning more robust construction and potentially higher upfront costs. You also need to consider security for outdoor units and accessibility for deliveries, especially in bad weather. Imagine hauling cases of produce through a blizzard to an outdoor walk-in. Not ideal.
Regardless of indoor or outdoor, think about kitchen workflow. Ideally, the walk-in should be easily accessible from both the receiving area (for quick unloading of deliveries) and the main prep lines (for easy access to ingredients). Every extra step your staff has to take adds up in labor time and potential frustration. Another critical, and often overlooked, factor is the floor. The floor beneath your walk-in needs to be perfectly level and capable of supporting a significant amount of weight – we’re talking tons, literally, when it’s fully stocked. If you’re installing an indoor unit without a pre-fabricated floor, the existing concrete needs to be in good condition and properly sealed. And don’t forget ventilation for the condensing unit placement, especially for remote systems. It needs plenty of fresh air to operate efficiently and prevent overheating. A poorly ventilated condenser will work harder, consume more energy, and have a shorter lifespan. Seriously, map out the delivery paths, the staff access paths, and the proximity to your prep stations. This isn’t just about plopping a box down; it’s about integrating a critical component into your operational ecosystem.
Decoding Refrigeration Systems: Remote vs. Self-Contained
Now let’s talk about what makes the cool happen: the refrigeration system. The two main types you’ll encounter are self-contained and remote systems. Self-contained systems have all the refrigeration components (condenser, compressor, evaporator coil) integrated into a single unit, often mounted on the top or side of the walk-in. The big advantage here is simpler, and usually cheaper, installation. It’s pretty much plug-and-play, relatively speaking. However, the major downside is that the condenser releases heat directly into the surrounding area. If your walk-in is inside your already hot kitchen, this just adds to the heat load, making your kitchen staff uncomfortable and potentially overworking your HVAC system. They can also be a bit noisier. I’d say self-contained units are often a decent choice for smaller operations, or if the walk-in is located in a storage area away from the main kitchen, or for outdoor units where the heat dissipation isn’t an issue.
Remote systems, on the other hand, have the condensing unit and compressor located separately from the walk-in box, typically outside the building or on the roof. The evaporator coil remains inside the walk-in. The main benefits are a quieter kitchen environment and no added heat load inside, which can be a huge plus for staff comfort and overall energy efficiency of your building. This is generally the preferred option for larger walk-ins and busy kitchens where ambient heat is a concern. However, the installation complexity is higher, and therefore usually more expensive. You’ll need refrigerant lines running between the walk-in and the remote condenser, which requires skilled technicians. Maintenance can sometimes be a bit more involved too, simply because the components are in different locations. When deciding, you need to weigh the upfront cost and installation complexity of a remote system against the long-term benefits of reduced kitchen heat and noise. Also consider the ambient temperature impact where the remote condenser will be located; extreme heat or cold can affect its performance and efficiency.
Insulation Matters More Than You Think: Panels and R-Value
When you’re looking at walk-in coolers, it’s easy to get caught up in the size and the refrigeration system, but the unsung hero of any good walk-in is its insulation. This is what keeps the cold in and the heat out, and it has a massive impact on your energy consumption and the unit’s ability to maintain temperature consistency. Walk-ins are typically constructed from prefabricated panels, and these panels are filled with insulating material. The most common types are polyurethane and extruded polystyrene (XPS). Polyurethane generally offers a higher R-value per inch, meaning it’s a better insulator for a given thickness. The R-value is a measure of thermal resistance – the higher the R-value, the better the insulation’s ability to resist heat flow.
Most manufacturers offer panels in different thicknesses, commonly 4 inches, but sometimes 5 or even 6 inches, especially for freezers or applications in very hot climates. For a cooler (typically holding temps between 35°F and 41°F), a 4-inch panel with high-quality polyurethane foam is often sufficient, aiming for an R-value of around R-25 to R-32. For freezers, you’ll definitely want thicker panels and higher R-values, like R-32 or more. Don’t skimp on insulation to save a few bucks upfront! Poor insulation means your refrigeration system has to work much harder and more frequently to maintain the set temperature, leading to significantly higher energy bills over the life of the walk-in and increased wear and tear on the refrigeration components. Also, pay attention to how the panels connect. Most modern walk-ins use cam-lock systems that pull the panels tightly together, creating an airtight seal. Good seals are just as important as good insulation; any gaps or leaks are just pathways for cold air to escape and warm, moist air to enter, which can lead to condensation and frost buildup.
Doors: Not Just an Entry Point
It sounds obvious, but the door of your walk-in is a critical component that sees a lot of action and can be a major source of energy loss prevention if not chosen or maintained correctly. First, consider the door size. It needs to be wide enough and tall enough to easily move your largest inventory items and any carts or dollies you use. Trying to angle a wide sheet pan rack through a too-narrow door multiple times a day is a recipe for frustration and damage. Then there’s the swing direction and the necessary clearance. Make sure the door swing doesn’t obstruct busy traffic lanes or bang into other equipment. Most walk-in doors are reversible, but it’s best to plan this out beforehand.
A self-closing mechanism is an absolute must-have. Doors get left ajar all the time in busy kitchens, and every second that door is open, cold air is rushing out and warm air is rushing in, making your refrigeration unit work overtime. Heavy-duty hinges and a positive latch are also vital for a tight seal. Check the door seals (gaskets) regularly; worn or damaged gaskets are a huge energy leak. Some people like view windows in their walk-in doors, allowing a quick peek inside without opening it. I’m a bit torn on these; they can be useful, but they are also a point of slightly lower insulation. If you opt for one, make sure it’s at least double-paned, preferably triple-paned for freezers. Strip curtains are another common add-on. They can definitely help reduce air exchange when the door is open, especially in high-traffic walk-ins. However, some staff find them annoying to push through. For walk-in freezers, a heated door frame and a pressure relief port are essential to prevent the door from freezing shut and to equalize pressure differences that occur during defrost cycles. Don’t underestimate the importance of a good door system; it’s key to efficiency and usability and impacts your traffic flow significantly.
Flooring Options: Durability and Sanitation
The floor of your walk-in cooler is another area where you have choices, and these choices impact durability, sanitation standards, and safety. Many walk-ins come with integrated, insulated floors. These are typically made of metal, like smooth or patterned aluminum or stainless steel, over insulation. An integrated floor ensures a continuous seal and insulation barrier, which is generally best for energy efficiency, especially if the walk-in is installed on an uninsulated concrete slab or an upper story. It also provides a durable, cleanable surface. However, if your existing concrete floor is in excellent condition, level, and well-insulated (which is rare for a standard slab), you might consider a floorless walk-in. This can save some upfront cost and provides a continuous surface from your kitchen into the cooler, making it easier to roll heavy carts in and out without a ramp, assuming the surrounding floor is at the same height.
If you go with an integrated floor, consider the load bearing capacity. Standard floors are usually fine for foot traffic and light shelving, but if you plan on using heavy rolling racks or storing very dense products like kegs, you might need a reinforced floor. Material choice matters too. Aluminum is common and relatively inexpensive, but stainless steel is more durable and resistant to corrosion, though it costs more. For sanitation, whatever floor type you choose, it must be easy to clean and ideally have coved corners where the floor meets the walls to prevent dirt and bacteria from accumulating. A non-slip surface is also crucial for safety, as floors in walk-ins can sometimes become wet or slick. If you opt for a floorless model on existing concrete, make sure the concrete is properly sealed to prevent moisture absorption and facilitate cleaning. Some operations even build their walk-ins over quarry tile floors with built-in drains, especially for larger installations, but that’s a more custom approach.
Essential Features and Nice-to-Haves
Beyond the box, the refrigeration, and the floor, there are several other features that can make your walk-in more functional, safer, and easier to maintain. Good lighting is essential. Modern LED lighting is the way to go – it’s bright, energy-efficient, and produces very little heat compared to older incandescent or fluorescent bulbs, which is a bonus in a refrigerated space. Make sure there’s enough light to see clearly in all corners. Shelving is obviously critical for interior organization. Epoxy-coated wire shelving is common and good for air circulation, while stainless steel is more durable and easier to clean but pricier. Look for shelving that is easily adjustable to accommodate different product sizes and has a good weight capacity.
For food safety monitoring, a reliable digital thermometer with an external display is a must. Even better is a temperature alarm system that can alert you (via phone call, text, or email) if the temperature goes out of range. This can save you thousands of dollars in spoiled inventory. Pressure relief vents are particularly important for walk-in freezers to equalize air pressure during temperature changes, preventing damage to the structure or difficulty opening the door. If your walk-in floor isn’t flush with the surrounding floor, you’ll need a ramp for wheeled carts – consider the slope and material for safety and ease of use. Some ‘nice-to-haves’ that are becoming more common include smart features like remote temperature monitoring apps, diagnostic alerts, and even humidity controls for certain types of produce. While not strictly essential for everyone, these tech upgrades can offer significant benefits in terms of proactive maintenance and quality control. Think about these accessibility aids and monitoring tools as investments in efficiency and peace of mind.
Considering Energy Efficiency: Long-Term Savings
A walk-in cooler or freezer is one of the biggest energy consumers in most food service operations, running 24/7. So, focusing on energy efficiency isn’t just about being green; it’s about significant long-term savings on your utility bills. We’ve already talked about insulation (R-value) and good door seals, which are foundational. But the refrigeration system itself offers many opportunities for efficiency. Look for units with high-efficiency compressors. Electronically Commutated (EC) motors for evaporator and condenser fans can use up to 70% less energy than conventional shaded-pole motors and they also run cooler, which reduces the refrigeration load slightly. Adaptive defrost controls are another smart feature. Instead of defrosting on a fixed timer, they initiate defrost cycles only when actually needed, saving energy. Some systems use demand defrost, which senses frost buildup.
Proper sizing of the refrigeration system is also crucial for efficiency. An oversized system will short-cycle (turn on and off frequently), which is inefficient and causes more wear and tear. An undersized system will run constantly, struggling to maintain temperature. Make sure your supplier does a proper load calculation. Also, be aware of DOE regulations. The Department of Energy has minimum efficiency standards for walk-in cooler and freezer components. Reputable manufacturers will ensure their products meet or exceed these standards. Yes, more energy-efficient components might have a slightly higher upfront cost, but the payback period in energy savings can be surprisingly short. Think about the lifecycle costs, not just the purchase price. A cheaper, less efficient unit could end up costing you far more over its 10-15 year lifespan. This is an area where doing your homework and possibly spending a bit more upfront can yield substantial dividends for a more sustainable operation.
Installation and Maintenance: Don’t Skimp Here!
You can select the most perfectly sized, feature-rich, energy-efficient walk-in cooler on the planet, but if it’s installed incorrectly, you’re in for a world of trouble. This is not a DIY project for your handyman cousin, unless your cousin happens to be a certified refrigeration technician who specializes in walk-ins. Professional installation by qualified technicians is absolutely crucial. They’ll ensure the panels are assembled correctly with airtight seals, the refrigeration system is properly charged and balanced, electrical connections are safe, and everything is calibrated for optimal performance. Get references, check certifications, and make sure they understand the specific requirements of your chosen unit and your site conditions.
And the commitment doesn’t end once it’s installed. A regular preventive maintenance plan is essential to keep your walk-in running efficiently and reliably for years to come. This includes things like cleaning the condenser and evaporator coils (dirty coils drastically reduce efficiency), checking and cleaning drain lines, inspecting door seals and hardware, verifying refrigerant levels, and checking electrical components. Some of this you or your staff can do (like basic cleaning), but you’ll need a qualified technician for the more technical aspects. Finally, understand the warranty terms. What’s covered (parts, labor, compressor), for how long, and what are the conditions? Sometimes, the warranty is tied to professional installation and documented maintenance. Skimping on installation or maintenance to save a few dollars is a false economy. It will almost certainly lead to higher energy bills, more frequent breakdowns, premature component failure, and potentially catastrophic inventory loss. This is an investment that protects another huge investment – your perishable goods.
Final Thoughts on Your Cool Investment
Whew, that was a lot to cover, wasn’t it? Choosing the right walk-in cooler is a pretty involved decision, with lots of variables to consider. It’s so much more than just picking a big cold box. From meticulously calculating your true space needs and understanding the nuances of refrigeration systems to prioritizing energy efficiency and planning for proper installation and maintenance, every detail matters. It’s clear that this isn’t a purchase to be rushed. My biggest piece of advice? Do your homework, then do some more. Talk to multiple suppliers, get multiple quotes, and if possible, visit other businesses similar to yours and see what they’re using and what they like or dislike about their setups.
Is this the best approach for everyone to spend so much time on this? I genuinely think so. The right walk-in cooler isn’t just an expense; it’s a critical investment in the efficiency, safety, and profitability of your operation. It’s the silent workhorse that protects your valuable inventory day in and day out. Get it right, and it will serve you well for many years. Get it wrong, and well, let’s just say Luna here has seen me more stressed over far less critical decisions. So, take your time, make a checklist, and choose wisely. Maybe the real question isn’t just what walk-in to buy, but how thoughtfully are you approaching the core infrastructure of your business?
FAQ
Q: How much bigger should I go for future growth when sizing my walk-in cooler?
A: There’s no magic percentage, unfortunately. It really depends on your specific business plan and realistic growth projections. A common suggestion is to plan for 3-5 years of anticipated growth. If you expect a 20% increase in volume in that time, factor that into your capacity needs. However, oversizing too much can lead to inefficiency. It’s a balance; discuss your growth plans with your supplier, they might offer insights or even modular options that can be expanded later, though that has its own set of complexities.
Q: Are outdoor walk-in coolers a good idea in climates with extreme heat or cold?
A: Yes, they can still be a very good option, but you need to ensure they are built for it. This means specifying units with enhanced insulation (possibly thicker panels or higher R-value foam), durable weather-resistant finishes, and potentially a roof cap or ‘snow hood’ for protection. The refrigeration system might also need to be sized to handle the extreme ambient temperatures. In very hot climates, a well-ventilated shelter over the condensing unit can improve its efficiency and lifespan. In cold climates, components might need to be rated for low-ambient operation.
Q: What’s the single biggest mistake people make when choosing a walk-in cooler?
A: That’s a tough one, as there are a few common pitfalls. But if I had to pick one, it’s probably undersizing the unit or focusing too heavily on the upfront purchase price without adequately considering long-term operational costs, energy efficiency, or its suitability for their actual day-to-day workflow. A cheap, small cooler might seem like a deal, but if it can’t hold temperature, constantly breaks down, or causes daily operational bottlenecks, it’s no bargain at all. It’s the classic ‘penny wise, pound foolish’ scenario.
Q: Can I move a walk-in cooler if I relocate my business?
A: It depends on the construction. Most modern walk-ins are made with cam-lock panels designed for assembly and disassembly, so technically, yes, they can be moved. However, it’s a significant undertaking. It requires careful disassembly, transportation, and reassembly by qualified technicians, including evacuating and recharging the refrigeration system. There’s always a risk of damaging panels or components. You’d need to weigh the cost of moving and reinstalling against the cost of a new unit at the new location. It’s often feasible for newer, well-maintained units, but might not be worth it for older ones.
@article{right-walk-in-cooler-size-features-smart-choices,
    title   = {Right Walk-In Cooler Size Features: Smart Choices},
    author  = {Chef's icon},
    year    = {2025},
    journal = {Chef's Icon},
    url     = {https://chefsicon.com/choosing-the-right-walk-in-cooler-size-and-features/}
} 

