The Best Fluffy Pancakes recipe you will fall in love with. Full of tips and tricks to help you make the best pancakes.
Training Recipes for Building Kitchen Speed Without Sacrificing Quality: Why This Matters More Than You Think
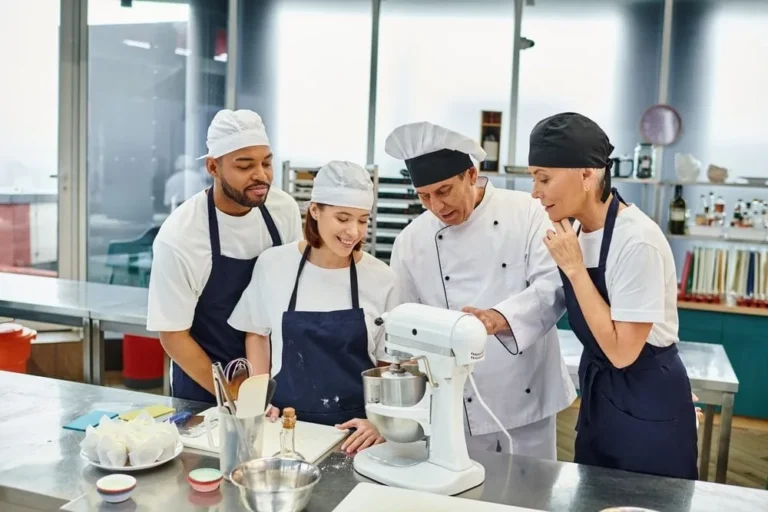
Let me tell you about the first time I realized speed in the kitchen wasn’t just about moving faster, it was about thinking smarter. It was a Tuesday night, the kind where the dinner rush hits like a freight train, and I was working the line at a small but ambitious restaurant in Nashville. The chef had just handed me a ticket for three different dishes, all with modifications, and my hands were shaking. Not from nerves, but from the sheer weight of knowing I had to get each plate out in under eight minutes without turning the kitchen into a war zone. I remember looking at the clock, the seconds ticking by, and thinking, There’s got to be a better way.
That moment stuck with me. Speed in the kitchen isn’t about rushing; it’s about systems, preparation, and muscle memory. It’s about knowing when to slow down so you can speed up later. Over the years, I’ve worked in kitchens where the pressure was relentless, and I’ve seen cooks burn out because they thought speed meant sacrificing quality. But here’s the truth: the best chefs don’t choose between speed and quality, they train to have both. And that’s what this guide is about.
In this article, I’m going to walk you through the training recipes and techniques that have helped me, and countless other cooks, build kitchen speed without cutting corners. We’ll cover everything from mise en place hacks to timing drills, equipment optimization, and even how to train your brain to work faster under pressure. By the end, you’ll have a toolkit of strategies to make your kitchen (or home cooking) faster, smoother, and more consistent. And don’t worry, this isn’t about turning you into a robotic line cook. It’s about working smarter, not harder.
So, if you’ve ever felt like the clock is your enemy in the kitchen, or if you’ve watched a seasoned chef move effortlessly while you’re still fumbling with the garlic, this one’s for you. Let’s dive in.
The Philosophy Behind Kitchen Speed: Why Faster Doesn’t Mean Sloppier
Speed vs. Quality: The False Dichotomy
I’ll admit it: when I first started cooking professionally, I thought speed and quality were on opposite ends of a spectrum. You could have one, but not the other. If you wanted to cook fast, you had to cut corners, less seasoning, less attention to detail, maybe even a little less love. But after years of working in kitchens where both speed and precision were non-negotiable, I realized that mindset was completely wrong. Speed and quality aren’t enemies; they’re partners. The key is learning how to make them work together.
Think about it like this: a Formula 1 driver doesn’t win races by driving recklessly. They win because they’ve trained their reflexes, memorized the track, and optimized every movement. The same goes for cooking. The fastest cooks aren’t the ones who rush, they’re the ones who’ve eliminated wasted motion, anticipated problems before they happen, and built muscle memory so their hands know what to do before their brain even catches up. That’s the kind of speed that doesn’t sacrifice quality. That’s the kind of speed we’re after.
But here’s the thing: this kind of speed doesn’t happen overnight. It’s not about flipping a switch and suddenly being able to plate 50 dishes in an hour. It’s about training-consistent, deliberate practice that rewires how you think and move in the kitchen. And the best way to train? With recipes designed for speed. Not just any recipes, but ones that force you to think ahead, work efficiently, and build the habits that make speed second nature.
So, before we get into the specific recipes and drills, let’s talk about the mindset shift that has to happen first. Because if you don’t believe that speed and quality can coexist, no amount of practice will help.
The Three Pillars of Kitchen Speed
Over the years, I’ve boiled down kitchen speed to three core principles. These aren’t just theoretical, they’re the foundation of every fast, high-quality kitchen I’ve ever worked in. And they’re the same principles we’ll use to structure the training recipes later on. Here they are:
- 1. Mise en Place is Non-Negotiable: This is the French term for “everything in its place,” and it’s the backbone of kitchen speed. If you’re scrambling to chop onions while your sauce is burning, you’ve already lost. Mise en place isn’t just about having your ingredients prepped, it’s about organizing your workflow so that every step flows into the next without hesitation. We’ll dive deeper into how to optimize this later, but for now, just know this: the faster your mise en place, the faster your cooking.
- 2. Timing is Everything: Cooking is a dance, and every ingredient has its own rhythm. Some things take longer to cook; others need to be added at the last second. The difference between a good cook and a great one is the ability to anticipate timing. This means knowing when to start each component of a dish so that everything finishes at the same time. It’s not about cooking faster, it’s about cooking smarter.
- 3. Muscle Memory is Your Secret Weapon: The first time you make a dish, you’re thinking about every step. The tenth time? Your hands are moving before your brain even registers what’s happening. That’s muscle memory, and it’s the reason why professional cooks can work so quickly without sacrificing quality. The more you repeat a task, the more automatic it becomes. And the more automatic it becomes, the faster you can do it without thinking.
These three pillars, mise en place, timing, and muscle memory, are the foundation of kitchen speed. And the training recipes we’re about to cover? They’re designed to help you build all three. But before we get to the recipes, let’s talk about how to set yourself up for success.
Setting Up Your Kitchen for Speed: The Prep Work That Makes All the Difference
Why Your Kitchen Layout is the First Step to Speed
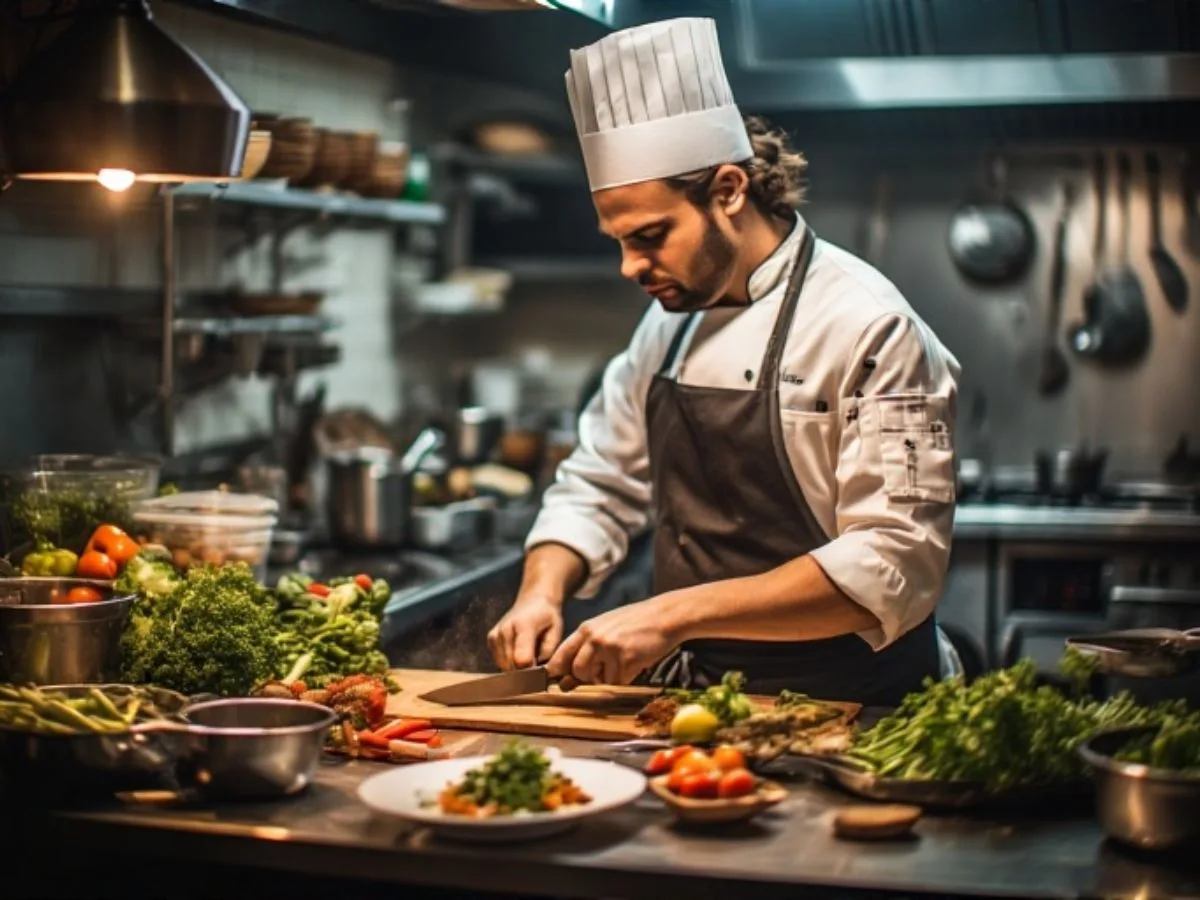
I’ll never forget the first time I walked into a professional kitchen. It was chaotic, sure, but it was also organized chaos. Every station had its own tools, every ingredient had its place, and there was a rhythm to the madness. Compare that to my home kitchen at the time, a cluttered mess where I was constantly digging through drawers for a whisk or realizing halfway through cooking that I’d run out of salt. No wonder I was slow.
Your kitchen layout is the first step to speed. If you’re constantly walking across the room to grab a cutting board or digging through a drawer for a peeler, you’re wasting time. And wasted time is the enemy of speed. So, before we even get into the recipes, let’s talk about how to set up your kitchen for maximum efficiency. This isn’t just for professional cooks, even if you’re cooking at home, a few small tweaks can make a huge difference.
Here’s the thing: the best kitchen layouts follow the work triangle principle. This is the idea that your three main work areas-the stove, the sink, and the refrigerator-should form a triangle, with no side longer than nine feet. This minimizes the distance you have to travel between tasks. But beyond that, here are a few other principles to keep in mind:
- Keep frequently used tools within arm’s reach: If you’re constantly reaching for your chef’s knife or tongs, they should be in a spot where you don’t have to move. For me, that means keeping my knives on a magnetic strip right above my cutting board and my tongs in a jar next to the stove.
- Organize by task, not by type: Instead of grouping all your baking tools together or all your spices in one cabinet, organize them by how you use them. For example, keep your sauté pan, spatula, and oil near the stove, and your mixing bowls, whisk, and measuring cups near your prep area. This way, you’re not constantly running back and forth.
- Use vertical space: Shelves, pegboards, and magnetic strips are your friends. The more you can keep off your countertops, the more space you’ll have to work. And the less cluttered your workspace, the faster you’ll be able to move.
- Prep your prep station: This is where mise en place happens. Your prep station should have everything you need, cutting boards, knives, bowls, trash bin, and a damp towel for wiping down surfaces. If you’re constantly walking away from your prep station, you’re doing it wrong.
Now, I know what you’re thinking: This all sounds great, but I don’t have a professional kitchen. I’m cooking in a tiny apartment with barely enough counter space for a cutting board. And I get it. Not everyone has the luxury of a spacious, well-designed kitchen. But even in a small space, you can make adjustments to improve your workflow. For example:
- If you don’t have a lot of counter space, use a rolling cart as a mobile prep station. You can wheel it out of the way when you’re not using it.
- If your tools are scattered, invest in a pegboard or wall-mounted organizer to keep everything within reach.
- If your fridge is far from your stove, keep a small tray of frequently used ingredients (like oil, salt, and spices) near your cooking area so you don’t have to run back and forth.
The point is, you don’t need a professional kitchen to cook quickly. You just need to optimize the space you have. And once you’ve done that, you’ll be amazed at how much faster you can work.
The Tools That Actually Make You Faster (And the Ones That Don’t)
Let’s talk about kitchen tools. Because here’s the thing: not all tools are created equal. Some are designed to make you faster; others are just gimmicks that slow you down. And if you’re serious about building kitchen speed, you need to know the difference.
First, let’s talk about the tools that do make you faster. These are the workhorses of the kitchen, the ones that professionals rely on day in and day out. Here are a few of my favorites:
- Chef’s knife: A good chef’s knife is the most important tool in your kitchen. It’s versatile, precise, and, when you know how to use it-fast. If you’re still using a dull or cheap knife, you’re wasting time. Invest in a high-quality chef’s knife (I like the 8-inch Wüsthof or Victorinox) and keep it sharp. A sharp knife is safer, more precise, and way faster than a dull one.
- Mandoline: If you’re slicing a lot of vegetables (think onions, potatoes, or carrots), a mandoline can save you minutes of knife work. Just be careful, mandolines are sharp, and it’s easy to cut yourself if you’re not paying attention. I like the Benriner mandoline because it’s affordable and adjustable.
- Microplane: Grating garlic, ginger, or citrus zest by hand is tedious. A microplane makes it instant. It’s one of those tools that seems small but makes a big difference in speed.
- Instant-read thermometer: If you’re cooking meat, an instant-read thermometer is a game-changer. No more guessing if your chicken is done, just stick the thermometer in, and you’ll know in seconds. This saves time and ensures you don’t overcook (or undercook) your food.
- Tongs: Tongs are like an extension of your hand. They’re great for flipping meat, tossing salads, and even plating food. I keep a pair of 12-inch tongs next to my stove at all times.
- Bench scraper: This is one of those tools that doesn’t seem essential until you try it. A bench scraper is great for scooping up chopped vegetables, dividing dough, and even cleaning your cutting board. It’s cheap, versatile, and saves time.
Now, let’s talk about the tools that don’t make you faster. These are the gadgets that seem like a good idea but end up slowing you down. Here are a few to avoid:
- Garlic press: I know, I know, this one’s controversial. But hear me out: a garlic press is slower than just mincing garlic with a knife. Plus, it’s harder to clean. If you’re serious about speed, learn to mince garlic quickly with a chef’s knife. It’s faster and more versatile.
- Avocado slicer: This is one of those single-use tools that seems convenient but is actually slower than just using a knife. Plus, it’s another thing to clean. Learn to slice an avocado with a knife, it’s faster and safer.
- Electric can opener: Unless you have mobility issues, a manual can opener is faster and more reliable. Electric can openers are bulky, prone to breaking, and take up valuable counter space.
- Herb scissors: These seem like a good idea, but they’re actually slower than just chopping herbs with a knife. Plus, they’re hard to clean. Stick with your chef’s knife, it’s faster and more versatile.
The bottom line? Invest in versatile, high-quality tools that you’ll use every day. And avoid the gimmicks that promise to make you faster but end up slowing you down. Because when it comes to kitchen speed, the right tools can make all the difference.
Training Recipes for Building Kitchen Speed: The Drills That Work
Recipe 1: The 10-Minute Mise en Place Challenge
Alright, let’s get into the training recipes. And we’re starting with the most important one: mise en place. If you want to cook faster, you need to master mise en place. It’s the foundation of kitchen speed, and it’s the first thing I teach new cooks. But here’s the thing: mise en place isn’t just about chopping vegetables and measuring ingredients. It’s about organizing your workflow so that you can cook without hesitation. And the best way to get faster at it? Practice.
That’s where the 10-Minute Mise en Place Challenge comes in. The goal is simple: prep all the ingredients for a dish in 10 minutes or less. No distractions, no excuses. Just you, your knife, and a timer. Here’s how it works:
- Choose a dish: Pick something with a variety of ingredients that need to be prepped. A stir-fry, a pasta dish, or a salad are all good options. For this example, let’s go with a chicken stir-fry.
- List your ingredients: Write down everything you’ll need to prep. For a chicken stir-fry, that might include:
- 1 lb chicken breast (sliced into thin strips)
- 1 bell pepper (julienned)
- 1 onion (thinly sliced)
- 2 carrots (julienned)
- 3 cloves garlic (minced)
- 1-inch piece of ginger (grated)
- 2 green onions (sliced on the bias)
- Sauce ingredients (soy sauce, rice vinegar, sesame oil, etc.)
- Set up your station: Clear your countertop, grab your cutting board, knives, bowls, and a trash bin. Make sure everything is within arm’s reach.
- Start the timer: Set a timer for 10 minutes and go. Your goal is to prep every single ingredient in that time. No stopping, no distractions. If you finish early, great! If not, that’s okay, just keep practicing.
- Cook the dish: Once your mise en place is done, cook the stir-fry as quickly as possible. The goal here isn’t just to prep fast, it’s to cook fast. Because the better your mise en place, the faster you can cook.
Now, I’ll be honest: the first time you try this, you might not finish in 10 minutes. That’s okay. The point isn’t to be perfect, it’s to build the habit of prepping efficiently. Over time, you’ll get faster. You’ll learn to chop onions without thinking, to slice chicken into even strips without measuring, and to organize your ingredients so that they’re ready to go when you need them.
And here’s the thing: this isn’t just a drill. It’s a mindset shift. When you start treating mise en place as a challenge, you’ll begin to see it as a game. And the more you play, the better you’ll get. So, grab a timer, pick a dish, and give it a try. Your future self will thank you.
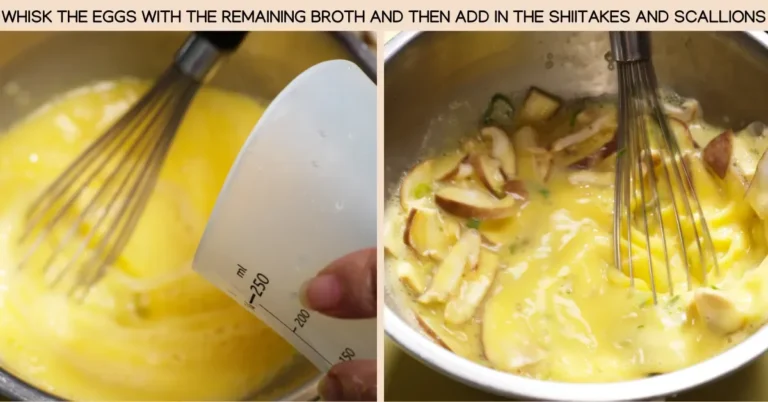
Recipe 2: The 5-Minute Egg Scramble Drill
Eggs are the ultimate test of kitchen speed. They’re simple, but they’re also fast. If you can’t cook eggs quickly, you can’t cook anything quickly. That’s why the 5-Minute Egg Scramble Drill is one of the best training recipes for building speed. It forces you to think ahead, move efficiently, and cook without hesitation. And the best part? You can do it with just a few ingredients.
Here’s how it works:
- Gather your ingredients: You’ll need:
- 3 eggs
- 1 tbsp butter
- Salt and pepper
- 1 tbsp milk or cream (optional)
- 1 tbsp chopped chives or green onions (optional)
- Set up your station: Place your nonstick skillet on the stove, grab a bowl, a whisk, and a spatula. Make sure everything is within arm’s reach.
- Start the timer: Set a timer for 5 minutes. Your goal is to have a perfectly cooked egg scramble on a plate in that time. No excuses, no distractions.
- Crack and whisk the eggs: Crack the eggs into the bowl, add the milk (if using), and whisk until the yolks and whites are fully combined. Season with salt and pepper.
- Heat the pan: Turn the heat to medium-high and add the butter. Let it melt and coat the pan.
- Cook the eggs: Pour the eggs into the pan and let them sit for a few seconds. Then, using your spatula, gently push the eggs from one side of the pan to the other, letting the uncooked eggs flow to the bottom. Keep doing this until the eggs are just set, about 2-3 minutes.
- Plate the eggs: Once the eggs are cooked, transfer them to a plate. Garnish with chives or green onions if you’re using them.
- Stop the timer: If you finish in under 5 minutes, congratulations! If not, keep practicing.
Now, I know what you’re thinking: This seems too simple. How is this going to make me faster? And that’s a fair question. But here’s the thing: the 5-Minute Egg Scramble Drill isn’t just about cooking eggs. It’s about building muscle memory, optimizing your movements, and learning to cook without hesitation. Every second counts in this drill, and the more you practice, the faster you’ll get.
Plus, eggs are a great way to practice heat control. If your pan is too hot, the eggs will burn. If it’s not hot enough, they’ll be rubbery. Learning to control the heat is a skill that translates to every dish you cook. So, don’t underestimate this drill. It’s one of the best ways to build kitchen speed.
Recipe 3: The One-Pan Pasta Timing Drill
Let’s talk about timing. Because here’s the thing: cooking isn’t just about moving fast, it’s about coordinating multiple tasks at once. And one of the best ways to practice timing is with the One-Pan Pasta Timing Drill. This drill forces you to think ahead, multitask, and cook everything so that it finishes at the same time. It’s a great way to build the kind of speed that doesn’t sacrifice quality.
Here’s how it works:
- Choose your ingredients: For this drill, we’ll use a simple one-pan pasta dish. You’ll need:
- 8 oz pasta (spaghetti, linguine, or fettuccine)
- 2 cups chicken or vegetable stock
- 1 cup cherry tomatoes (halved)
- 1 small onion (thinly sliced)
- 3 cloves garlic (minced)
- 1/2 cup heavy cream or half-and-half
- 1/2 cup grated Parmesan cheese
- 2 tbsp olive oil
- Salt and pepper to taste
- Fresh basil or parsley for garnish
- Set up your station: Place a large skillet or sauté pan on the stove, grab your cutting board, knife, and all your ingredients. Make sure everything is within arm’s reach.
- Start the timer: Set a timer for 20 minutes. Your goal is to have a perfectly cooked pasta dish on the table in that time. No overcooked pasta, no undercooked vegetables, just a well-timed, delicious meal.
- Cook the onions and garlic: Heat the olive oil in the pan over medium heat. Add the onions and cook until they’re soft and translucent, about 3-4 minutes. Then, add the garlic and cook for another 30 seconds, until fragrant.
- Add the tomatoes and stock: Add the cherry tomatoes to the pan and cook for 2-3 minutes, until they start to soften. Then, pour in the stock and bring it to a simmer.
- Add the pasta: Break the pasta in half (so it fits in the pan) and add it to the simmering stock. Stir to make sure the pasta is fully submerged.
- Cook the pasta: Let the pasta cook for about 8-10 minutes, stirring occasionally, until it’s al dente and most of the liquid has been absorbed. If the pasta starts to dry out, add a little more stock.
- Add the cream and cheese: Once the pasta is cooked, reduce the heat to low and stir in the cream and Parmesan cheese. Season with salt and pepper to taste.
- Garnish and serve: Transfer the pasta to a plate, garnish with fresh basil or parsley, and serve.
- Stop the timer: If you finish in under 20 minutes, great! If not, keep practicing.
Now, here’s why this drill is so effective: it forces you to multitask. You’re cooking the onions and garlic while the stock is heating up. You’re adding the tomatoes while the onions are softening. You’re stirring the pasta while the cream is melting. Every step flows into the next, and if you’re not paying attention, something will overcook or undercook. This is the kind of timing that separates good cooks from great ones.
And the best part? This isn’t just a drill, it’s a delicious meal. So, you’re not just building speed; you’re also practicing a dish that you can make for dinner. Win-win.
Recipe 4: The 15-Minute Stir-Fry Speed Test
Stir-fries are the ultimate test of kitchen speed. They’re fast, they’re versatile, and they require perfect timing. If you can master a stir-fry, you can master anything. That’s why the 15-Minute Stir-Fry Speed Test is one of the best training recipes for building speed. It forces you to prep quickly, cook efficiently, and plate like a pro. And the best part? It’s a great way to practice heat control and multitasking.
Here’s how it works:
- Choose your ingredients: For this drill, we’ll use a classic chicken stir-fry. You’ll need:
- 1 lb chicken breast (sliced into thin strips)
- 1 bell pepper (julienned)
- 1 onion (thinly sliced)
- 2 carrots (julienned)
- 3 cloves garlic (minced)
- 1-inch piece of ginger (grated)
- 2 green onions (sliced on the bias)
- 2 tbsp soy sauce
- 1 tbsp rice vinegar
- 1 tbsp sesame oil
- 1 tbsp cornstarch (mixed with 1 tbsp water)
- 2 tbsp vegetable oil
- Salt and pepper to taste
- Set up your station: Place a large skillet or wok on the stove, grab your cutting board, knife, and all your ingredients. Make sure everything is within arm’s reach.
- Start the timer: Set a timer for 15 minutes. Your goal is to have a perfectly cooked stir-fry on the table in that time. No overcooked chicken, no undercooked vegetables, just a well-timed, delicious meal.
- Prep the sauce: In a small bowl, mix the soy sauce, rice vinegar, sesame oil, and cornstarch slurry. Set it aside.
- Cook the chicken: Heat 1 tbsp of vegetable oil in the pan over high heat. Add the chicken and cook until it’s browned and cooked through, about 4-5 minutes. Remove the chicken from the pan and set it aside.
- Cook the vegetables: Add the remaining 1 tbsp of vegetable oil to the pan. Add the onions, bell peppers, and carrots. Cook for 3-4 minutes, until the vegetables are tender-crisp. Add the garlic and ginger and cook for another 30 seconds, until fragrant.
- Combine everything: Add the chicken back to the pan, pour in the sauce, and stir to coat everything. Cook for another 1-2 minutes, until the sauce has thickened.
- Garnish and serve: Transfer the stir-fry to a plate, garnish with green onions, and serve.
- Stop the timer: If you finish in under 15 minutes, congratulations! If not, keep practicing.
Now, here’s why this drill is so effective: it forces you to work under pressure. You’re cooking the chicken while the vegetables are prepping. You’re adding the sauce while the vegetables are cooking. Every step has to be timed perfectly, or something will overcook. This is the kind of speed that doesn’t sacrifice quality, it enhances it.
And the best part? Stir-fries are endlessly customizable. Once you’ve mastered this basic recipe, you can swap in different proteins, vegetables, and sauces. The possibilities are endless.
Advanced Techniques for Building Kitchen Speed
The Art of Parallel Processing: How to Cook Multiple Dishes at Once
Let’s talk about parallel processing. This is the art of cooking multiple dishes at the same time without sacrificing quality. It’s what separates home cooks from professionals, and it’s one of the most important skills you can develop if you want to build kitchen speed. But here’s the thing: parallel processing isn’t just about multitasking. It’s about planning, timing, and organization. And if you don’t have those three things dialed in, you’ll end up with a mess.
So, how do you master parallel processing? It starts with menu planning. Before you even turn on the stove, you need to think about which dishes can be cooked simultaneously and which ones need to be cooked sequentially. For example, if you’re making a steak and mashed potatoes, you can cook the steak while the potatoes are boiling. But if you’re making a stir-fry and fried rice, you’ll need to cook them one after the other, because they both require the same pan.
Here’s a simple exercise to practice parallel processing:
- Choose two dishes: Pick two dishes that can be cooked at the same time. For this example, let’s go with grilled chicken and roasted vegetables.
- Plan your timing: Write down the cooking time for each dish. Grilled chicken takes about 6-8 minutes per side, and roasted vegetables take about 20-25 minutes at 400°F (200°C).
- Prep your ingredients: Prep all your ingredients before you start cooking. For the chicken, that means seasoning it with salt, pepper, and any other spices. For the vegetables, that means chopping them into even pieces and tossing them with oil, salt, and pepper.
- Start cooking: Preheat your oven to 400°F (200°C) and start roasting the vegetables. While they’re cooking, heat your grill or grill pan and start cooking the chicken. Flip the chicken halfway through cooking, and check the vegetables to make sure they’re not burning.
- Plate and serve: Once the chicken is cooked and the vegetables are tender, plate them together and serve.
Now, I’ll be honest: the first time you try this, it might feel overwhelming. You’re juggling multiple tasks at once, and it’s easy to get distracted. But the more you practice, the easier it gets. And the better you get at parallel processing, the faster you’ll be able to cook.
Here are a few tips to make parallel processing easier:
- Use a timer: Set a timer for each dish so you don’t forget to check on them. This is especially important for dishes that take longer to cook, like roasted vegetables or braised meats.
- Clean as you go: Parallel processing can get messy, so it’s important to clean as you go. Wipe down your counters, wash your cutting boards, and put away ingredients as soon as you’re done with them. This will keep your workspace clear and make it easier to focus.
- Prioritize tasks: Not all tasks are created equal. Some things, like chopping vegetables, can be done ahead of time. Others, like searing meat, need to be done at the last minute. Prioritize your tasks so that you’re always working on the most important thing.
- Stay organized: Keep your ingredients and tools organized so that you don’t have to search for anything. This means labeling your bowls, keeping your knives sharp, and making sure everything is within arm’s reach.
Parallel processing is a skill that takes time to master, but it’s one of the best ways to build kitchen speed. And the more you practice, the faster and more efficient you’ll become.
How to Train Your Brain for Faster Decision-Making
Speed in the kitchen isn’t just about your hands, it’s about your brain. The faster you can make decisions, the faster you can cook. And the good news? Decision-making is a skill that can be trained. Just like you can train your hands to chop faster, you can train your brain to think faster. Here’s how:
First, let’s talk about decision fatigue. This is the idea that the more decisions you make, the harder it becomes to make good ones. And in the kitchen, decision fatigue is a real problem. If you’re constantly second-guessing yourself-Should I add more salt? Is this cooked enough? Should I flip the steak now or later?-you’re wasting time. The key is to reduce the number of decisions you have to make.
One way to do this is by standardizing your recipes. This means using the same techniques, ingredients, and measurements every time you cook a dish. For example, if you always use 1 tsp of salt per pound of meat, you don’t have to think about how much salt to add, you just do it. This might seem boring, but it’s a great way to reduce decision fatigue and speed up your cooking.
Another way to train your brain for faster decision-making is by practicing under pressure. This is where the training recipes we covered earlier come in. The more you practice cooking quickly, the more automatic your decisions will become. And the more automatic your decisions, the faster you’ll be able to cook.
Here’s a simple exercise to practice faster decision-making:
- Choose a simple dish: Pick something with a few ingredients and a straightforward technique. For this example, let’s go with scrambled eggs.
- Set a timer: Set a timer for 5 minutes. Your goal is to have a perfectly cooked egg scramble on a plate in that time.
- Cook without thinking: The key here is to cook without overthinking. Don’t second-guess yourself, just trust your instincts and cook. If you’re used to adding a little milk to your eggs, do it. If you like your eggs a little runny, cook them that way. The point isn’t to be perfect, it’s to make decisions quickly.
- Reflect on your decisions: Once the timer goes off, take a minute to reflect on the decisions you made. Did you hesitate at any point? Did you second-guess yourself? If so, think about why. The more you reflect on your decisions, the faster you’ll get at making them.
Now, I know what you’re thinking: This seems too simple. How is this going to make me faster? And that’s a fair question. But here’s the thing: the more you practice making decisions quickly, the more automatic they’ll become. And the more automatic your decisions, the faster you’ll be able to cook.
Here are a few other tips to train your brain for faster decision-making:
- Limit your options: The more options you have, the harder it is to make a decision. So, limit your options. For example, if you’re trying to decide what to cook for dinner, pick two or three dishes and choose between them. Don’t spend 20 minutes scrolling through recipes.
- Use a checklist: Checklists are a great way to reduce decision fatigue. If you have a checklist for each dish you cook, you don’t have to think about what comes next, you just follow the list. This is especially helpful for complex dishes with multiple steps.
- Practice visualization: Before you start cooking, take a minute to visualize the process. Think about each step, from chopping the vegetables to plating the dish. The more you visualize, the more automatic your decisions will become.
- Embrace mistakes: The fear of making mistakes can slow you down. So, embrace them. If you burn the garlic or overcook the pasta, it’s not the end of the world. Learn from your mistakes and move on. The more you embrace mistakes, the faster you’ll be able to cook.
Training your brain for faster decision-making is a skill that takes time to develop, but it’s one of the best ways to build kitchen speed. And the more you practice, the faster and more efficient you’ll become.
Common Mistakes That Slow You Down (And How to Avoid Them)
Why Overcomplicating Recipes Kills Your Speed
Let’s talk about one of the biggest mistakes I see cooks make when they’re trying to build speed: overcomplicating recipes. It’s a trap that’s easy to fall into, especially if you’re trying to impress someone or cook something fancy. But here’s the thing: complicated recipes are the enemy of speed. The more steps a recipe has, the longer it takes to cook. And the longer it takes to cook, the more opportunities there are for things to go wrong.
I’ll never forget the first time I tried to make a beef Wellington. It was a disaster. The recipe had 15 steps, and by the time I was done, the beef was overcooked, the pastry was soggy, and I was exhausted. And the worst part? It took me three hours to make something that should have taken 45 minutes. That’s when I realized: simplicity is the key to speed.
So, how do you avoid overcomplicating recipes? It starts with choosing the right dishes. If you’re trying to build speed, stick to recipes with a few ingredients and straightforward techniques. For example:
- Stir-fries: They’re fast, they’re versatile, and they’re a great way to practice timing.
- One-pan pasta dishes: They’re easy to make, and they force you to think ahead.
- Grilled meats and vegetables: They’re simple, they’re delicious, and they’re a great way to practice heat control.
- Salads: They’re fast, they’re healthy, and they’re a great way to practice knife skills.
Another way to avoid overcomplicating recipes is by simplifying the ones you already know. For example, if you love making lasagna but it takes you two hours, think about how you can simplify it. Can you use no-boil noodles? Can you make the sauce ahead of time? Can you assemble it the night before and bake it the next day? The more you simplify your recipes, the faster you’ll be able to cook.
Here are a few other tips to avoid overcomplicating recipes:
- Stick to a few techniques: The more techniques you try to master at once, the slower you’ll be. So, stick to a few techniques and perfect them. For example, if you’re trying to build speed, focus on sautéing, roasting, and grilling. Once you’ve mastered those, you can move on to more complex techniques.
- Use versatile ingredients: The more versatile your ingredients, the fewer you’ll need to keep on hand. For example, onions, garlic, and olive oil are used in countless dishes. So, stock up on them and learn how to use them in different ways.
- Plan ahead: The more you plan ahead, the less you’ll have to think about while you’re cooking. So, take a few minutes before you start cooking to think about what you’re going to make, what ingredients you’ll need, and what steps you’ll take. The more you plan ahead, the faster you’ll be able to cook.
- Embrace imperfection: The fear of imperfection can slow you down. So, embrace it. If your vegetables aren’t perfectly julienned or your sauce isn’t perfectly smooth, it’s not the end of the world. The more you embrace imperfection, the faster you’ll be able to cook.
Overcomplicating recipes is one of the biggest mistakes cooks make when they’re trying to build speed. But the good news? It’s also one of the easiest to fix. Stick to simple recipes, simplify the ones you already know, and focus on a few techniques at a time. The more you do this, the faster you’ll be able to cook.
The Danger of Skipping Steps (Even When You’re in a Rush)
Let’s talk about another mistake that slows cooks down: skipping steps. It’s a trap that’s easy to fall into, especially when you’re in a rush. You’re cooking dinner, the kids are hungry, and you just want to get food on the table. So, you skip a step, maybe you don’t let the pan heat up enough, or you don’t season the meat properly. And what happens? The food doesn’t turn out right, and you end up wasting time fixing your mistakes.
I’ll never forget the first time I skipped a step in a professional kitchen. It was a busy Saturday night, and I was working the line. The chef had just handed me a ticket for a steak, and I was in a rush. So, I skipped letting the pan heat up enough before adding the steak. The result? The steak didn’t sear properly, and it took twice as long to cook. The chef wasn’t happy, and I learned a valuable lesson: skipping steps doesn’t save time, it wastes it.
So, how do you avoid skipping steps? It starts with respecting the process. Every step in a recipe is there for a reason. If a recipe says to let the pan heat up for 5 minutes, it’s because the pan needs to be hot enough to sear the meat properly. If a recipe says to season the meat 30 minutes before cooking, it’s because the salt needs time to penetrate the meat. The more you respect the process, the faster you’ll be able to cook.
Another way to avoid skipping steps is by using a checklist. Checklists are a great way to make sure you don’t forget anything. If you have a checklist for each dish you cook, you don’t have to think about what comes next, you just follow the list. This is especially helpful for complex dishes with multiple steps.
Here are a few other tips to avoid skipping steps:
- Read the recipe all the way through: Before you start cooking, read the recipe all the way through. This will help you understand what steps are coming up and why they’re important.
- Prep everything before you start cooking: Mise en place isn’t just about chopping vegetables, it’s about making sure you have everything you need before you start cooking. The more you prep ahead of time, the less likely you are to skip a step.
- Use a timer: Timers are a great way to make sure you don’t forget anything. If a recipe says to let something cook for 10 minutes, set a timer. This will help you stay on track and avoid skipping steps.
- Slow down: The faster you try to cook, the more likely you are to skip steps. So, slow down. Take your time, and focus on each step. The more you slow down, the faster you’ll be able to cook in the long run.
Skipping steps is one of the biggest mistakes cooks make when they’re trying to build speed. But the good news? It’s also one of the easiest to fix. Respect the process, use a checklist, and slow down. The more you do this, the faster you’ll be able to cook.
Putting It All Together: A Week-Long Speed Training Plan
Alright, let’s put everything we’ve talked about into action. If you’ve made it this far, you’ve learned about the philosophy behind kitchen speed, how to set up your kitchen for efficiency, the training recipes that build speed, and the common mistakes that slow you down. Now, it’s time to put it all together with a week-long speed training plan.
This plan is designed to help you build speed without sacrificing quality. It’s not about rushing, it’s about working smarter. Each day, you’ll focus on a different aspect of kitchen speed, from mise en place to timing to muscle memory. And by the end of the week, you’ll be faster, more efficient, and more confident in the kitchen.
Here’s how it works:
Day 1: Mise en Place Mastery
Today, you’re going to focus on mise en place. The goal is to prep all your ingredients for a dish in 10 minutes or less. Here’s what you’ll do:
- Choose a dish: Pick something with a variety of ingredients that need to be prepped. A stir-fry, a pasta dish, or a salad are all good options. For this example, let’s go with a chicken stir-fry.
- Set up your station: Clear your countertop, grab your cutting board, knives, bowls, and a trash bin. Make sure everything is within arm’s reach.
- Start the timer: Set a timer for 10 minutes and go. Your goal is to prep every single ingredient in that time. No stopping, no distractions.
- Cook the dish: Once your mise en place is done, cook the stir-fry as quickly as possible. The goal here isn’t just to prep fast, it’s to cook fast.
Repeat this exercise with a different dish each day. The more you practice, the faster you’ll get.
Day 2: The 5-Minute Egg Scramble Drill
Today, you’re going to focus on heat control and muscle memory with the 5-Minute Egg Scramble Drill. Here’s what you’ll do:
- Gather your ingredients: You’ll need 3 eggs, 1 tbsp butter, salt and pepper, and 1 tbsp milk or cream (optional).
- Set up your station: Place your nonstick skillet on the stove, grab a bowl, a whisk, and a spatula. Make sure everything is within arm’s reach.
- Start the timer: Set a timer for 5 minutes. Your goal is to have a perfectly cooked egg scramble on a plate in that time.
- Cook the eggs: Crack the eggs into the bowl, add the milk (if using), and whisk until the yolks and whites are fully combined. Season with salt and pepper. Heat the butter in the pan over medium-high heat, pour in the eggs, and cook, stirring constantly, until they’re just set.
- Plate the eggs: Once the eggs are cooked, transfer them to a plate and stop the timer.
Repeat this drill three times today. The more you practice, the faster you’ll get.
Day 3: The One-Pan Pasta Timing Drill
Today, you’re going to focus on timing with the One-Pan Pasta Timing Drill. Here’s what you’ll do:
- Choose your ingredients: For this drill, we’ll use a simple one-pan pasta dish. You’ll need 8 oz pasta, 2 cups chicken or vegetable stock, 1 cup cherry tomatoes, 1 small onion, 3 cloves garlic, 1/2 cup heavy cream, 1/2 cup grated Parmesan cheese, 2 tbsp olive oil, salt and pepper, and fresh basil or parsley for garnish.
- Set up your station: Place a large skillet or sauté pan on the stove, grab your cutting board, knife, and all your ingredients. Make sure everything is within arm’s reach.
- Start the timer: Set a timer for 20 minutes. Your goal is to have a perfectly cooked pasta dish on the table in that time.
- Cook the dish: Follow the steps we covered earlier, making sure to time each step perfectly. The goal is to have everything finish at the same time.
Repeat this drill with a different pasta dish tomorrow.
Day 4: The 15-Minute Stir-Fry Speed Test
Today, you’re going to focus on multitasking with the 15-Minute Stir-Fry Speed Test. Here’s what you’ll do:
- Choose your ingredients: For this drill, we’ll use a classic chicken stir-fry. You’ll need 1 lb chicken breast, 1 bell pepper, 1 onion, 2 carrots, 3 cloves garlic, 1-inch piece of ginger, 2 green onions, 2 tbsp soy sauce, 1 tbsp rice vinegar, 1 tbsp sesame oil, 1 tbsp cornstarch (mixed with 1 tbsp water), 2 tbsp vegetable oil, and salt and pepper.
- Set up your station: Place a large skillet or wok on the stove, grab your cutting board, knife, and all your ingredients. Make sure everything is within arm’s reach.
- Start the timer: Set a timer for 15 minutes. Your goal is to have a perfectly cooked stir-fry on the table in that time.
- Cook the dish: Follow the steps we covered earlier, making sure to time each step perfectly. The goal is to have everything finish at the same time.
Repeat this drill with a different stir-fry tomorrow.
Day 5: Parallel Processing Practice
Today, you’re going to focus on parallel processing. Here’s what you’ll do:
- Choose two dishes: Pick two dishes that can be cooked at the same time. For this example, let’s go with grilled chicken and roasted vegetables.
- Plan your timing: Write down the cooking time for each dish. Grilled chicken takes about 6-8 minutes per side, and roasted vegetables take about 20-25 minutes at 400°F (200°C).
- Prep your ingredients: Prep all your ingredients before you start cooking.
- Start cooking: Preheat your oven to 400°F (200°C) and start roasting the vegetables. While they’re cooking, heat your grill or grill pan and start cooking the chicken. Flip the chicken halfway through cooking, and check the vegetables to make sure they’re not burning.
- Plate and serve: Once the chicken is cooked and the vegetables are tender, plate them together and serve.
Repeat this exercise with different dishes each day. The more you practice, the better you’ll get at parallel processing.
Day 6: Decision-Making Drills
Today, you’re going to focus on decision-making. Here’s what you’ll do:
- Choose a simple dish: Pick something with a few ingredients and a straightforward technique. For this example, let’s go with scrambled eggs.
- Set a timer: Set a timer for 5 minutes. Your goal is to have a perfectly cooked egg scramble on a plate in that time.
- Cook without thinking: The key here is to cook without overthinking. Don’t second-guess yourself, just trust your instincts and cook.
- Reflect on your decisions: Once the timer goes off, take a minute to reflect on the decisions you made. Did you hesitate at any point? Did you second-guess yourself? If so, think about why.
Repeat this drill with different dishes each day. The more you practice, the faster you’ll get at making decisions.
Day 7: Putting It All Together
Today, you’re going to put everything you’ve learned into practice. Here’s what you’ll do:
- Choose a complex dish: Pick something with multiple components that need to be cooked at the same time. For this example, let’s go with chicken parmesan with a side salad and garlic bread.
- Plan your timing: Write down the cooking time for each component. Chicken parmesan takes about 20 minutes, the salad takes about 5 minutes, and the garlic bread takes about 10 minutes.
- Prep your ingredients: Prep all your ingredients before you start cooking. This includes breading the chicken, chopping the vegetables for the salad, and mixing the garlic butter for the bread.
- Start cooking: Start with the component that takes the longest to cook, in this case, the chicken parmesan. While it’s cooking, prepare the salad and toast the garlic bread.
- Plate and serve: Once everything is cooked, plate the chicken parmesan, salad, and garlic bread together and serve.
Congratulations! You’ve just completed a week-long speed training plan. The more you practice these drills, the faster and more efficient you’ll become in the kitchen. And the best part? You’ll be able to cook delicious, high-quality meals in a fraction of the time.
Final Thoughts: Speed is a Skill, Not a Talent
Let me leave you with this: speed in the kitchen isn’t something you’re born with. It’s a skill, and like any skill, it can be learned. The best chefs in the world didn’t start out fast, they trained to be fast. They practiced mise en place until it was second nature. They drilled timing until it was automatic. They built muscle memory until their hands knew what to do before their brain even caught up.
And the good news? You can do the same thing. You don’t need a professional kitchen or years of experience. You just need to practice. Start with the training recipes in this article. Focus on one skill at a time. And most importantly, don’t rush. Speed isn’t about moving faster, it’s about working smarter. It’s about eliminating wasted motion, anticipating problems before they happen, and building the habits that make speed second nature.
So, what’s next? Pick one of the training recipes in this article and give it a try. Start with the 10-Minute Mise en Place Challenge or the 5-Minute Egg Scramble Drill. And don’t worry if you don’t get it right the first time. The more you practice, the faster you’ll get. And the faster you get, the more confident you’ll become in the kitchen.
Because here’s the thing: cooking fast isn’t about impressing anyone. It’s about enjoying the process. It’s about being able to cook a delicious meal for your family without spending hours in the kitchen. It’s about feeling confident and capable, no matter what’s on the menu. And that’s a skill worth building.
FAQ
Q: How long does it take to build kitchen speed?
A: Building kitchen speed is a gradual process, and the timeline varies depending on your starting point and how much you practice. If you’re a complete beginner, you might see noticeable improvements in a few weeks with consistent practice. For more experienced cooks, it could take a few months to refine your skills and build muscle memory. The key is to focus on one skill at a time, like mise en place or timing, and practice it until it becomes second nature. Speed isn’t something you can rush, but with deliberate practice, you’ll get there.
Q: Can I build kitchen speed without sacrificing quality?
A: Absolutely! In fact, the best kitchen speed is built without sacrificing quality. The goal isn’t to rush through cooking, it’s to work more efficiently. This means focusing on mise en place (having everything prepped and ready to go), timing (cooking each component so it finishes at the same time), and muscle memory (training your hands to move automatically). When you master these skills, you’ll be able to cook faster and better. Quality and speed aren’t mutually exclusive, they’re two sides of the same coin.
Q: What are the best tools for building kitchen speed?
A: The best tools for building kitchen speed are the ones that help you work more efficiently. Here are a few must-haves:
- Chef’s knife: A sharp, high-quality chef’s knife is the most important tool in your kitchen. It’s versatile, precise, and, when you know how to use it-fast. Invest in a good one and keep it sharp.
- Mandoline: If you’re slicing a lot of vegetables, a mandoline can save you minutes of knife work. Just be careful, mandolines are sharp!
- Instant-read thermometer: This is a game-changer for cooking meat. No more guessing if your chicken is done, just stick the thermometer in, and you’ll know in seconds.
- Tongs: Tongs are like an extension of your hand. They’re great for flipping meat, tossing salads, and even plating food. Keep a pair next to your stove at all times.
- Bench scraper: This is one of those tools that doesn’t seem essential until you try it. A bench scraper is great for scooping up chopped vegetables, dividing dough, and even cleaning your cutting board.
Avoid gimmicky tools like garlic presses or avocado slicers, they’re often slower than just using a knife. Focus on versatile, high-quality tools that you’ll use every day.
Q: How do I stay motivated when training for kitchen speed?
A: Staying motivated can be tough, especially when you’re not seeing immediate results. Here are a few tips to keep you on track:
- Set small, achievable goals: Instead of focusing on the big picture, break your training into small, manageable goals. For example, aim to prep your mise en place in 10 minutes or less, or cook a stir-fry in under 15 minutes. Celebrate these small wins, they add up!
- Track your progress: Keep a journal or use an app to track your progress. Write down how long it takes you to complete each training recipe, and note any improvements. Seeing your progress over time can be a huge motivator.
- Make it fun: Turn your training into a game. Challenge yourself to beat your personal best, or invite a friend to join you in a speed cooking challenge. The more fun you have, the more motivated you’ll be to keep going.
- Focus on the why: Remind yourself why you’re doing this. Maybe you want to cook dinner faster for your family, or maybe you’re training for a job in a professional kitchen. Whatever your reason, keep it in mind when you’re feeling unmotivated.
- Embrace mistakes: Mistakes are part of the learning process. If you burn the garlic or overcook the pasta, don’t beat yourself up. Learn from your mistakes and move on. The more you embrace them, the faster you’ll improve.
Building kitchen speed takes time and effort, but it’s worth it. Stay patient, stay consistent, and most importantly, have fun with it. You’ve got this!
@article{training-recipes-for-building-kitchen-speed-without-sacrificing-quality-a-chefs-guide-to-efficiency,
    title   = {Training Recipes for Building Kitchen Speed Without Sacrificing Quality: A Chef’s Guide to Efficiency},
    author  = {Chef's icon},
    year    = {2026},
    journal = {Chef's Icon},
    url     = {https://chefsicon.com/training-recipes-for-building-kitchen-speed-without-sacrificing-quality/}
}