The Best Fluffy Pancakes recipe you will fall in love with. Full of tips and tricks to help you make the best pancakes.
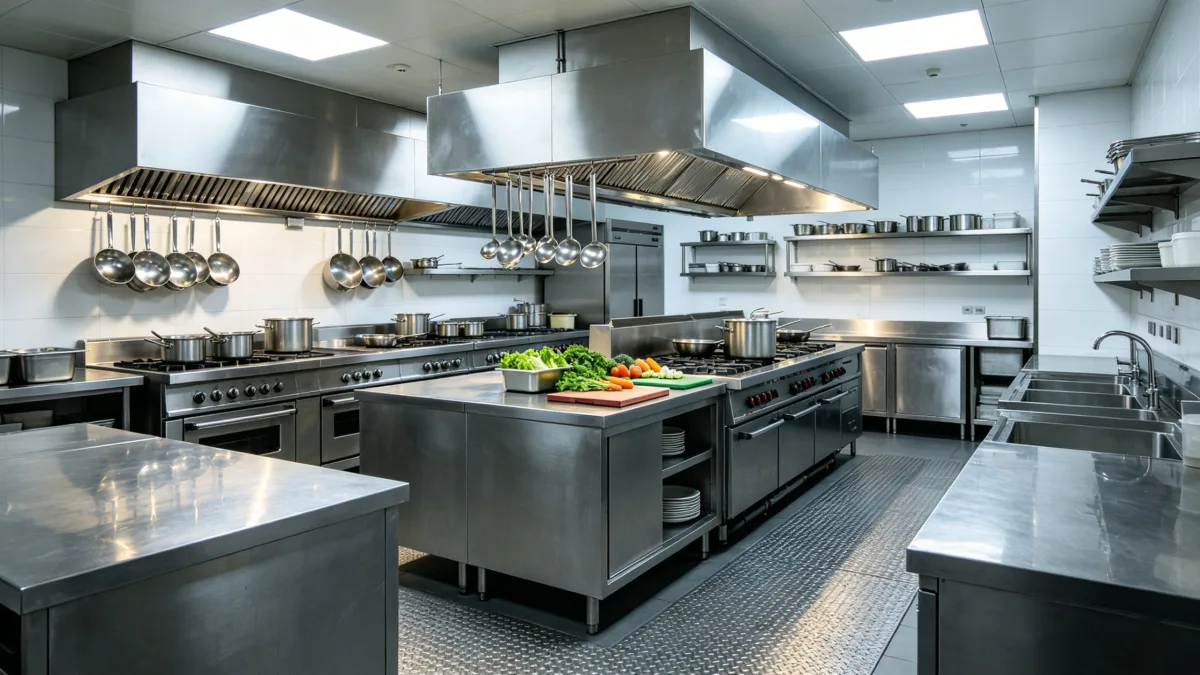
So, you’re opening a restaurant. Congratulations! You’ve probably spent months, maybe even years, dreaming about the menu, the vibe, the name, the first review that’ll make your heart swell with pride. But let’s be real: none of that matters if your kitchen isn’t equipped to handle the chaos, the orders, the dinner rushes, or the 2 AM “I just need a grilled cheese” crowd. I’ve been there, standing in the middle of a half-empty kitchen, staring at a list of equipment longer than my arm, wondering if I’m about to make a $50,000 mistake. And that’s before I even think about the commercial kitchen tools that’ll actually make or break my operation.
I remember when I helped a friend set up his Nashville hot chicken joint back in 2023. We thought we had it all figured out, until we realized we’d forgotten something as basic as a commercial-grade can opener. Turns out, the one from Target just doesn’t cut it when you’re opening 50 cans of tomatoes a day. That’s the thing about restaurant startups: the devil’s in the details, and those details are often hiding in the tools you didn’t even know you needed. So, let’s dive in. I’m going to walk you through the essential commercial kitchen tools every restaurant startup needs, from the obvious to the obscure, the expensive to the surprisingly affordable. And yeah, I’ll throw in some hard-earned wisdom along the way, because if there’s one thing I’ve learned, it’s that the right tools don’t just make your job easier; they make your food better.
By the end of this, you’ll have a clear roadmap of what to buy, what to prioritize, and, just as importantly, what to skip. Because let’s face it: you’re not made of money, and neither is your restaurant. Every dollar counts, and every tool should earn its keep. So, grab a coffee (or a whiskey, no judgment), and let’s get into it.
The Foundation: Heavy-Duty Cooking Equipment
1. Commercial Ranges: The Heart of Your Kitchen
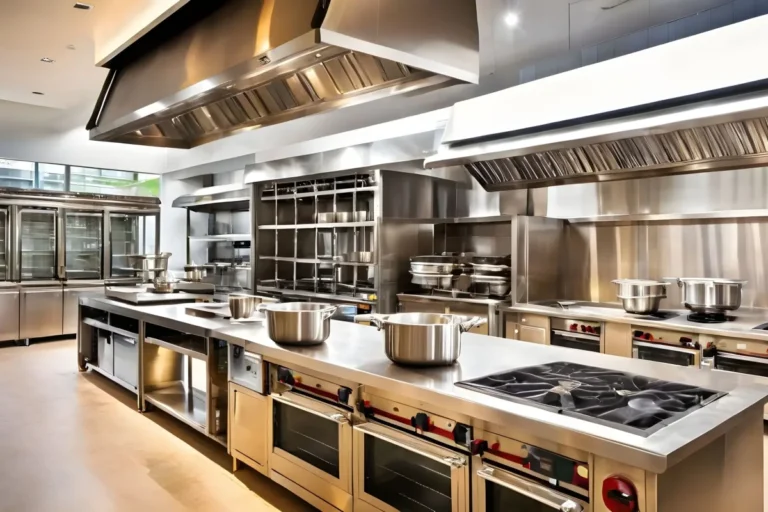
If your kitchen is a body, the commercial range is the heart. It’s where the magic happens, or where everything falls apart if you cheap out. I’ve seen too many startups try to get by with residential-grade ranges, and it’s a disaster waiting to happen. Commercial ranges are built to handle the abuse of a busy kitchen: high BTUs, durable burners, and construction that can withstand the wear and tear of, say, a line cook slamming a pan down at 1 AM after their third double shift in a row.
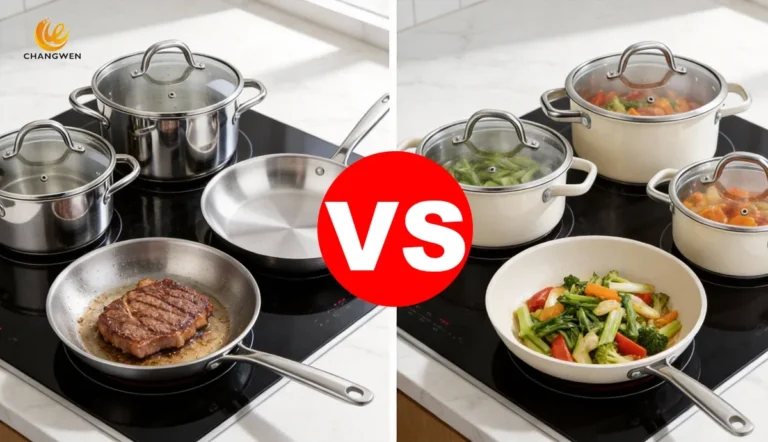
Now, I’m not saying you need to drop $20,000 on a top-of-the-line Vulcan range right out of the gate. But you do need something that’s NSF-certified and designed for heavy use. Gas or electric? That’s a debate for another day, but gas is still the gold standard for most chefs because of the instant heat control. If you’re going electric, make sure it’s induction, it’s more energy-efficient and safer, but it requires magnetic cookware, so keep that in mind. And for the love of all things holy, get one with a griddle top if you’re serving breakfast or burgers. Trust me, you’ll thank me later when you’re cranking out 200 pancakes on a Saturday morning.
Is this the best approach? Let’s consider: maybe you’re thinking, “I’ll just start with a residential range and upgrade later.” Don’t. The moment you open your doors, you’re committed. There’s no “later” in the restaurant business, there’s only now, and now is when you need equipment that won’t quit on you. So, bite the bullet and invest in a commercial-grade range. Your future self will high-five you.
2. Convection Ovens: The Unsung Heroes
I’ll admit it: I used to think convection ovens were overrated. Then I worked a shift at a bakery where we had to bake 300 croissants in three hours. Spoiler alert: we didn’t make it. The oven just couldn’t keep up, and by the time we pulled the last batch out, they looked more like hockey pucks than pastries. That’s when I learned the hard way that a commercial convection oven isn’t just a nice-to-have, it’s a necessity if you’re doing any kind of baking, roasting, or even just reheating large quantities of food.
Here’s the thing about convection ovens: they use a fan to circulate hot air, which means your food cooks faster and more evenly. No more rotating trays halfway through the bake. No more hot spots that burn one side of your lasagna while the other side stays cold. And because they cook faster, you can turn over more product in less time, which is a game-changer during a dinner rush. Look for one with adjustable fan speeds and a steam injection system if you’re doing bread or pastries. And make sure it’s big enough, nothing worse than realizing your oven can’t fit a full sheet pan when you’re in the middle of service.
I’m torn between recommending a standalone convection oven or a combi oven, which combines convection, steam, and sometimes even grilling functions. Combi ovens are versatile as hell, but they’re also expensive and can be overkill if you’re not doing a ton of different cooking methods. Maybe I should clarify: if you’re a bakery or a restaurant with a heavy baking component, go for a high-quality convection oven. If you’re a full-service restaurant with a diverse menu, consider a combi. Either way, don’t skimp. A good oven will last you 15 years or more, so it’s worth the investment.
3. Fryers: Because Everything Tastes Better Fried
Let’s talk about commercial fryers. I know, I know, fried food isn’t exactly “healthy,” but let’s be real: it’s delicious, and your customers are going to order it. Whether it’s french fries, chicken wings, or those insane deep-fried Oreos that somehow became a thing, you need a fryer that can handle the volume without turning your kitchen into a grease fire waiting to happen.
First things first: size matters. A 35-pound fryer might seem like overkill for your tiny burger joint, but trust me, you’ll regret it when you’re trying to keep up with orders and your fryer can’t recover fast enough between batches. Look for a fryer with a fast recovery time-that’s the time it takes for the oil to heat back up to temperature after you drop in a batch of frozen fries. The faster the recovery, the more consistent your food will be, and the more product you can push out during peak hours.
Now, gas or electric? Gas fryers tend to heat up faster and are more energy-efficient, but electric fryers are easier to clean and maintain. If you’re in a small space, you might also consider a countertop fryer, but be warned: they’re not as powerful as floor models, and they can be a pain to keep clean. And speaking of clean, make sure your fryer has a built-in filtration system. Changing the oil is a pain in the ass, but it’s a necessary evil if you want your food to taste good and not like last week’s leftovers. A filtration system will extend the life of your oil and save you money in the long run.
Oh, and one more thing: safety. Fryers are one of the most dangerous pieces of equipment in a kitchen. Make sure yours has automatic shut-off valves and cool-touch handles. And for the love of all things holy, train your staff on how to use it properly. A grease fire is not the kind of excitement you want in your kitchen.
The Backbone: Food Prep Tools
4. Commercial Food Processors: The Workhorses of Prep
If you’re still chopping onions by hand, stop. Just stop. I get it, there’s something romantic about the idea of a chef meticulously dicing vegetables with a knife. But in reality, that chef is probably cursing under their breath while their eyes water from the onions, and they’re falling behind on prep because they’re spending 20 minutes on something a commercial food processor could do in 20 seconds. Time is money in the restaurant business, and food processors are one of the best investments you can make for your prep station.
Now, not all food processors are created equal. A residential-grade Cuisinart might work for a home kitchen, but it’s not going to cut it in a commercial setting. You need something heavy-duty, with a powerful motor that can handle continuous use. Look for a processor with a large feed tube (so you’re not spending all day pushing food through a tiny hole), multiple blade options (for slicing, dicing, shredding, and pureeing), and a durable construction that can withstand the abuse of a busy kitchen. And make sure it’s easy to clean, because if it’s not, your staff won’t use it, and you’ll be back to chopping onions by hand.
I’ve seen too many kitchens try to get by with one small food processor, and it’s a bottleneck waiting to happen. If you’re doing a lot of prep, consider getting two: one for wet ingredients (like sauces and purees) and one for dry ingredients (like vegetables and cheese). And if you’re really smart, you’ll get one with a continuous feed attachment, so you can process large quantities of food without having to stop and empty the bowl every five minutes. Trust me, your prep cook will love you for it.
5. Mixers: Because No One Wants to Whisk by Hand
I’ll never forget the first time I saw a commercial mixer in action. It was at a bakery in San Francisco, and the baker was making dough for what felt like a million baguettes. He dumped a mountain of flour into the mixer, added some water and yeast, and within minutes, the machine had transformed it into a smooth, elastic dough. No kneading, no sweating, no blisters, just perfect dough, every time. That’s when I realized that a good mixer isn’t just a tool; it’s a game-changer.
If you’re doing any kind of baking, a commercial mixer is non-negotiable. Even if you’re not a bakery, it’s still worth considering, think about how much time you’ll save mixing batters, whipping cream, or even just making mashed potatoes. The key is to get the right size. A 5-quart mixer might work for a small café, but if you’re making large batches of dough or batter, you’ll need something bigger. Look for a mixer with a powerful motor (at least 1/2 horsepower for most applications), a tilting head (for easy access to the bowl), and multiple attachments (like a dough hook, paddle, and whisk). And make sure it’s NSF-certified-because the last thing you want is to fail a health inspection because your mixer isn’t up to code.
I’m torn between recommending a planetary mixer (which is great for general use) or a spiral mixer (which is better for dough). Planetary mixers are more versatile, but spiral mixers are gentler on dough and can handle larger batches. Maybe I should clarify: if you’re doing a lot of bread or pizza dough, go for a spiral mixer. If you’re doing a mix of baking and general cooking, a planetary mixer is the way to go. Either way, don’t cheap out. A good mixer will last you decades, and it’s one of those tools that’ll pay for itself in no time.
6. Slicers: Precision Matters
There’s something oddly satisfying about watching a commercial meat slicer in action. The way the blade glides through a piece of prosciutto, leaving behind perfectly even slices, is almost hypnotic. But beyond the aesthetic appeal, a good slicer is an essential tool for any restaurant that serves deli meats, cheeses, or even vegetables. It’s faster, more precise, and safer than slicing by hand, and let’s be real, no one wants to see a line cook with a bandaged finger because they tried to slice a tomato with a chef’s knife.
When it comes to slicers, there are two main types: manual and automatic. Manual slicers are cheaper and take up less space, but they require more effort to use. Automatic slicers are more expensive and bulkier, but they’re also faster and more consistent. If you’re doing a high volume of slicing, an automatic slicer is worth the investment. Look for one with a powerful motor (at least 1/3 horsepower), a sturdy construction (stainless steel is best), and a safety guard to protect your staff from the blade. And make sure it’s easy to clean, because a slicer that’s caked in cheese and meat residue is a health code violation waiting to happen.
One thing I wish I’d known before buying my first slicer: the blade size matters. A 10-inch blade is fine for most applications, but if you’re slicing large roasts or blocks of cheese, you’ll need a 12-inch or even 14-inch blade. And don’t forget to get a sharpener-a dull blade is more dangerous than a sharp one, and it’ll tear your food instead of slicing it cleanly. Oh, and one more thing: train your staff on how to use it properly. A slicer is one of the most dangerous tools in a kitchen, and it’s not something you want to learn on the job.
The Lifelines: Refrigeration and Storage
7. Walk-In Coolers: The Cold Hard Truth
Let’s talk about walk-in coolers. If you’re opening a restaurant, you’re going to need one. There’s no way around it. You can’t store all your perishable ingredients in a reach-in fridge and expect to keep up with demand. A walk-in cooler is where you’ll store everything from produce to dairy to meat, and it’s one of the most important investments you’ll make. But here’s the thing: not all walk-ins are created equal, and a bad one can cost you thousands of dollars in wasted food and energy bills.
First things first: size. A walk-in cooler that’s too small will leave you scrambling for space, while one that’s too big will waste energy and money. As a general rule, you’ll need about 1 to 1.5 cubic feet of space per meal you serve per day. So, if you’re serving 200 meals a day, you’ll need a walk-in that’s at least 200 to 300 cubic feet. But don’t just take my word for it, talk to your suppliers and figure out how much inventory you’ll need to store at any given time. And remember: it’s always better to err on the side of too big than too small. You can always fill extra space with shelves or racks, but you can’t magically create more room when you’re running out of space.
Next, insulation. A well-insulated walk-in will keep your food at the right temperature without wasting energy. Look for a cooler with at least 4 inches of insulation in the walls and ceiling, and make sure the door has a good seal. A poorly insulated walk-in will cost you a fortune in energy bills, and it’ll struggle to maintain a consistent temperature, which can lead to spoiled food. And speaking of temperature, make sure your walk-in has a digital thermometer and alarm system to alert you if the temperature rises above a certain level. The last thing you want is to open your cooler one morning and find that your entire inventory of chicken has gone bad because the compressor failed overnight.
Oh, and one more thing: organization. A walk-in cooler is only as good as its organization system. Invest in stainless steel shelving, clear storage bins, and a labeling system to keep everything in its place. The last thing you want is to be digging through a mountain of produce at 6 AM, trying to find the carrots you know you ordered. Trust me, your staff will thank you.
8. Reach-In Refrigerators: The Workhorses of the Line
While your walk-in cooler is where you’ll store your bulk ingredients, your reach-in refrigerators are where you’ll keep the stuff you need quick access to during service. These are the fridges that sit behind the line, holding everything from prepped ingredients to backup sauces to the occasional employee’s lunch (we’ve all been there). And because they’re in constant use, they need to be durable, reliable, and easy to clean.
When it comes to reach-in refrigerators, there are two main types: solid door and glass door. Solid door fridges are more energy-efficient and better at maintaining a consistent temperature, but they’re also less convenient because you can’t see what’s inside without opening the door. Glass door fridges are great for visibility, but they’re less energy-efficient and can be harder to keep clean. If you’re tight on space, you might also consider an under-counter fridge, which fits neatly beneath a counter and is perfect for storing backup ingredients or prepped items.
Here’s what to look for in a reach-in fridge: stainless steel construction (for durability and easy cleaning), adjustable shelves (so you can customize the space to fit your needs), and a self-closing door (to prevent cold air from escaping). And make sure it’s NSF-certified-because the last thing you want is to fail a health inspection because your fridge isn’t up to code. Oh, and one more thing: get a fridge with a digital thermometer. It’s a small investment that’ll save you a ton of headaches down the road.
I’m torn between recommending a single-door fridge or a double-door one. Single-door fridges are cheaper and take up less space, but they’re also less convenient because you have to open the door more often, which lets cold air escape. Double-door fridges are more expensive and bulkier, but they’re also more efficient and easier to organize. Maybe I should clarify: if you’re tight on space or budget, go for a single-door fridge. If you have the room and the money, a double-door fridge is the way to go. Either way, don’t skimp. A good reach-in fridge will last you years, and it’s one of those tools that’ll pay for itself in no time.
9. Freezers: Because Ice Cream and Frozen Fries Aren’t Going Anywhere
Let’s talk about commercial freezers. If you’re serving anything frozen, whether it’s ice cream, frozen fries, or backup ingredients, you’re going to need a freezer that can keep up with demand. And just like with refrigerators, not all freezers are created equal. A residential freezer might work for a home kitchen, but it’s not going to cut it in a commercial setting. You need something heavy-duty, with a powerful compressor that can maintain a consistent temperature even when the door is being opened and closed every five minutes.
First things first: size. A freezer that’s too small will leave you scrambling for space, while one that’s too big will waste energy and money. As a general rule, you’ll need about 0.5 to 1 cubic foot of freezer space per meal you serve per day. So, if you’re serving 200 meals a day, you’ll need a freezer that’s at least 100 to 200 cubic feet. But don’t just take my word for it, talk to your suppliers and figure out how much frozen inventory you’ll need to store at any given time. And remember: it’s always better to err on the side of too big than too small. You can always fill extra space with shelves or racks, but you can’t magically create more room when you’re running out of space.
Next, insulation. A well-insulated freezer will keep your food at the right temperature without wasting energy. Look for a freezer with at least 4 inches of insulation in the walls and ceiling, and make sure the door has a good seal. A poorly insulated freezer will cost you a fortune in energy bills, and it’ll struggle to maintain a consistent temperature, which can lead to freezer burn and spoiled food. And speaking of temperature, make sure your freezer has a digital thermometer and alarm system to alert you if the temperature rises above a certain level. The last thing you want is to open your freezer one morning and find that your entire inventory of ice cream has turned into soup.
Oh, and one more thing: organization. A freezer is only as good as its organization system. Invest in stainless steel shelving, clear storage bins, and a labeling system to keep everything in its place. The last thing you want is to be digging through a mountain of frozen peas at 6 AM, trying to find the chicken breasts you know you ordered. Trust me, your staff will thank you.
The Extras: Tools You Didn’t Know You Needed
10. Vacuum Sealers: The Secret to Longer Shelf Life
I’ll be honest: I didn’t think much about vacuum sealers until I started working in a restaurant that did a lot of sous vide cooking. Turns out, these things are game-changers. Not only do they extend the shelf life of your ingredients by removing oxygen (which is what causes food to spoil), but they also make it easier to store and organize your food. And if you’re doing any kind of sous vide cooking, a vacuum sealer is non-negotiable, it’s the only way to get a perfect seal on your bags.
But even if you’re not doing sous vide, a vacuum sealer is still worth considering. Think about how much money you’ll save by extending the shelf life of your ingredients. No more throwing out half a case of chicken because it went bad before you could use it. No more wasting money on produce that spoils before you can prep it. And because vacuum-sealed food takes up less space, you’ll be able to store more in your walk-in cooler or freezer. It’s a win-win.
When it comes to vacuum sealers, there are two main types: chamber sealers and external sealers. Chamber sealers are more expensive and bulkier, but they’re also more powerful and can handle liquids (like marinades or sauces). External sealers are cheaper and more compact, but they’re not as powerful and can’t handle liquids. If you’re doing a lot of sous vide cooking or sealing liquids, a chamber sealer is worth the investment. If you’re just sealing dry ingredients, an external sealer will do the job.
One thing I wish I’d known before buying my first vacuum sealer: the bags matter. Cheap bags will save you money upfront, but they’ll cost you in the long run because they’re more likely to tear or lose their seal. Invest in high-quality vacuum sealer bags, and make sure they’re compatible with your machine. And don’t forget to get a bag cutter-it’s a small tool, but it’ll save you a ton of time and frustration.
11. Immersion Blenders: The Unsung Heroes of Sauces and Soups
I’ll never forget the first time I used an immersion blender. I was making a batch of tomato soup, and I was dreading the thought of transferring it to a regular blender in batches. Then I remembered the immersion blender sitting in the drawer, and within minutes, I had a perfectly smooth soup with no mess, no fuss, and no burned fingers from hot liquid. That’s when I realized that an immersion blender isn’t just a nice-to-have, it’s a must-have for any kitchen that makes sauces, soups, or purees.
Here’s the thing about immersion blenders: they’re faster, easier, and safer than regular blenders. No more transferring hot liquid to a blender and hoping it doesn’t explode all over your kitchen. No more waiting for the blender to cool down between batches. With an immersion blender, you can puree your soup right in the pot, and you can control the texture with precision. Want it chunky? Blend for a few seconds. Want it smooth? Blend for a minute. It’s that simple.
When it comes to immersion blenders, there are two main types: corded and cordless. Corded blenders are more powerful and don’t require charging, but they’re also less convenient because you have to deal with a cord. Cordless blenders are more portable and easier to use, but they’re also less powerful and require charging. If you’re doing a lot of blending, a corded blender is worth the investment. If you’re just doing occasional blending, a cordless blender will do the job.
One thing I wish I’d known before buying my first immersion blender: the attachments matter. Some blenders come with a whisk attachment, which is great for whipping cream or beating eggs. Others come with a chopper attachment, which is perfect for chopping herbs or nuts. And some come with a blending cup, which is great for making small batches of sauces or dressings. Make sure your blender comes with the attachments you need, and don’t forget to get a storage case-it’s a small investment that’ll keep your blender and attachments organized and easy to find.
12. Portion Scales: Because Consistency is Key
Let’s talk about portion scales. I know, I know, they’re not the most exciting tool in the kitchen. But if you’re not using one, you’re doing yourself (and your customers) a disservice. Consistency is key in the restaurant business, and a portion scale is the easiest way to ensure that every dish you serve is the same size, the same weight, and the same quality. No more guessing, no more eyeballing, no more complaints from customers who got a smaller portion than the person next to them.
Here’s the thing about portion scales: they’re not just for measuring ingredients. They’re also for portioning out proteins, sides, and even desserts. Think about how much money you’ll save by ensuring that every steak you serve is the same weight, or that every scoop of ice cream is the same size. And because they’re so precise, they’ll help you reduce waste by ensuring that you’re not over-portioning your food. It’s a small investment that’ll pay for itself in no time.
When it comes to portion scales, there are two main types: digital and mechanical. Digital scales are more precise and easier to read, but they’re also more expensive and require batteries. Mechanical scales are cheaper and don’t require batteries, but they’re also less precise and harder to read. If you’re doing a lot of portioning, a digital scale is worth the investment. If you’re just doing occasional portioning, a mechanical scale will do the job.
One thing I wish I’d known before buying my first portion scale: the capacity matters. A scale that can only handle 5 pounds won’t be much use if you’re portioning out large cuts of meat. Look for a scale with a high capacity (at least 20 pounds) and a large platform (so you can portion out large items). And make sure it’s easy to clean, because a scale that’s caked in food residue is a health code violation waiting to happen. Oh, and one more thing: get a scale with a tare function, so you can zero out the weight of your container and get an accurate measurement of your food.
Putting It All Together: A Kitchen That Works for You
So, there you have it: the essential commercial kitchen tools every restaurant startup needs. I know it’s a lot to take in, and I know it’s a lot of money to spend. But trust me, it’s worth it. The right tools don’t just make your job easier; they make your food better, your staff happier, and your customers more likely to come back. And at the end of the day, that’s what it’s all about.
Now, I’m not saying you need to buy everything on this list right away. Start with the basics, the range, the oven, the fridge, and build from there. Prioritize the tools that’ll have the biggest impact on your operation, and don’t be afraid to start small. You can always upgrade later, once you’ve got some cash flow coming in. And remember: it’s not about having the fanciest equipment; it’s about having the right equipment for your needs.
I’ll leave you with this: opening a restaurant is one of the hardest things you’ll ever do. But it’s also one of the most rewarding. There’s nothing quite like the feeling of serving a meal you’re proud of, knowing that you built something from the ground up. And when you’ve got the right tools in your kitchen, that feeling becomes a whole lot easier to achieve. So, take a deep breath, trust the process, and get to work. Your dream kitchen is waiting.
FAQ
Q: How much should I budget for commercial kitchen tools when starting a restaurant?
A: Budgeting for commercial kitchen tools can vary widely depending on the size and type of your restaurant, but a good rule of thumb is to allocate about 20-30% of your total startup budget to equipment. For a small restaurant, this could mean $50,000 to $100,000, while larger operations might need $200,000 or more. Prioritize essential tools like ranges, refrigeration, and prep equipment first, and consider leasing or buying used equipment to save money where possible. Don’t forget to factor in installation costs, which can add 10-20% to your total equipment budget.
Q: Is it better to buy new or used commercial kitchen tools?
A: This is a tough one, and the answer depends on your budget, timeline, and risk tolerance. New equipment comes with warranties, the latest technology, and the peace of mind that it hasn’t been abused by a previous owner. However, it’s also significantly more expensive. Used equipment can save you a ton of money upfront, but it comes with risks, like hidden wear and tear or outdated safety features. If you go the used route, buy from a reputable dealer who offers some kind of warranty or return policy, and always inspect the equipment in person before purchasing. For critical tools like refrigeration or cooking equipment, I’d lean toward new, because the last thing you want is a fridge that dies on you during your first weekend rush.
Q: What’s the most overlooked commercial kitchen tool that I should definitely include?
A: Hands down, it’s the vacuum sealer. Most startups focus on the big-ticket items like ranges and refrigeration (which are obviously important), but they forget about tools that can save them time, money, and headaches in the long run. A vacuum sealer extends the shelf life of your ingredients, reduces waste, and makes storage more efficient. It’s also essential if you’re doing any kind of sous vide cooking. Another often-overlooked tool is a high-quality portion scale. Consistency is key in the restaurant business, and a portion scale ensures that every dish you serve is the same size and quality. It’s a small investment that pays off in customer satisfaction and reduced waste.
Q: How do I decide between gas and electric equipment for my kitchen?
A: This is one of those decisions that depends on a few factors, including your location, menu, and personal preference. Gas equipment (like ranges and fryers) is generally preferred by chefs because it offers instant heat control and is more energy-efficient in the long run. However, it requires a gas line, which can be expensive to install if your kitchen isn’t already set up for it. Electric equipment (like induction ranges or electric fryers) is easier to install and maintain, and it’s often safer because there’s no open flame. However, it can be slower to heat up and less energy-efficient, depending on your local electricity rates. If you’re in an area with high electricity costs, gas might be the better option. If you’re tight on space or don’t have access to a gas line, electric could be the way to go. Ultimately, it’s worth talking to your chef and equipment supplier to figure out what makes the most sense for your specific needs.
@article{the-ultimate-guide-to-commercial-kitchen-tools-every-restaurant-startup-needs-in-2026,
    title   = {The Ultimate Guide to Commercial Kitchen Tools Every Restaurant Startup Needs in 2026},
    author  = {Chef's icon},
    year    = {2026},
    journal = {Chef's Icon},
    url     = {https://chefsicon.com/commercial-kitchen-tools-every-restaurant-startup-needs/}
}