The Best Fluffy Pancakes recipe you will fall in love with. Full of tips and tricks to help you make the best pancakes.
Table of Contents
There’s nothing quite like the comforting aroma of a perfect roast chicken wafting through your home. It’s a classic dish that brings people together, whether it’s a cozy dinner for two or a family gathering. But achieving that golden, crispy skin and juicy, tender meat every time can be a bit of a challenge. I’ve had my fair share of hits and misses, but after countless experiments in my Nashville kitchen, with my trusty rescue cat Luna keeping a watchful eye, I’ve finally nailed down a foolproof method. So, let’s dive in and explore the art and science of roasting the perfect chicken every single time.
Growing up in the Bay Area, I was surrounded by a vibrant food scene that sparked my curiosity about culinary arts. After moving to Nashville, I found a new appreciation for Southern comfort food, and roast chicken quickly became a staple in my home. Through trial and error, I’ve discovered that the key to a perfect roast chicken lies in a combination of simple techniques and understanding the science behind cooking.
In this guide, I’ll walk you through everything you need to know to achieve that perfect roast chicken every time. From selecting the right bird to mastering the art of trussing, we’ll cover it all. By the end, you’ll be armed with the knowledge and confidence to impress your friends and family with a show-stopping roast chicken that’s sure to become a favorite.
Understanding the Basics of Roast Chicken
Choosing the Right Chicken
The first step to a perfect roast chicken is selecting the right bird. While it might seem like a no-brainer, the quality of your chicken can significantly impact the final result. Look for a fresh, plump chicken with smooth, unblemished skin. If possible, opt for an organic or free-range chicken, as they tend to have better flavor and texture.
When it comes to size, a 3 to 4-pound chicken is ideal for roasting. This size ensures even cooking and a good ratio of skin to meat. Larger chickens can be more challenging to cook evenly and may require longer cooking times, which can lead to dry meat.
Preparing the Chicken
Once you’ve selected your chicken, it’s time to prepare it for roasting. Begin by removing any giblets or innards from the cavity. Rinse the chicken inside and out under cold water, then pat it dry with paper towels. It’s crucial to ensure the chicken is completely dry, as excess moisture can prevent the skin from crisping up.
Next, season the chicken generously with salt and pepper, both inside and out. I like to use a coarse sea salt for added texture and flavor. Don’t be afraid to be generous with the seasoning, remember, you’re flavoring the entire chicken, not just the surface.
The Science of Salt
Salt plays a crucial role in enhancing the flavor of your roast chicken. Through a process called osmosis, salt draws moisture out of the chicken’s cells, concentrating the flavors and improving the texture. This is why it’s essential to season your chicken well in advance, allowing the salt to penetrate the meat and work its magic.
I usually season my chicken at least an hour before roasting, but if you have the time, seasoning it overnight in the refrigerator can yield even better results. Just make sure to cover the chicken loosely with plastic wrap to prevent it from drying out.
Trussing: The Art of Tying
Trussing your chicken might seem like an unnecessary step, but it serves an important purpose. By tying the legs and wings close to the body, you ensure even cooking and prevent the extremities from drying out. Plus, a well-trussed chicken simply looks more appealing on the dinner table.
To truss a chicken, start by placing it breast-side up on a cutting board. Tuck the wing tips under the chicken to secure them in place. Next, use a piece of kitchen twine to tie the legs together at the ankles. Finally, loop the twine around the chicken’s body, securing the wings and legs in place.
Stuffing: To Stuff or Not to Stuff
Stuffing your chicken can add flavor and moisture, but it also increases the cooking time and can lead to uneven cooking. If you do choose to stuff your chicken, opt for a simple mixture of herbs, aromatics, and maybe some citrus. Avoid dense bread-based stuffings, as they can absorb too much moisture and result in a soggy bird.
I personally prefer to cook my stuffing separately and use the chicken cavity for aromatics like onions, garlic, and herbs. This way, I can control the cooking time more precisely and ensure a perfectly cooked chicken.
The Perfect Roasting Temperature
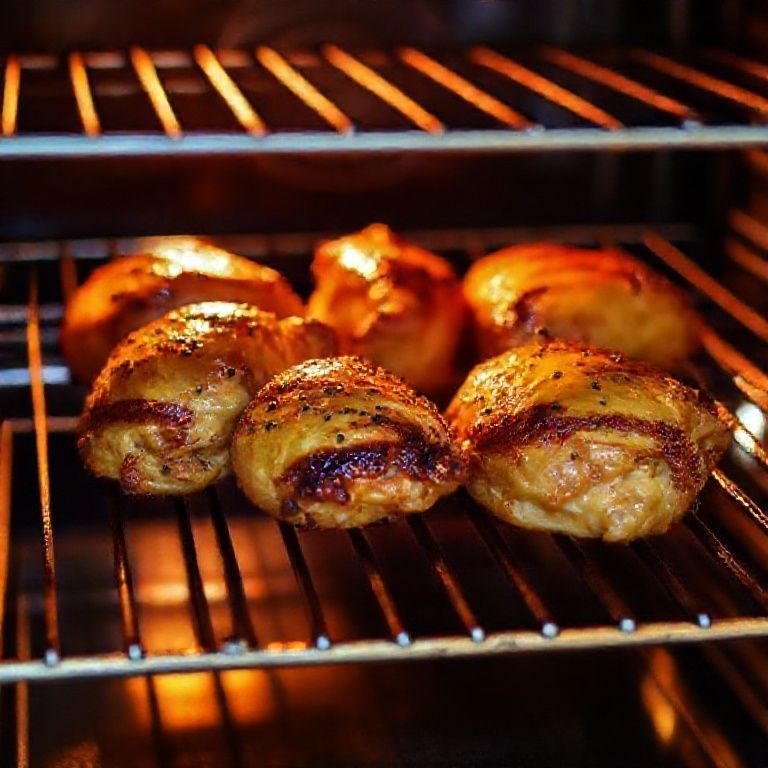
Finding the ideal roasting temperature is a balancing act between achieving crispy skin and juicy meat. I’ve found that starting with a high temperature to sear the skin, then reducing the heat to cook the chicken through, yields the best results.
Preheat your oven to 425°F (220°C). Place the chicken breast-side up in a roasting pan or a large cast-iron skillet. Roast it at this high temperature for about 15-20 minutes, or until the skin starts to turn golden brown. Then, reduce the heat to 375°F (190°C) and continue roasting until the chicken is cooked through.
The Magic of Basting
Basting your chicken with its own juices helps to keep the meat moist and enhances the flavor. Every 20 minutes or so, spoon the juices from the bottom of the pan over the chicken. This simple step can make a world of difference in the final result.
Be careful not to baste too frequently, as opening the oven door can cause the temperature to drop, leading to uneven cooking. Aim for 2-3 basting sessions throughout the cooking process.
Checking for Doneness
Knowing when your chicken is done is crucial for avoiding undercooked or overcooked meat. The most reliable way to check for doneness is by using a meat thermometer. Insert the thermometer into the thickest part of the thigh, making sure not to touch the bone, which can give a false reading.
The chicken is done when the internal temperature reaches 165°F (74°C). If you don’t have a thermometer, you can also check by piercing the thigh with a knife and ensuring the juices run clear. However, this method is less precise and can be more challenging for beginners.
Resting: The often overlooked step
Once your chicken is cooked to perfection, it’s tempting to dive right in. But resting the chicken is a crucial step that’s often overlooked. Resting allows the juices to redistribute throughout the meat, ensuring a moist and flavorful result.
Remove the chicken from the oven and let it rest, uncovered, for about 15-20 minutes before carving. This gives the juices time to settle and prevents them from rushing out when you cut into the chicken.
Carving Like a Pro
Carving a chicken can seem intimidating, but with a bit of practice, you’ll be slicing like a pro in no time. Start by removing the legs and thighs, then separate the wings. Next, carve the breast meat by slicing along the breastbone and gently pulling the meat away from the bone.
Remember, the key to good carving is a sharp knife and a steady hand. Take your time and don’t rush the process. With each chicken you carve, you’ll gain more confidence and skill.
Elevating Your Roast Chicken
Herbs and Aromatics
Adding herbs and aromatics to your roast chicken can elevate its flavor to new heights. Classic combinations include thyme, rosemary, and garlic, but don’t be afraid to experiment with other herbs and spices.
Try stuffing the cavity with a mixture of fresh herbs, citrus slices, and aromatic vegetables like onions and garlic. You can also create a compound butter by mixing softened butter with herbs and spices, then rubbing it under the chicken’s skin for added flavor.
Brining: The Secret Weapon
Brining your chicken before roasting can result in incredibly juicy and flavorful meat. A brine is simply a solution of salt, water, and sometimes sugar, which helps to break down the proteins in the chicken and infuse it with moisture.
To brine a chicken, dissolve about 1/2 cup of salt in 1 gallon of water. Submerge the chicken in the brine and refrigerate for at least 4 hours, or up to overnight. After brining, rinse the chicken and pat it dry before seasoning and roasting.
Spatchcocking: The Quick and Easy Method
If you’re short on time or looking for a quicker cooking method, consider spatchcocking your chicken. Spatchcocking involves removing the backbone and flattening the chicken, which allows it to cook more evenly and quickly.
To spatchcock a chicken, place it breast-side down on a cutting board. Using sharp kitchen shears, cut along both sides of the backbone and remove it. Flip the chicken over and press down firmly on the breastbone to flatten it. Season and roast as usual, but reduce the cooking time accordingly.
Leftovers: Making the Most of Your Roast Chicken
One of the best things about roast chicken is the leftovers. From chicken salad to soups and stews, there are endless ways to repurpose your roast chicken into delicious meals.
Store leftover chicken in an airtight container in the refrigerator for up to 4 days, or freeze it for up to 3 months. When reheating, be sure to add a bit of moisture, such as chicken broth or water, to prevent the chicken from drying out.
The Perfect Roast Chicken: A Personal Challenge
Now that you’re armed with all this knowledge, it’s time to put it into practice. I challenge you to try roasting a chicken using these techniques and see the difference for yourself. Remember, the key to a perfect roast chicken is patience, attention to detail, and a willingness to experiment.
As you embark on your roast chicken journey, don’t be afraid to make mistakes and learn from them. Even the most seasoned chefs have had their share of culinary mishaps. The important thing is to keep trying and refining your skills.
FAQ
Q: Can I roast a chicken from frozen?
A: It’s not recommended to roast a chicken directly from frozen, as it can lead to uneven cooking and increased risk of foodborne illness. Always thaw your chicken completely in the refrigerator before roasting.
Q: How long should I roast my chicken?
A: The roasting time depends on the size of your chicken and your oven temperature. A good rule of thumb is to roast at 375°F (190°C) for about 20 minutes per pound, plus an additional 15 minutes. Always use a meat thermometer to ensure the chicken is cooked to an internal temperature of 165°F (74°C).
Q: Can I roast a chicken in a convection oven?
A: Yes, you can roast a chicken in a convection oven. Convection ovens circulate hot air, which can result in more even cooking and crispier skin. Reduce the oven temperature by about 25°F (15°C) when using a convection oven, as they tend to cook faster than conventional ovens.
Q: What should I do with the chicken drippings?
A: Don’t let those flavorful chicken drippings go to waste! You can use them to make a delicious gravy or sauce to serve with your roast chicken. Simply deglaze the pan with a bit of wine or broth, then whisk in some flour or cornstarch to thicken the mixture.
@article{perfect-roast-chicken-every-time-a-comprehensive-guide,
    title   = {Perfect Roast Chicken Every Time: A Comprehensive Guide},
    author  = {Chef's icon},
    year    = {2025},
    journal = {Chef's Icon},
    url     = {https://chefsicon.com/perfect-roast-chicken-every-time/}
}