
Table of Contents
- 1 The Great Kitchen Clear-Out: A Detailed Plan
- 1.1 Section 1: The Mental Game & Gathering Supplies
- 1.2 Section 2: Countertop Chaos Control
- 1.3 Section 3: Utensil Drawer Debacle
- 1.4 Section 4: The Other Drawers – Linens, Gadgets, Junk
- 1.5 Section 5: Cabinet Clear-Out – Dishes & Glassware
- 1.6 Section 6: Cabinet Clear-Out – Pots, Pans & Bakeware
- 1.7 Section 7: The Pantry Purge Adventure
- 1.8 Section 8: Facing the Fridge & Freezer
- 1.9 Section 9: Conquering the Under-Sink Abyss
- 1.10 Section 10: Small Appliances & The Decisive ‘Maybe’ Pile
- 2 Keeping the Momentum: Life After the Declutter
- 3 FAQ
Okay, let’s talk kitchens. Mine, yours, everyone’s. It’s the heart of the home, right? But sometimes, maybe often, it feels more like the heart… attack waiting to happen. A jumble of gadgets, expired spices, and Tupperware lids that mysteriously lost their partners. I’m Sammy, by the way, writing for Chefsicon.com from my cozy (read: sometimes chaotic) home office here in Nashville. Luna, my rescue cat, is currently supervising from her perch on the bookshelf, probably judging my slightly messy desk. Anyway, back to kitchens. After moving from the Bay Area, where kitchen space was, shall we say, ‘premium’, to Nashville, I thought I’d have room to breathe. Turns out, more space just means more places to stash stuff you *think* you need. Sound familiar? That’s why I decided to tackle the beast head-on with a kitchen declutter challenge, and I figured, why not drag you along with me, step-by-step?
Embarking on a kitchen declutter challenge isn’t just about making things look pretty for Instagram (though, hey, bonus points if it does). It’s about reclaiming sanity, improving efficiency, and maybe, just maybe, rediscovering the joy of cooking in a space that actually *works* for you. Think about it: less time hunting for the right lid, more time actually enjoying your morning coffee. Less stress about where to put the groceries, more mental energy for nailing that new recipe. It’s a system overhaul, applied to the most functional room in the house. My marketing brain loves analyzing systems, and let me tell you, a cluttered kitchen is one seriously inefficient system. We’re going to break it down, zone by zone, decision by decision. It might get messy before it gets better, but stick with me. We’ll navigate the piles, the doubts (‘Do I *really* need three whisks?’), and the potential arguments with partners or roommates about that novelty pineapple corer.
This isn’t going to be one of those guides that just says ‘get rid of stuff’. We’re going deep. We’ll look at the ‘why’ behind the clutter, the common pitfalls, and develop practical strategies not just for the initial purge, but for *keeping* it manageable long-term. I’ll share my own thought process, the occasional stumble, and maybe a realization or two along the way. Consider this a participant-observer mission into the wilds of our own kitchens. We’ll cover everything from the countertops to the deepest cabinet corners, the fridge to that dreaded under-sink area. Ready to transform your kitchen from a source of stress into a streamlined haven? Let’s dive into this step-by-step kitchen declutter adventure. Grab a coffee (if you can find a clean mug!), maybe put on some music, and let’s begin the great kitchen clear-out.
The Great Kitchen Clear-Out: A Detailed Plan
Section 1: The Mental Game & Gathering Supplies
Alright, first things first. Before we even touch a single stray spatula, we need to get our heads in the game. Why are we doing this? Is it just because ‘decluttering’ is trendy? Hopefully not. For me, it started when I realized I was spending more time shuffling things around on the counter to make space for my cutting board than I was actually chopping vegetables. That’s friction. Unnecessary friction in a process that should be enjoyable. Define your ‘why’. Is it efficiency? Less stress? More space? Better hygiene? Maybe you just want to be able to find the can opener without excavating a drawer? Write it down. Seriously. Stick it on the fridge. When you’re knee-deep in expired canned goods and questioning your life choices, that ‘why’ will be your anchor. It’s easy to get overwhelmed, I know I do. Sometimes staring at the sheer volume of *stuff* makes me want to just close the door and order takeout. But breaking it down helps. This is a marathon, not a sprint. Or maybe a series of sprints? Let’s call it interval training for your kitchen.
Now, supplies. You don’t need fancy matching containers right away (unless that’s your jam, no judgment). But you *will* need some basics. Get yourself four boxes or designated areas. Label them clearly: KEEP, DONATE/SELL, TRASH/RECYCLE, and the crucial RELOCATE. That last one is for things that belong in the kitchen but are currently homeless, OR things that don’t belong in the kitchen at all (why is there a screwdriver in the utensil drawer? Asking for a friend…). You’ll also want cleaning supplies handy – all-purpose spray, cloths, maybe some degreaser for later. Trash bags. Recycling bin access. And maybe, just maybe, a reward planned for when you finish a major section. Acknowledge the effort! This isn’t just tidying; it’s decision-making, physical labor, and sometimes emotional labor too (we’ll get to sentimental items later). Okay, deep breath. Supplies gathered? ‘Why’ statement visible? Let’s move to the first zone.
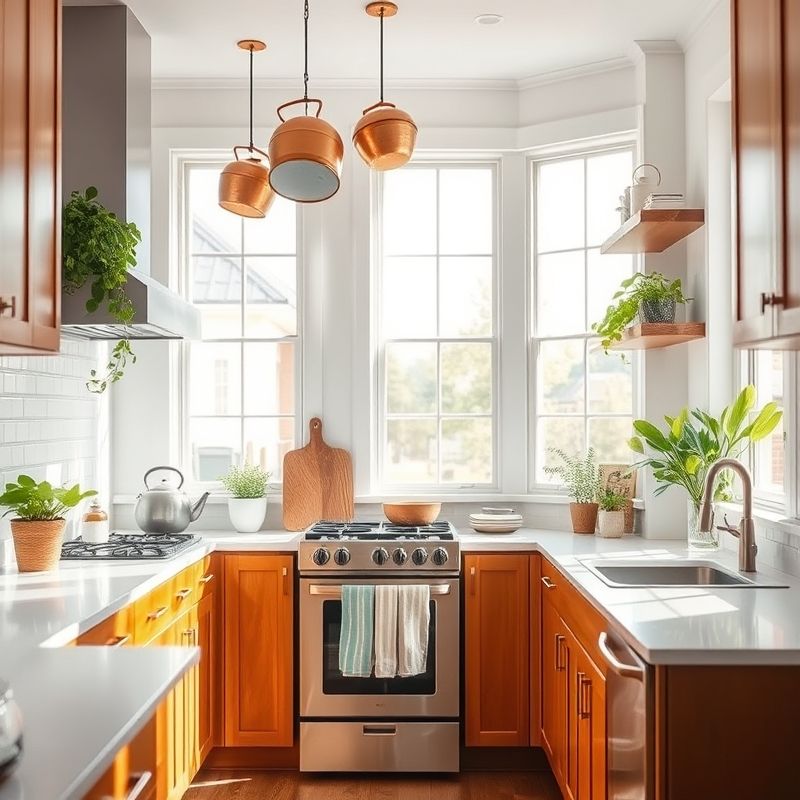
Section 2: Countertop Chaos Control
The countertops. They’re the face of your kitchen, the first thing you see. And often, the first place clutter accumulates. Mail, keys, appliances you use once a year, decorative canisters holding who-knows-what. Step one: **Clear EVERYTHING off**. Yes, everything. The toaster, the coffee maker, the fruit bowl, that pile of papers. Move it all to your dining table, the floor, wherever you have temporary space. Now, look at that glorious, empty expanse. Feels good, right? Maybe a little weird? Step two: **Clean the counters thoroughly**. Get rid of crumbs, sticky spots, water rings. Give yourself a truly blank slate. This isn’t just about cleaning; it’s a mental reset for the space.
Step three: The hard part – **Be ruthlessly honest about what deserves to return**. The goal here is functionality and visual calm. What do you use *every single day*? For me, it’s the coffee maker and maybe the electric kettle. The toaster? Daily use. The giant stand mixer I use twice a year for holiday baking? It needs a new home in a cabinet or pantry. That decorative utensil crock holding 15 spatulas? Let’s rethink that. Ask yourself: Does this item *need* to live on the counter? Could it be easily stored nearby and brought out when needed? Think about prime real estate. Counter space is valuable. Don’t let clutter squat there rent-free. Aim to keep only the essentials and perhaps one or two items you genuinely love seeing daily. Everything else goes into the KEEP box (to be assigned a proper home later), DONATE/SELL, TRASH, or RELOCATE pile. This step alone can make a massive difference in how your kitchen feels.
Section 3: Utensil Drawer Debacle
Ah, the utensil drawer. Or drawers, plural, if you’re lucky (or unlucky, depending on how cluttered they are). This is often a tangled mess of metal and plastic, a graveyard for gadgets past. Same process applies: **Empty the entire drawer**. Dump it all out onto a cleared counter space or that table you commandeered. Wow. Look at all that. Do you even know what half of this stuff is? Next, **clean the drawer**. Wipe out the crumbs, the weird sticky residue. Maybe put in a drawer liner if you’re feeling fancy, but it’s not essential right now.
Now, the sorting. Group like items together: all the spatulas, all the whisks, all the measuring spoons, etc. This is where the truth comes out. How many duplicates do you have? I once found four veggie peelers. Four. I don’t even eat that many vegetables that require peeling! Be honest. Do you need five different types of can openers? Probably not. Keep the one you like best, the one that actually works smoothly. Donate the rest. That weird gadget you bought from an infomercial that slices bananas into perfect, uniform rounds? If you haven’t used it in six months (or ever), it’s time for it to go. Think about utility versus novelty. Keep what serves a real purpose in your cooking routine. Get rid of broken items, rusted tools, and anything that makes you ask, ‘What even *is* this?’ Consider drawer organizers – they can be simple, inexpensive trays – to keep your chosen utensils from immediately descending back into chaos. It’s about creating **sustainable systems**, not just a one-time fix.
Section 4: The Other Drawers – Linens, Gadgets, Junk
Beyond utensils, kitchens often have drawers dedicated to dish towels, oven mitts, maybe random tools, foil and wrap, and the infamous ‘junk drawer’. Let’s tackle these. Apply the same empty, clean, sort method. For **kitchen linens**, be critical. How many dish towels do you realistically use between washes? Keep the ones in good condition – absorbent, not threadbare, relatively stain-free. Get rid of the crusty, hole-ridden ones. Same for oven mitts and pot holders – if they’re thin, burnt, or just plain gross, toss ’em. Safety first! Folding them neatly (or rolling them, Marie Kondo style, if that brings you joy) makes a huge difference in storage.
The **gadget and tool drawer** often overlaps with utensils but might hold things like meat thermometers, corkscrews, bag clips, corn cob holders, maybe even small appliance attachments. Again, assess duplicates and actual usage. That apple corer/slicer? The avocado tool? The strawberry huller? If you use them regularly, great. If they were an impulse buy or a gift you never wanted, let them go. Free up that space for things you *do* use. And then there’s the **junk drawer**. Every kitchen seems to have one. It’s a magnet for batteries, rubber bands, pens that don’t work, takeout menus, instruction manuals for appliances you no longer own… Be brave. Empty it. Sort it ruthlessly. Most of it likely belongs in the TRASH or RELOCATE box. Maybe, just maybe, you can eliminate the kitchen junk drawer entirely? Or at least contain it to a very small, organized section with dividers for essentials like *working* pens, a notepad, maybe spare keys. Reclaim that drawer!
Section 5: Cabinet Clear-Out – Dishes & Glassware
Moving on up to the cabinets! Let’s start with dishes and glassware. As always: **pull everything out**. Yes, all of it. Stack it carefully on your counter or table. Now you can see exactly what you have. How many plates? Bowls? Mugs? Wine glasses? Tumblers? Be honest, it’s probably more than you thought. And again, **clean the shelves**. Dust bunnies and mysterious crumbs have no place in your newly organized cabinets.
Now, assess. Do you have chipped plates or cracked mugs? Time to say goodbye. Safety hazard, plus they just look sad. Do you have incomplete sets you never use? Maybe donate them. How many place settings do you realistically need? Consider your household size and how often you entertain. If you have service for 12 but haven’t hosted more than 6 people in five years, maybe pare down the ‘everyday’ set and store the ‘special occasion’ dishes elsewhere if you really want to keep them. Mugs are a notorious pain point. They multiply like rabbits. Keep your favorites, the ones you actually reach for. Let the novelty ones, the oversized ones you never use, the ones from that conference five years ago, find new homes via donation. Think about **accessibility and frequency of use**. Everyday dishes should be easy to reach. Special occasion items can go on higher shelves. Group similar items together – all dinner plates stacked, all bowls nested. This sounds basic, but it makes a world of difference visually and functionally.
Section 6: Cabinet Clear-Out – Pots, Pans & Bakeware
This is often a noisy, clangy process. The pots and pans cabinet (or drawers). Empty it all out. Lids will probably tumble down. Stacks will shift precariously. It’s okay. Lay everything out so you can see it. **Clean those shelves or drawers**, especially if they’re greasy or full of seasoning spillover.
Now, inspect your arsenal. Are there pans with scratched non-stick coating? Experts say these can potentially release harmful substances and should be discarded. Be honest. Do you use that giant stockpot? Or that tiny saucepan? Do you have three frying pans the exact same size? Keep the ones you use regularly and that are in good condition. Consider the **types of cooking** you actually do. If you never bake, maybe you don’t need five different cake pans and a Bundt mold. If you primarily stir-fry, prioritize your wok. The lid situation is often chaotic. Try to match lids to their corresponding pots. If you have orphan lids or pots without lids, decide if it’s worth keeping them or trying to find a match (probably not). Consider storage solutions: stacking pans with protectors in between, using vertical organizers for lids and baking sheets. Getting rid of unused or damaged cookware frees up significant space and makes finding the right pan so much less frustrating. I found I had this one weirdly shaped roasting pan I literally *never* used. It was a gift. Felt guilty getting rid of it for years. Finally donated it – liberating!
Section 7: The Pantry Purge Adventure
Whether you have a walk-in pantry or just a couple of shelves in a cabinet, the principles are the same. Food storage can get out of hand quickly. First step, you guessed it: **Take everything out**. Everything. Cans, boxes, bags, jars. Put it all on your counter or table. Prepare to be potentially horrified by expiration dates. And **clean the shelves thoroughly**. Crumbs, sticky spills, dust – get rid of it all.
Now, the crucial part: **Check every single expiration date**. Be ruthless. If it’s expired, toss it. No, that can of beans from 2019 is not ‘probably fine’. Spices lose their potency over time too; if that paprika is pale and smells like dust, it’s not doing you any favors. Toss it. While you’re at it, check for anything stale or things you bought for a specific recipe and will truly never use again. Group similar items together: all the canned goods, all the pastas, all the baking supplies, snacks, etc. This helps you see what you actually have an excess of. Maybe you don’t need to buy lentils for a while. Consider transferring items like flour, sugar, pasta, and cereal into clear, airtight containers. Is this strictly necessary? No. I was skeptical myself. But it *does* help you see quantities at a glance, keeps things fresher, prevents pests, and often looks neater. But if that feels like too much effort, just grouping the original packaging neatly works too. The goal is a **functional food inventory system**. Put taller items in the back, group categories logically (e.g., baking supplies together, breakfast items together), and try to implement a ‘first-in, first-out’ system where you use older items before newer ones.
Section 8: Facing the Fridge & Freezer
Deep breaths. The refrigerator and freezer can be daunting. Things lurk in the back. Mysteries wrapped in foil. Condiments older than your cat. Let’s do this. Start with the fridge. **Take everything out**, shelf by shelf, drawer by drawer. Use coolers or insulated bags if you’re worried about things warming up too much, especially for a deep clean. As you take things out, **check expiration dates** and assess freshness. That questionable Tupperware of leftovers? When in doubt, throw it out. That half-empty jar of something fuzzy? Definitely out. Wipe down shelves and drawers as you empty them. A clean fridge feels amazing.
Group items as you put them back: dairy together, produce in crispers, condiments on the door (usually the warmest part, so check if items need colder storage). Try to create zones. Maybe a ‘use first’ area for items nearing their date. Don’t overstuff the fridge; cold air needs to circulate. Now, the freezer. Same process: **empty it, check dates/condition, toss anything ancient or freezer-burnt**. Defrost if necessary (follow manufacturer instructions). Wipe it down. Group items as you return them: meats, veggies, fruits, prepared meals. Labeling and dating items you freeze yourself is crucial. Use freezer-safe containers or bags. An organized freezer means less food waste and easier meal planning. It’s shocking how much usable space appears once you remove the icy relics of meals past. This step often feels like an archaeological dig, but the payoff in **food safety and usability** is huge.
Section 9: Conquering the Under-Sink Abyss
Ah, the cabinet under the kitchen sink. Often dark, sometimes damp, usually crammed with cleaning supplies, trash bags, sponges, and who knows what else. Time to shed some light. **Pull everything out**. Yes, even that bottle of mystery blue liquid. Be careful, as sometimes things leak. Check for any dampness or signs of leaks from the plumbing while it’s empty – better to catch problems early. **Clean the base of the cabinet thoroughly**. It probably needs it.
Now, sort through the items. Discard any nearly empty bottles, dried-up sponges, or products you never use or actively dislike (that cleaner that smells awful? Let it go). Consolidate duplicates if possible (e.g., combine two half-empty bottles of dish soap). Check that spray bottle nozzles work. Group your cleaning supplies by purpose – all-purpose, glass, wood, etc. Store trash bags and recycling bags neatly. Consider **vertical storage** here. Because this space is often deep and awkward, things get lost in the back. Tension rods can hold spray bottles, stackable bins can corral smaller items, or a lazy susan can make accessing things easier. Keep safety in mind: store chemicals properly, preferably away from food items (though under the sink is common, be mindful), and ensure they’re out of reach of children or pets if applicable. Transforming this often-neglected space makes daily cleanup tasks much smoother.
Section 10: Small Appliances & The Decisive ‘Maybe’ Pile
We’re nearing the end! This step involves dealing with those small appliances that might be cluttering counters or cabinets, and also addressing the ‘Maybe’ pile that inevitably forms during decluttering. First, **small appliances**. Think blenders, food processors, slow cookers, Instant Pots, air fryers, rice cookers, etc. Where do they currently live? Are they hogging valuable counter space? For each one, ask: **How often do I *actually* use this?** If it’s daily or multiple times a week, maybe countertop storage (if you have space) or a very accessible cabinet shelf makes sense. If it’s weekly or monthly, it definitely belongs in a cabinet or pantry. If it’s less than once a month, or you honestly can’t remember the last time you used it… it’s a prime candidate for the DONATE/SELL box. Don’t keep appliances out of guilt or aspiration (‘I *should* make more smoothies…’). Base the decision on your real habits.
Now, let’s talk about the items you put aside because you were unsure. The ‘Maybe’ pile. This could include sentimental items (Grandma’s rolling pin), gadgets you’re not sure about, or anything that caused decision paralysis. It’s okay to have this pile, but it needs a deadline. One popular method is the **’Maybe Box’**. Put all these items in a box, seal it, and write the date six months from now on it. Store it somewhere out of the way (attic, garage, closet). If you haven’t needed or thought about anything in that box by the deadline, donate the entire unopened box. No second guessing. Is this the best approach? Maybe not for truly precious heirlooms, but for general clutter, it’s effective. For sentimental items you *do* want to keep but don’t use, could they be displayed elsewhere in the house, rather than taking up prime kitchen real estate? Be honest, be thoughtful, but also be decisive. The goal is a functional kitchen, not a museum of unused items.
Keeping the Momentum: Life After the Declutter
Whew. We did it. Or, you did it. Take a moment, look around your kitchen. Doesn’t it feel… lighter? More spacious? More potential? The hard part, the big purge, is over. But the challenge isn’t *really* finished. Now comes the maintenance phase, which, let’s be honest, can sometimes be harder than the initial blitz. The key is shifting habits. Try the ‘one in, one out’ rule: when you buy a new kitchen item (mug, gadget, whatever), an old one has to go. Tidy up as you go – wash dishes or load the dishwasher immediately after cooking, wipe down counters daily. Put things back where they belong *right away*, don’t just set them on the counter ‘for later’. It takes conscious effort initially, but it becomes second nature.
Don’t expect perfection. Life happens. Things will get a little messy again sometimes. That’s okay. The difference is that now you have systems in place, designated homes for things. A quick 15-minute reset each evening or once a week can keep things largely under control. Revisit trouble spots periodically – maybe that utensil drawer starts to get chaotic again after a few months. Take 20 minutes to re-sort it. It’s much easier to maintain than to face another massive overhaul down the road. Maybe I should clarify… this isn’t about rigid minimalism for everyone. It’s about creating a kitchen that serves *you* and your lifestyle, reducing friction and increasing enjoyment. Your version of decluttered might look different from mine, and that’s perfectly fine.
So, what now? I guess the real question is, how does this newfound kitchen order influence other parts of life? It sounds a bit philosophical, maybe, but I genuinely believe our external environment reflects our internal state, and vice-versa. A calmer kitchen might just lead to calmer cooking, maybe even calmer thoughts? Or am I just projecting because Luna finally settled down for a nap? Perhaps. But I challenge you to observe: notice how you feel using your kitchen now. Notice if it changes how you cook, how you eat, how you start your day. The kitchen declutter challenge is more than just cleaning; it’s about intentionally designing a space – and maybe a mindset – that supports you better. What will you do with that reclaimed space and energy?
FAQ
Q: How long should this kitchen declutter challenge take?
A: It really depends on the size of your kitchen and the amount of clutter. Some people tackle it in a weekend, others prefer doing one zone (like countertops or a single drawer) per day over a week or two. Don’t rush! It’s better to be thorough than fast. I’d suggest blocking out at least a few hours per major section (counters, drawers, cabinets, pantry/fridge).
Q: I live with roommates/family. How do I declutter shared kitchen items?
A: Communication is key! Get everyone involved if possible. Discuss the ‘why’ and the plan. For shared items, you’ll need consensus on what to keep and discard. Maybe designate specific shelves or drawers for each person’s items if space allows. If others aren’t on board, focus on decluttering your own items and the common areas you’re primarily responsible for maintaining.
Q: What do I do with all the stuff I’m getting rid of?
A: Items in good condition can be donated to thrift stores, shelters, or community organizations. Some things might be suitable for selling online (Facebook Marketplace, eBay) or at a garage sale. Broken or unusable items should be trashed responsibly – check local recycling guidelines for things like metal pans or certain plastics. Avoid just throwing everything in the landfill if possible.
Q: How do I deal with sentimental kitchen items I don’t use but can’t bear to part with?
A: This is tough. First, be sure it’s genuine sentiment, not just guilt or obligation. If it’s truly meaningful, consider if it can be displayed elsewhere as decor (e.g., Grandma’s pretty platter on a wall hanger). If it must stay in the kitchen, give it an honored, protected spot, perhaps on a higher shelf, not buried under everyday clutter. You could also take a photo of the item to keep the memory, then let the physical object go if it’s causing significant storage issues. There’s no single right answer here; do what feels right for you, balancing sentiment with functional space.
You might also like
- Small Kitchen Storage Hacks to Maximize Space
- Pantry Organization Ideas for Every Budget
- Sustainable Kitchen Practices to Reduce Waste
@article{kitchen-declutter-challenge-a-step-by-step-nashville-journey,
    title   = {Kitchen Declutter Challenge: A Step-by-Step Nashville Journey},
    author  = {Chef's icon},
    year    = {2025},
    journal = {Chef's Icon},
    url     = {https://chefsicon.com/kitchen-declutter-challenge-step-by-step/}
} 

