The Best Fluffy Pancakes recipe you will fall in love with. Full of tips and tricks to help you make the best pancakes.
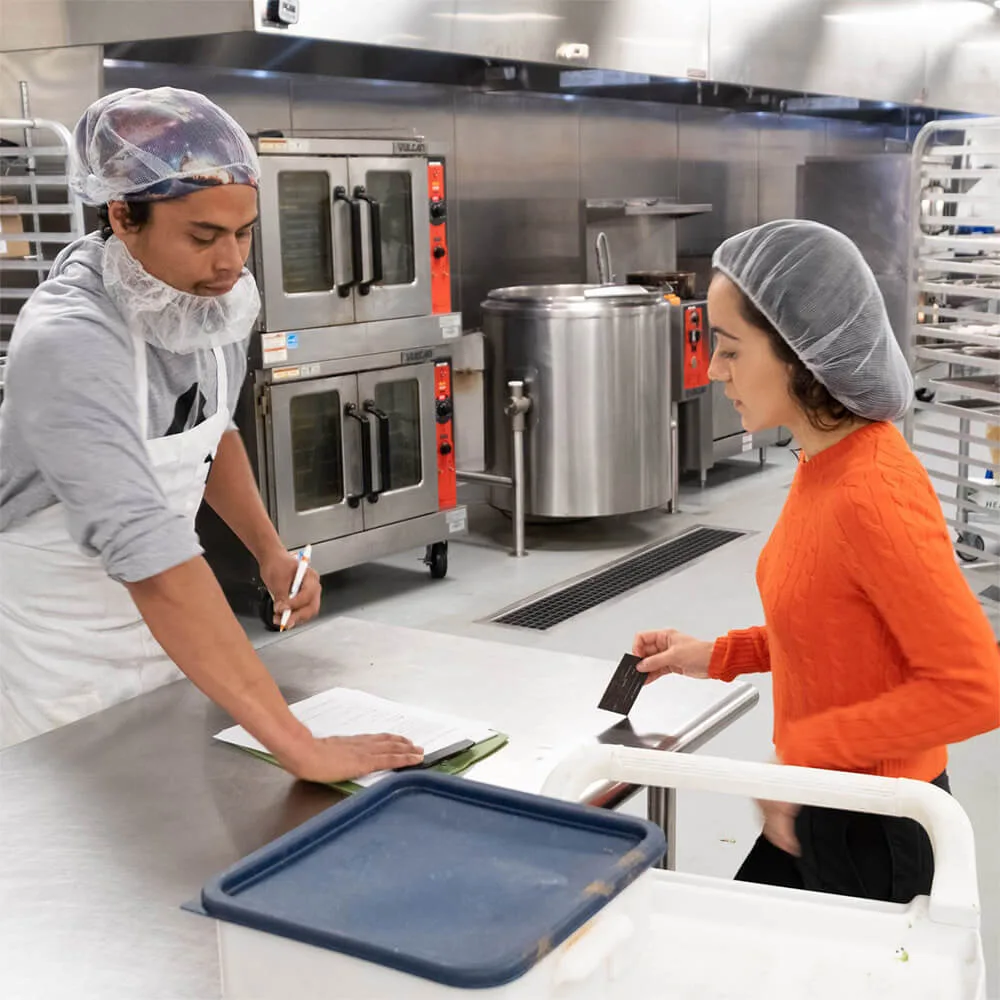
I’ll never forget the first time I stepped into a real restaurant kitchen. It was a tiny Italian place in San Francisco, the kind with checkered tablecloths and a wine list scribbled on a chalkboard. The chef, a guy named Marco with a permanent five o’clock shadow and a cigarette tucked behind his ear (this was pre-smoking-ban, obviously), let me hang around during prep. I watched as he moved like a dancer, searing steaks on a flattop that hissed like a dragon, tossing pasta in a colander the size of a small bathtub, and plating dishes with the precision of a surgeon. “You home cooks,” he said, wiping his hands on a towel that had seen better days, “you’re all doing it wrong.”
Now, I’m not here to tell you you’re doing it *wrong*. But I *am* here to say there’s a whole world of techniques professional kitchens use that can transform your home cooking, if you know how to adapt them. The problem? Most commercial kitchen methods are designed for volume, speed, and consistency at a scale that would make your average home cook’s head spin. A restaurant might go through 50 pounds of onions in a night; you’re probably using one or two. Their ovens can hold 20 sheet pans at once; yours might fit one. Their walk-in fridge is the size of your bedroom; yours is… well, you get the idea.
So how do you take those pro techniques and scale them down without losing what makes them special? That’s what we’re diving into today. We’ll talk about mise en place (but for people who don’t have a team of prep cooks), high-heat searing (without setting off your smoke alarm), batch cooking (without ending up with a freezer full of sad leftovers), and a dozen other tricks that’ll make your home kitchen feel like a Michelin-starred operation, just, you know, smaller. And cheaper. And with less yelling.
Is this the *only* way to cook at home? Of course not. But if you’ve ever watched a cooking show and thought, “How the hell do they make it look so easy?” or stared at a recipe that calls for “a pinch of salt” and wondered how much salt actually fits in a pinch (spoiler: it’s more than you think), this is for you. Let’s get into it.
The Mindset Shift: Thinking Like a Pro (Without the Stress)
Why Commercial Techniques Matter for Home Cooks
Here’s the thing about commercial kitchens: they’re not just bigger versions of your home setup. They’re designed for efficiency, repetition, and precision in ways that most home kitchens aren’t. But that doesn’t mean you can’t borrow from their playbook. The key is understanding *why* they do things the way they do, and then figuring out how to adapt those principles to your space, your tools, and your life.
Take mise en place, for example. In a restaurant, this isn’t just about chopping veggies ahead of time; it’s about having *everything* ready to go so that when the tickets start flying in, you’re not scrambling. At home, you might not have 20 orders of coq au vin coming in at once, but you *do* have a hungry family or roommates or just your own growling stomach to contend with. Applying mise en place at home means less stress, fewer forgotten ingredients, and dishes that come together like clockwork. (Or at least like a well-rehearsed community theater production.)
But here’s where it gets tricky: commercial kitchens also rely on tools and techniques that don’t always translate directly to a home setup. A pro kitchen might have a combi oven that can steam, roast, and bake all at once; you’ve got a single oven that’s probably fighting with your dishwasher for space. They’ve got a tilt skillet the size of a bathtub; you’ve got a 10-inch cast-iron skillet that’s seen better days. So the challenge isn’t just *what* to borrow from commercial kitchens, it’s *how* to borrow it in a way that actually works for you.
I’m torn between two approaches here. On one hand, I want to give you a step-by-step guide to scaling down specific techniques. On the other, I think it’s more important to start with the *mindset* behind these methods. Because once you understand the *why*, the *how* becomes a lot easier. So let’s start there: what does it mean to think like a pro, even if you’re just cooking for one (or two, or four)?
The Three Pillars of Pro Cooking (That You Can Steal)
After years of talking to chefs, working in kitchens (badly, at first), and trying to bring some of that magic home, I’ve noticed that commercial cooking really comes down to three core principles. These aren’t just about recipes or tools, they’re about how you *approach* cooking. And the best part? You don’t need a $50,000 oven to apply them.
-
Prep is everything. In a restaurant, prep isn’t just a step, it’s a religion. Chefs spend hours (sometimes *days*) getting ingredients ready before service even starts. At home, this might look like washing and chopping veggies the night before, measuring out spices in advance, or even just reading the recipe all the way through before you start. The goal is to eliminate as many “oh crap, I forgot the garlic” moments as possible. (And yes, we’ve all been there.)
-
Heat is your friend (but it’s also a fickle one). Commercial kitchens use high heat for a reason: it’s the fastest way to develop flavor, create texture, and get food on the plate. At home, high heat can feel intimidating, what if you burn something? What if the smoke alarm goes off? But here’s the thing: you don’t need a 10,000 BTU burner to get pro-level results. You just need to understand how heat works and how to control it. (More on that later.)
-
Consistency is king. In a restaurant, the same dish should taste the same every time. That’s why chefs use standardized recipes, precise measurements, and repeatable techniques. At home, this might mean writing down what you did (even if it’s just a note in your phone) so you can recreate your best dishes. Or it might mean learning to eyeball measurements instead of relying on guesswork. (Spoiler: most home cooks under-season their food. Don’t be that person.)
Now, I know what you’re thinking: “This all sounds great, but my kitchen is the size of a shoebox and my knife skills are… let’s just say they’re a work in progress.” And that’s okay! The point isn’t to turn your home kitchen into a Michelin-starred restaurant. It’s to borrow the *principles* that make commercial cooking so effective and adapt them to your space, your tools, and your life. So let’s get into the nitty-gritty: how do you actually *do* this?
Mise en Place: The Art of Being Ready (Without Losing Your Mind)
What Mise en Place Really Means (And Why It’s Not Just for Chefs)
If you’ve ever watched a cooking show, you’ve heard the term mise en place. It’s French for “everything in its place,” and in a restaurant, it’s the difference between a smooth service and total chaos. But here’s the thing: mise en place isn’t just about chopping veggies ahead of time. It’s about mental preparation as much as it is about physical prep. It’s about knowing what’s coming next, anticipating problems, and having a plan for when things go sideways (and they *will* go sideways).
At home, mise en place can feel like overkill. Do you *really* need to measure out your spices before you start cooking? Do you *really* need to chop all your veggies before you turn on the stove? The answer is: it depends. If you’re making a quick weeknight dinner, maybe not. But if you’re tackling a more complex recipe, or if you’re the kind of person who forgets to add the onions until the very end, then yes, mise en place can be a game-changer.
Here’s how I think about it: mise en place is like packing for a trip. You could throw everything into a suitcase at the last minute and hope for the best, or you could take five minutes to make a list, check the weather, and pack accordingly. The first approach might work… until you realize you forgot your toothbrush or your favorite pair of socks. The second approach takes a little more effort upfront, but it saves you a *lot* of stress later.
So how do you apply mise en place at home without feeling like you’re running a restaurant? Start small. Here’s what that might look like:
- Read the recipe all the way through before you start. (I know, I know, this seems obvious. But you’d be surprised how many people skip this step.)
- Gather all your ingredients and tools in one place. No more running back and forth between the fridge and the pantry.
- Chop your veggies, measure your spices, and prep any other ingredients before you turn on the stove. This is especially important for stir-fries, where timing is everything.
- Clean as you go. This isn’t technically part of mise en place, but it’s a pro habit that’ll save you a ton of time later.
Is this the best approach for every meal? Probably not. But if you’re making something new or complex, it’s worth the extra effort. And the more you do it, the more natural it’ll feel.
Scaling Down Mise en Place for Home Cooks
Now, let’s talk about the elephant in the room: space. Most home kitchens don’t have the counter space (or the prep cooks) to lay out everything like a cooking show. So how do you adapt mise en place to a smaller space? Here are a few tricks I’ve picked up over the years:
-
Use small bowls or ramekins. You don’t need a dozen prep bowls like the pros. A few small ramekins or even coffee mugs can work just as well for holding prepped ingredients. (Bonus: they’re easy to clean and stack when you’re done.)
-
Prep in stages. If you’re making a dish with multiple components (like a stir-fry with veggies, protein, and sauce), prep one component at a time and set it aside. This keeps your workspace from getting cluttered and makes it easier to stay organized.
-
Label everything. This might seem like overkill, but if you’re prepping ingredients ahead of time (say, for a big dinner party), labeling can save you a lot of headaches. Use masking tape and a marker, or just write directly on the bowl with a dry-erase marker.
-
Embrace the “prep station.” If you’re really tight on space, designate one area of your kitchen (like a cutting board over the sink) as your prep station. Keep all your tools and ingredients in that one spot to minimize clutter.
I’ll be honest: mise en place can feel tedious at first. It’s easy to think, “I don’t have time for this,” especially on a busy weeknight. But here’s the thing: the more you do it, the faster you’ll get. And the less you’ll have to scramble mid-cook because you forgot to chop the garlic or measure the soy sauce. It’s one of those habits that pays off in spades once it becomes second nature.
High-Heat Cooking: How to Get Pro-Level Sear Without Burning Down Your Kitchen
Why High Heat Matters (And How to Control It at Home)
If there’s one thing that separates restaurant food from home cooking, it’s heat. Commercial kitchens use high heat for a reason: it’s the fastest way to develop flavor, create texture, and get food on the plate. Think about it: when you sear a steak in a cast-iron skillet, the high heat creates a Maillard reaction (that’s the fancy term for browning), which adds depth and complexity to the flavor. When you roast vegetables at high heat, the edges caramelize, bringing out their natural sweetness. And when you stir-fry, the high heat ensures that your veggies stay crisp and your protein cooks quickly without drying out.
But here’s the problem: most home kitchens aren’t designed for high-heat cooking. Your stove might not get hot enough, your oven might not distribute heat evenly, and your smoke alarm is probably a little too sensitive. So how do you get those pro-level results without setting off the fire department?
First, let’s talk about heat sources. In a commercial kitchen, you’ve got a few options:
- Gas burners: These are the gold standard for high-heat cooking. They heat up quickly, cool down quickly, and give you precise control over the flame.
- Flat-top grills: These are great for searing, grilling, and even cooking eggs. They distribute heat evenly and can get *scorching* hot.
- Charcoal or wood-fired grills: These add smoky flavor and can get insanely hot, but they’re not always practical for everyday cooking.
- Combi ovens: These are like the Swiss Army knives of the kitchen. They can steam, roast, bake, and even sous vide, all at precise temperatures.
At home, your options are more limited. Most home cooks have either a gas or electric stove, with maybe a toaster oven or air fryer thrown in for good measure. But that doesn’t mean you can’t get great results. It just means you have to be a little more strategic.
Here’s how I think about it: high-heat cooking at home is all about maximizing what you’ve got. If you’ve got a gas stove, you’re in luck, gas burners heat up quickly and give you more control over the flame. If you’ve got an electric stove, you might need to preheat your pan a little longer to get it hot enough. And if you’re using an oven, you might need to crank up the heat and keep an eye on things to make sure they don’t burn.
Tools and Techniques for High-Heat Cooking at Home
Okay, so you’re sold on the idea of high-heat cooking. But how do you actually *do* it without burning everything to a crisp? Here are a few tools and techniques that’ll help:
-
Use the right pan. Not all pans are created equal when it comes to high-heat cooking. Here’s what to look for:
- Cast iron: This is the gold standard for high-heat cooking at home. It retains heat well, distributes it evenly, and can get *scorching* hot. The downside? It’s heavy and requires a little more maintenance (like seasoning) to keep it in good shape.
- Carbon steel: This is like cast iron’s lighter, more nimble cousin. It heats up quickly, cools down quickly, and is great for stir-frying. The downside? It’s not as nonstick as cast iron, so you’ll need to season it regularly.
- Stainless steel: This is a great all-purpose option, especially if you’re cooking with acidic ingredients (like tomatoes or wine). It doesn’t retain heat as well as cast iron or carbon steel, but it’s durable and easy to clean.
- Nonstick: This is the easiest option for beginners, but it’s not ideal for high-heat cooking. Most nonstick pans can’t handle temperatures above 500°F, and they can release toxic fumes if they get too hot. If you’re going to use nonstick, stick to low or medium heat.
-
Preheat your pan. This is *crucial* for high-heat cooking. If your pan isn’t hot enough, your food will steam instead of sear, and you’ll end up with a sad, soggy mess. Here’s how to tell if your pan is ready:
- For a cast-iron or carbon steel pan, heat it over medium-high heat for about 5 minutes. To test if it’s ready, flick a few drops of water onto the surface. If the water sizzles and evaporates immediately, your pan is hot enough.
- For a stainless steel pan, heat it over medium-high heat for about 3-4 minutes. To test if it’s ready, add a drop of oil to the pan. If it shimmers and moves around easily, your pan is hot enough.
-
Use the right oil. Not all oils are created equal when it comes to high-heat cooking. Some oils have a low smoke point (the temperature at which they start to break down and release smoke), which can make your food taste burnt and your kitchen smell like a grease fire. Here’s what to look for:
- Avocado oil: This has a smoke point of around 520°F, making it one of the best options for high-heat cooking. It’s also neutral in flavor, so it won’t overpower your food.
- Refined coconut oil: This has a smoke point of around 450°F, which is still pretty high. It’s a good option if you like the flavor of coconut, but it can be expensive.
- Peanut oil: This has a smoke point of around 450°F and is a staple in many Asian cuisines. It’s great for stir-frying and deep-frying.
- Vegetable or canola oil: These have smoke points of around 400°F, which is still pretty high. They’re affordable and widely available, but they’re not as stable as some of the other options.
Avoid using olive oil (especially extra-virgin) for high-heat cooking. It has a low smoke point (around 375°F), which means it can break down and release smoke at high temperatures. Save it for low-heat cooking or finishing dishes.
-
Don’t overcrowd the pan. This is one of the biggest mistakes home cooks make when trying to cook at high heat. If you crowd the pan, your food will steam instead of sear, and you’ll end up with a soggy, sad mess. Here’s how to avoid it:
- Cook in batches. If you’re searing a bunch of chicken thighs, cook them in two batches instead of cramming them all into the pan at once. It’ll take a little longer, but the results will be *so* much better.
- Use a larger pan. If you’re cooking for a crowd, invest in a larger pan (like a 12-inch cast-iron skillet) so you can fit more food without overcrowding.
- Give your food space. When you’re adding food to the pan, make sure there’s at least an inch or two of space between each piece. This allows the heat to circulate and ensures that your food sears instead of steams.
I’ll be honest: high-heat cooking can be intimidating at first. It’s easy to burn things, set off the smoke alarm, or end up with a kitchen that smells like a grease fire. But once you get the hang of it, it’s *so* worth it. The flavors, the textures, the *sizzle*-it’s what makes restaurant food taste so damn good. And the best part? You don’t need a commercial kitchen to get those results. You just need the right tools, the right techniques, and a little bit of practice.
Batch Cooking: How to Cook Once and Eat All Week (Without Hating Your Life)
The Pros and Cons of Batch Cooking at Home
Batch cooking is one of those things that sounds amazing in theory but can be a total disaster in practice. I’ve been there: you spend all Sunday cooking up a storm, only to realize by Wednesday that you’re *so* sick of eating the same thing that you’d rather order takeout than look at another serving of chili. Or worse, you end up with a freezer full of sad, freezer-burned leftovers that you’ll never actually eat.
But here’s the thing: when done right, batch cooking can be a *game-changer*. It saves you time, money, and stress during the week. It ensures that you always have something healthy and delicious to eat, even on your busiest days. And it can help you reduce food waste by using up ingredients before they go bad. The key is to scale down the techniques that restaurants use to make batch cooking work for a home kitchen.
So what does batch cooking look like in a commercial kitchen? In a restaurant, batch cooking is all about efficiency and consistency. Chefs prep large quantities of ingredients (like sauces, stocks, and proteins) ahead of time so they can assemble dishes quickly during service. They use portion control to ensure that every dish is the same size and quality. And they rely on proper storage techniques to keep food fresh and safe to eat.
At home, batch cooking looks a little different. You’re not cooking for hundreds of people, so you don’t need to make massive quantities of food. But you *can* borrow some of the same principles to make batch cooking work for you. Here’s how:
-
Focus on versatile ingredients. In a restaurant, chefs prep ingredients that can be used in multiple dishes (like roasted vegetables, cooked grains, and proteins). At home, you can do the same thing. For example, roasted sweet potatoes can be used in bowls, salads, tacos, and more. Cooked quinoa can be used in salads, stir-fries, and soups. And grilled chicken can be used in sandwiches, wraps, and pasta dishes.
-
Use portion control. In a restaurant, portion control is all about consistency. At home, it’s more about not overcooking. If you’re batch cooking proteins (like chicken or ground beef), cook them in smaller batches so they don’t dry out. And if you’re cooking grains (like rice or quinoa), measure out the water carefully to avoid ending up with a mushy mess.
-
Store food properly. In a restaurant, food is stored in airtight containers at the right temperature to keep it fresh and safe to eat. At home, you can do the same thing. Invest in a set of glass or BPA-free plastic containers with tight-fitting lids. Store food in the fridge for up to 4 days, or in the freezer for up to 3 months. And label everything with the date so you know when it was made.
-
Reheat food properly. In a restaurant, food is reheated quickly and evenly to preserve its texture and flavor. At home, you can do the same thing. For best results, reheat food in the oven or on the stovetop instead of the microwave. If you’re reheating in the oven, spread the food out on a baking sheet and cover it with foil to keep it from drying out. If you’re reheating on the stovetop, add a splash of water or broth to keep the food moist.
I’m torn between two approaches here. On one hand, I want to give you a step-by-step guide to batch cooking. On the other, I think it’s more important to talk about the *mindset* behind it. Because batch cooking isn’t just about cooking a lot of food at once, it’s about planning ahead, being organized, and making the most of your time. So let’s talk about that.
How to Batch Cook Without Losing Your Mind
Batch cooking can feel overwhelming, especially if you’re new to it. But it doesn’t have to be. Here’s how to make it work for you:
-
Start small. You don’t have to cook a week’s worth of meals in one day. Start with just one or two dishes, and see how it goes. For example, you could cook a big batch of chili and a big batch of rice, and then mix and match them throughout the week.
-
Plan ahead. Before you start cooking, make a list of what you want to make and what ingredients you’ll need. Check your pantry and fridge to see what you already have, and make a grocery list for the rest. This’ll save you time and money, and it’ll ensure that you don’t forget anything.
-
Use the right tools. Batch cooking requires a few key tools, like a large pot, a baking sheet, and a set of airtight containers. If you don’t have these things, invest in them. They’ll make your life *so* much easier.
-
Cook in stages. If you’re making multiple dishes, cook them in stages so you don’t get overwhelmed. For example, you could roast your vegetables first, then cook your grains, and then cook your proteins. This’ll help you stay organized and ensure that everything cooks evenly.
-
Clean as you go. Batch cooking can be messy, but it doesn’t have to be. Clean as you go to keep your workspace tidy and make cleanup easier. For example, you could wash your cutting board and knife while your vegetables are roasting, or wipe down your counters while your grains are cooking.
-
Store food properly. Once your food is cooked, store it in airtight containers in the fridge or freezer. Label everything with the date so you know when it was made, and make sure to reheat it properly before eating.
-
Mix and match. One of the biggest mistakes people make with batch cooking is eating the same thing every day. To avoid this, mix and match your ingredients to create different meals. For example, you could use your roasted vegetables in a salad one day, in a wrap the next, and in a stir-fry the day after that.
I’ll be honest: batch cooking isn’t for everyone. It takes time, effort, and planning. But if you’re willing to put in the work, it can be a *game-changer*. It’ll save you time, money, and stress during the week. It’ll ensure that you always have something healthy and delicious to eat. And it’ll help you reduce food waste by using up ingredients before they go bad. So give it a try, you might be surprised by how much you like it.
Knife Skills: How to Chop Like a Chef (Without Losing a Finger)
Why Knife Skills Matter (And How to Improve Yours)
If there’s one thing that separates professional chefs from home cooks, it’s knife skills. In a restaurant, chefs spend *hours* chopping, dicing, and slicing ingredients. They do it quickly, efficiently, and, most importantly, safely. At home, most of us treat our knives like an afterthought. We hack away at onions with a dull blade, we use the wrong knife for the job, and we end up with unevenly chopped ingredients that cook at different rates.
But here’s the thing: good knife skills aren’t just about speed or showmanship. They’re about efficiency, safety, and consistency. When you chop ingredients evenly, they cook at the same rate, which means your food turns out better. When you use the right knife for the job, you’re less likely to hurt yourself. And when you know how to hold and use your knife properly, you can chop ingredients *so* much faster.
So how do you improve your knife skills at home? Here are a few tips:
-
Use the right knife. Not all knives are created equal. Here’s what to look for:
- Chef’s knife: This is the workhorse of the kitchen. It’s great for chopping, dicing, and slicing a wide variety of ingredients. Look for one that’s 8-10 inches long and feels comfortable in your hand.
- Paring knife: This is a small knife (usually 3-4 inches long) that’s great for peeling, trimming, and other detailed work.
- Serrated knife: This is great for slicing bread, tomatoes, and other delicate ingredients that might crush under the pressure of a chef’s knife.
-
Keep your knives sharp. A dull knife is more dangerous than a sharp one. It requires more force to cut through ingredients, which means it’s more likely to slip and cause an injury. Invest in a good sharpening stone or honing steel, and learn how to use it properly. (Or take your knives to a professional to get them sharpened.)
-
Learn the proper grip. There are two main ways to hold a knife:
- The pinch grip: This is the most common grip among professional chefs. Pinch the blade of the knife between your thumb and index finger, and wrap your other fingers around the handle. This gives you more control and precision.
- The handle grip: This is the most common grip among home cooks. Wrap your fingers around the handle of the knife, with your thumb and index finger resting on either side of the blade. This grip is less precise, but it’s more comfortable for some people.
-
Practice the basic cuts. There are a few basic cuts that every home cook should know:
- Chopping: This is the most basic cut. It’s great for onions, garlic, herbs, and other ingredients that don’t need to be perfectly uniform.
- Dicing: This is a more precise cut. It’s great for vegetables that need to cook evenly, like potatoes or carrots.
- Slicing: This is great for ingredients that need to be thin and even, like tomatoes or cucumbers.
- Julienning: This is a thin, matchstick cut. It’s great for stir-fries and salads.
-
Use a cutting board. Always use a cutting board when chopping ingredients. This protects your countertops and your knife, and it gives you a stable surface to work on. Look for a cutting board that’s large enough to hold your ingredients, and make sure it’s made of a material that won’t dull your knife (like wood or plastic).
I’ll be honest: improving your knife skills takes time and practice. It’s not something you can master overnight. But the more you do it, the better you’ll get. And the better you get, the faster, safer, and more efficient you’ll be in the kitchen. So grab a knife, grab an onion, and start practicing. Your future self will thank you.
Scaling Down Commercial Knife Techniques for Home Cooks
In a commercial kitchen, knife skills are all about speed, precision, and efficiency. Chefs chop ingredients quickly and evenly, so they cook at the same rate and look beautiful on the plate. They use specialized techniques (like the claw grip and the rock chop) to maximize their speed and control. And they rely on sharp knives and stable cutting boards to make the job easier.
At home, you don’t need to chop ingredients as quickly as a professional chef. But you *can* borrow some of their techniques to make your chopping faster, safer, and more efficient. Here’s how:
-
Use the claw grip. This is the safest and most efficient way to hold ingredients while chopping. Curl your fingers under, with your fingertips tucked in and your knuckles facing the blade of the knife. This protects your fingertips from the knife and gives you more control over the ingredient.
-
Master the rock chop. This is the most common chopping technique among professional chefs. Hold the knife with the pinch grip, and rock the blade back and forth over the ingredient, keeping the tip of the knife in contact with the cutting board. This allows you to chop ingredients quickly and evenly.
-
Use a stable cutting board. In a restaurant, chefs use large, heavy cutting boards that don’t move around while they’re chopping. At home, you can achieve the same stability by placing a damp towel or a non-slip mat under your cutting board. This keeps it from sliding around and makes chopping safer and more efficient.
-
Keep your knives sharp. A sharp knife is safer and more efficient than a dull one. It requires less force to cut through ingredients, which means it’s less likely to slip and cause an injury. Invest in a good sharpening stone or honing steel, and learn how to use it properly. (Or take your knives to a professional to get them sharpened.)
-
Practice, practice, practice. The more you chop, the better you’ll get. Start with easy ingredients (like onions and carrots), and work your way up to more challenging ones (like herbs and leafy greens). And don’t be afraid to make mistakes, everyone does at first.
I’m torn between two approaches here. On one hand, I want to give you a step-by-step guide to mastering the rock chop. On the other, I think it’s more important to talk about the *mindset* behind good knife skills. Because once you understand the *why*, the *how* becomes a lot easier. So let’s talk about that.
Good knife skills aren’t just about speed or showmanship. They’re about efficiency, safety, and consistency. When you chop ingredients evenly, they cook at the same rate, which means your food turns out better. When you use the right knife for the job, you’re less likely to hurt yourself. And when you know how to hold and use your knife properly, you can chop ingredients *so* much faster. So grab a knife, grab an onion, and start practicing. Your future self will thank you.
Sauces and Stocks: How to Build Flavor Like a Pro
The Secret to Restaurant-Quality Sauces (That You Can Make at Home)
If there’s one thing that makes restaurant food taste so damn good, it’s sauces. A great sauce can elevate even the simplest dish, adding depth, richness, and complexity. In a commercial kitchen, chefs spend *hours* making sauces from scratch, reducing stocks, emulsifying butter, and balancing flavors to perfection. At home, most of us rely on store-bought sauces or quick pan sauces that we whip up at the last minute. And while there’s nothing wrong with that, there’s something *magical* about a sauce that’s been simmered, reduced, and perfected over time.
So how do you make restaurant-quality sauces at home? Here are a few tips:
-
Start with a good stock. In a restaurant, chefs make stock from scratch using bones, vegetables, and aromatics. At home, you can do the same thing. It takes time, but the results are *so* worth it. If you don’t have time to make stock from scratch, you can use store-bought stock as a base. Just make sure it’s high-quality and low-sodium, so you can control the seasoning.
-
Reduce, reduce, reduce. One of the biggest differences between restaurant sauces and home sauces is reduction. In a restaurant, chefs simmer sauces for *hours* to concentrate the flavors and create a rich, velvety texture. At home, you can do the same thing, just on a smaller scale. Simmer your sauce over low heat until it’s reduced by about half, and you’ll be amazed by how much more flavorful it is.
-
Emulsify like a pro. Emulsification is the process of combining two liquids that don’t normally mix (like oil and vinegar). In a restaurant, chefs use emulsifiers (like mustard, egg yolks, or butter) to create smooth, creamy sauces. At home, you can do the same thing. For example, you can make a pan sauce by deglazing your pan with wine or stock, reducing it, and then whisking in cold butter to create a rich, velvety sauce.
-
Balance your flavors. A great sauce is all about balance. It should have a mix of sweet, salty, sour, and umami flavors, with none of them overpowering the others. In a restaurant, chefs taste and adjust their sauces constantly to achieve the perfect balance. At home, you can do the same thing. Taste your sauce as you go, and adjust the seasoning as needed. If it’s too sweet, add a splash of vinegar or lemon juice. If it’s too salty, add a pinch of sugar or a splash of water. And if it’s lacking depth, add a splash of soy sauce or Worcestershire sauce to boost the umami.
-
Finish with fresh herbs and aromatics. In a restaurant, chefs finish their sauces with fresh herbs, citrus zest, or other aromatics to add brightness and complexity. At home, you can do the same thing. For example, you can finish a tomato sauce with fresh basil, a pan sauce with fresh parsley, or a curry sauce with fresh cilantro.
I’ll be honest: making sauces from scratch takes time and effort. But the results are *so* worth it. A great sauce can elevate even the simplest dish, adding depth, richness, and complexity. And the best part? You don’t need a commercial kitchen to make it happen. You just need a few key ingredients, a little bit of patience, and a willingness to experiment.
How to Make Stock Like a Chef (Without the Giant Pot)
Stock is the backbone of great cooking. It’s the base for soups, sauces, and braises, and it adds depth and richness to everything it touches. In a commercial kitchen, chefs make stock in huge batches using bones, vegetables, and aromatics. They simmer it for *hours* (sometimes *days*) to extract every last bit of flavor. At home, most of us rely on store-bought stock or bouillon cubes. And while there’s nothing wrong with that, there’s something *magical* about a stock that’s been simmered, strained, and perfected over time.
So how do you make stock like a chef at home? Here’s how:
-
Start with the right ingredients. In a restaurant, chefs use bones, vegetables, and aromatics to make stock. At home, you can do the same thing. For a chicken stock, use chicken bones (or a whole chicken), onions, carrots, celery, garlic, and herbs (like thyme, parsley, and bay leaves). For a beef stock, use beef bones, onions, carrots, celery, garlic, and herbs. And for a vegetable stock, use onions, carrots, celery, garlic, mushrooms, and herbs.
-
Roast your ingredients first. In a restaurant, chefs roast their bones and vegetables before simmering them to add depth and complexity to the stock. At home, you can do the same thing. Spread your bones and vegetables on a baking sheet, drizzle them with oil, and roast them in a 400°F oven for about 30-45 minutes, until they’re golden brown and caramelized.
-
Simmer, don’t boil. In a restaurant, chefs simmer their stock gently to extract the flavors without making it cloudy. At home, you can do the same thing. Bring your stock to a gentle simmer (you should see a few bubbles breaking the surface, but not a rolling boil), and then reduce the heat to low. Simmer your stock for 4-6 hours for chicken or vegetable stock, and 8-10 hours for beef stock.
-
Skim the foam. In a restaurant, chefs skim the foam that rises to the surface of the stock to keep it clear and clean. At home, you can do the same thing. Use a slotted spoon or a fine-mesh skimmer to remove the foam as it rises to the surface.
-
Strain and store. In a restaurant, chefs strain their stock through a fine-mesh sieve or cheesecloth to remove any impurities. At home, you can do the same thing. Strain your stock through a fine-mesh sieve, and then store it in the fridge for up to 4 days, or in the freezer for up to 3 months.
I’ll be honest: making stock from scratch takes time and effort. But the results are *so* worth it. A great stock can elevate even the simplest dish, adding depth, richness, and complexity. And the best part? You don’t need a commercial kitchen to make it happen. You just need a few key ingredients, a little bit of patience, and a willingness to experiment.
Plating Like a Pro: How to Make Your Food Look as Good as It Tastes
Why Plating Matters (And How to Do It at Home)
Let’s be real: we eat with our eyes first. In a restaurant, chefs spend *hours* perfecting the plating of their dishes, using color, texture, and arrangement to make food look as good as it tastes. At home, most of us slap our food onto a plate and call it a day. And while there’s nothing wrong with that, there’s something *magical* about a dish that’s been plated with care and attention to detail.
So how do you plate like a pro at home? Here are a few tips:
-
Use the right plate. In a restaurant, chefs choose plates that complement their dishes, using color, shape, and size to enhance the presentation. At home, you can do the same thing. For example, you can use a white plate to make colorful ingredients pop, or a dark plate to create contrast with light-colored ingredients. And you can use a large plate to create a sense of abundance, or a small plate to make a dish feel more intimate.
-
Think about color. In a restaurant, chefs use color to make their dishes look vibrant and appetizing. At home, you can do the same thing. For example, you can pair green vegetables (like asparagus or broccoli) with red sauces (like tomato or beet), or orange vegetables (like carrots or sweet potatoes) with green sauces (like pesto or chimichurri).
-
Play with texture. In a restaurant, chefs use texture to create visual interest and contrast. At home, you can do the same thing. For example, you can pair crispy elements (like fried onions or croutons) with creamy elements (like mashed potatoes or risotto), or soft elements (like poached eggs or steamed fish) with crunchy elements (like toasted nuts or seeds).
-
Use the rule of thirds. In a restaurant, chefs use the rule of thirds to create balanced, visually appealing plates. At home, you can do the same thing. Imagine your plate is divided into a 3×3 grid, and place your ingredients along the lines and intersections. This creates a sense of balance and harmony, and it makes your dish look more professional.
-
Garnish with purpose. In a restaurant, chefs use garnishes to add color, texture, and flavor to their dishes. At home, you can do the same thing. For example, you can garnish a soup with fresh herbs, a salad with toasted nuts, or a dessert with fresh fruit. Just make sure your garnish is edible and enhances the dish, not just a pretty decoration.
I’ll be honest: plating like a pro takes time and practice. But the results are *so* worth it. A well-plated dish can elevate even the simplest meal, making it feel more special and more delicious. And the best part? You don’t need a commercial kitchen to make it happen. You just need a little bit of creativity, a little bit of patience, and a willingness to experiment.
Scaling Down Commercial Plating Techniques for Home Cooks
In a commercial kitchen, plating is all about precision, consistency, and visual appeal. Chefs use specialized tools (like squeeze bottles, tweezers, and ring molds) to create intricate, beautiful plates. They rely on standardized recipes and portion sizes to ensure that every dish looks the same. And they use color, texture, and arrangement to make their dishes look as good as they taste.
At home, you don’t need to plate like a Michelin-starred chef. But you *can* borrow some of their techniques to make your dishes look more professional. Here’s how:
-
Use a squeeze bottle. In a restaurant, chefs use squeeze bottles to drizzle sauces and purees onto their plates. At home, you can do the same thing. Fill a squeeze bottle with your favorite sauce, and use it to create elegant, precise lines on your plate. This adds visual interest and makes your dish look more professional.
-
Invest in a ring mold. In a restaurant, chefs use ring molds to create perfectly shaped portions of food (like risotto or mashed potatoes). At home, you can do the same thing. Use a ring mold to create neat, uniform portions of food, and then remove the mold to reveal a perfectly shaped dish.
-
Use tweezers or tongs. In a restaurant, chefs use tweezers or tongs to place delicate ingredients (like microgreens or edible flowers) onto their plates. At home, you can do the same thing. Use tweezers or tongs to gently place garnishes onto your dish, creating a sense of precision and care.
-
Play with height. In a restaurant, chefs use height to create visual interest and dimension on their plates. At home, you can do the same thing. For example, you can stack ingredients (like grilled vegetables or seared scallops) to create a towering, dramatic presentation. Or you can use a small bowl or ramekin to create a sense of elevation.
-
Keep it simple. In a restaurant, chefs often create elaborate, intricate plates with multiple components. At home, you don’t need to go overboard. Focus on one or two key ingredients, and let them shine. A simple, elegant plate can be just as beautiful as a complex one.
I’m torn between two approaches here. On one hand, I want to give you a step-by-step guide to plating like a pro. On the other, I think it’s more important to talk about the *mindset* behind great plating. Because once you understand the *why*, the *how* becomes a lot easier. So let’s talk about that.
Plating like a pro isn’t just about making your food look pretty. It’s about enhancing the dining experience, making your food look as good as it tastes, and creating a sense of occasion. It’s about paying attention to the details, and taking pride in your work. And it’s about sharing your love of food with the people you care about. So grab a plate, grab a squeeze bottle, and start experimenting. Your future self (and your dinner guests) will thank you.
Bringing It All Together: How to Apply Commercial Techniques in Your Home Kitchen
We’ve covered a lot of ground in this article-mise en place, high-heat cooking, batch cooking, knife skills, sauces, stocks, and plating. And if you’re feeling a little overwhelmed, I get it. There’s a *lot* to take in, and it’s easy to feel like you need to overhaul your entire cooking routine to see results. But here’s the thing: you don’t.
The key to applying commercial kitchen techniques at home is to start small. Pick one or two techniques that resonate with you, and focus on mastering those first. For example, you could start with mise en place, and spend a week prepping your ingredients ahead of time. Or you could focus on high-heat cooking, and practice searing steaks or stir-frying vegetables. Or you could dive into batch cooking, and spend a Sunday prepping meals for the week.
Once you’ve mastered one technique, move on to the next. And don’t be afraid to experiment, cooking is as much about creativity and intuition as it is about following rules. The more you cook, the more natural these techniques will feel, and the more confident you’ll become in the kitchen.
I’ll be honest: applying commercial kitchen techniques at home isn’t always easy. It takes time, effort, and practice. But the results are *so* worth it. When you cook like a pro, your food tastes better, looks better, and makes you feel more confident and capable in the kitchen. And the best part? You don’t need a commercial kitchen to make it happen. You just need a little bit of knowledge, a little bit of patience, and a willingness to experiment.
So what’s next? Maybe it’s time to invest in a good chef’s knife, or to practice your knife skills with an onion. Maybe it’s time to make stock from scratch, or to try batch cooking for the first time. Or maybe it’s time to plate your next meal like a pro, and see how it feels to eat with your eyes first.
Whatever you choose, remember this: cooking is a journey, not a destination. There’s always more to learn, more to explore, and more to discover. And the more you cook, the more you’ll grow as a cook, and the more you’ll enjoy the process.
So grab a knife, grab a pan, and get cooking. Your future self will thank you.
FAQ: Your Burning Questions About Commercial Kitchen Techniques for Home Cooks
Q: I don’t have a lot of counter space. How can I apply mise en place in a small kitchen?
A: Great question! Mise en place doesn’t have to mean covering every inch of your counter with prep bowls. In a small kitchen, try these tricks: use stackable containers to save space, prep ingredients in stages (chop veggies first, then measure spices), and designate one area (like a cutting board over the sink) as your prep station. You can also use magnetic strips to store knives and tools vertically, freeing up counter space. The key is to stay organized and clean as you go, it’ll make a huge difference.
Q: I’m scared of high-heat cooking because I don’t want to set off my smoke alarm. Any tips?
A: Totally understandable! High-heat cooking can be intimidating, but there are ways to do it safely. First, open a window or turn on your exhaust fan to improve ventilation. Second, preheat your pan properly-a hot pan means less sticking and less smoke. Third, use oils with high smoke points (like avocado or peanut oil) instead of olive oil. And finally, keep a close eye on your food-high heat means things can go from perfect to burnt in seconds. Start with shorter bursts of high heat (like searing a steak) before tackling longer cooking methods (like stir-frying).
Q: Batch cooking sounds great, but I always get bored eating the same thing. How do I keep it interesting?
A: This is such a common problem! The trick is to batch cook versatile ingredients (like roasted veggies, cooked grains, or proteins) and then mix and match them throughout the week. For example, roasted sweet potatoes can go into a grain bowl one day, a taco the next, and a salad the day after. Cooked chicken can be used in wraps, pasta, or stir-fries. And don’t forget about sauces and dressings-a simple swap (like switching from pesto to chimichurri) can make the same ingredients feel totally new. Also, freeze half your batch so you can pull it out later when you’re sick of leftovers.
Q: I don’t have fancy plating tools. Can I still plate like a pro?
A: Absolutely! You don’t need a squeeze bottle or ring mold to plate beautifully. Start with the basics: use a white plate to make colors pop, arrange food in odd numbers (like 3 scallops instead of 2), and wipe the edges of the plate for a clean look. You can also use everyday tools creatively, like a spoon to smear sauce, a fork to create texture, or a paper towel to blot excess oil. The key is to focus on balance and simplicity. A well-placed garnish (like a sprinkle of herbs or a drizzle of olive oil) can make even the simplest dish look restaurant-worthy.
@article{commercial-kitchen-techniques-for-home-cooks-how-to-scale-down-pro-methods-without-losing-the-magic,
    title   = {Commercial Kitchen Techniques for Home Cooks: How to Scale Down Pro Methods Without Losing the Magic},
    author  = {Chef's icon},
    year    = {2026},
    journal = {Chef's Icon},
    url     = {https://chefsicon.com/commercial-kitchen-techniques-for-home-cooks-scaled-down/}
}