The Best Fluffy Pancakes recipe you will fall in love with. Full of tips and tricks to help you make the best pancakes.
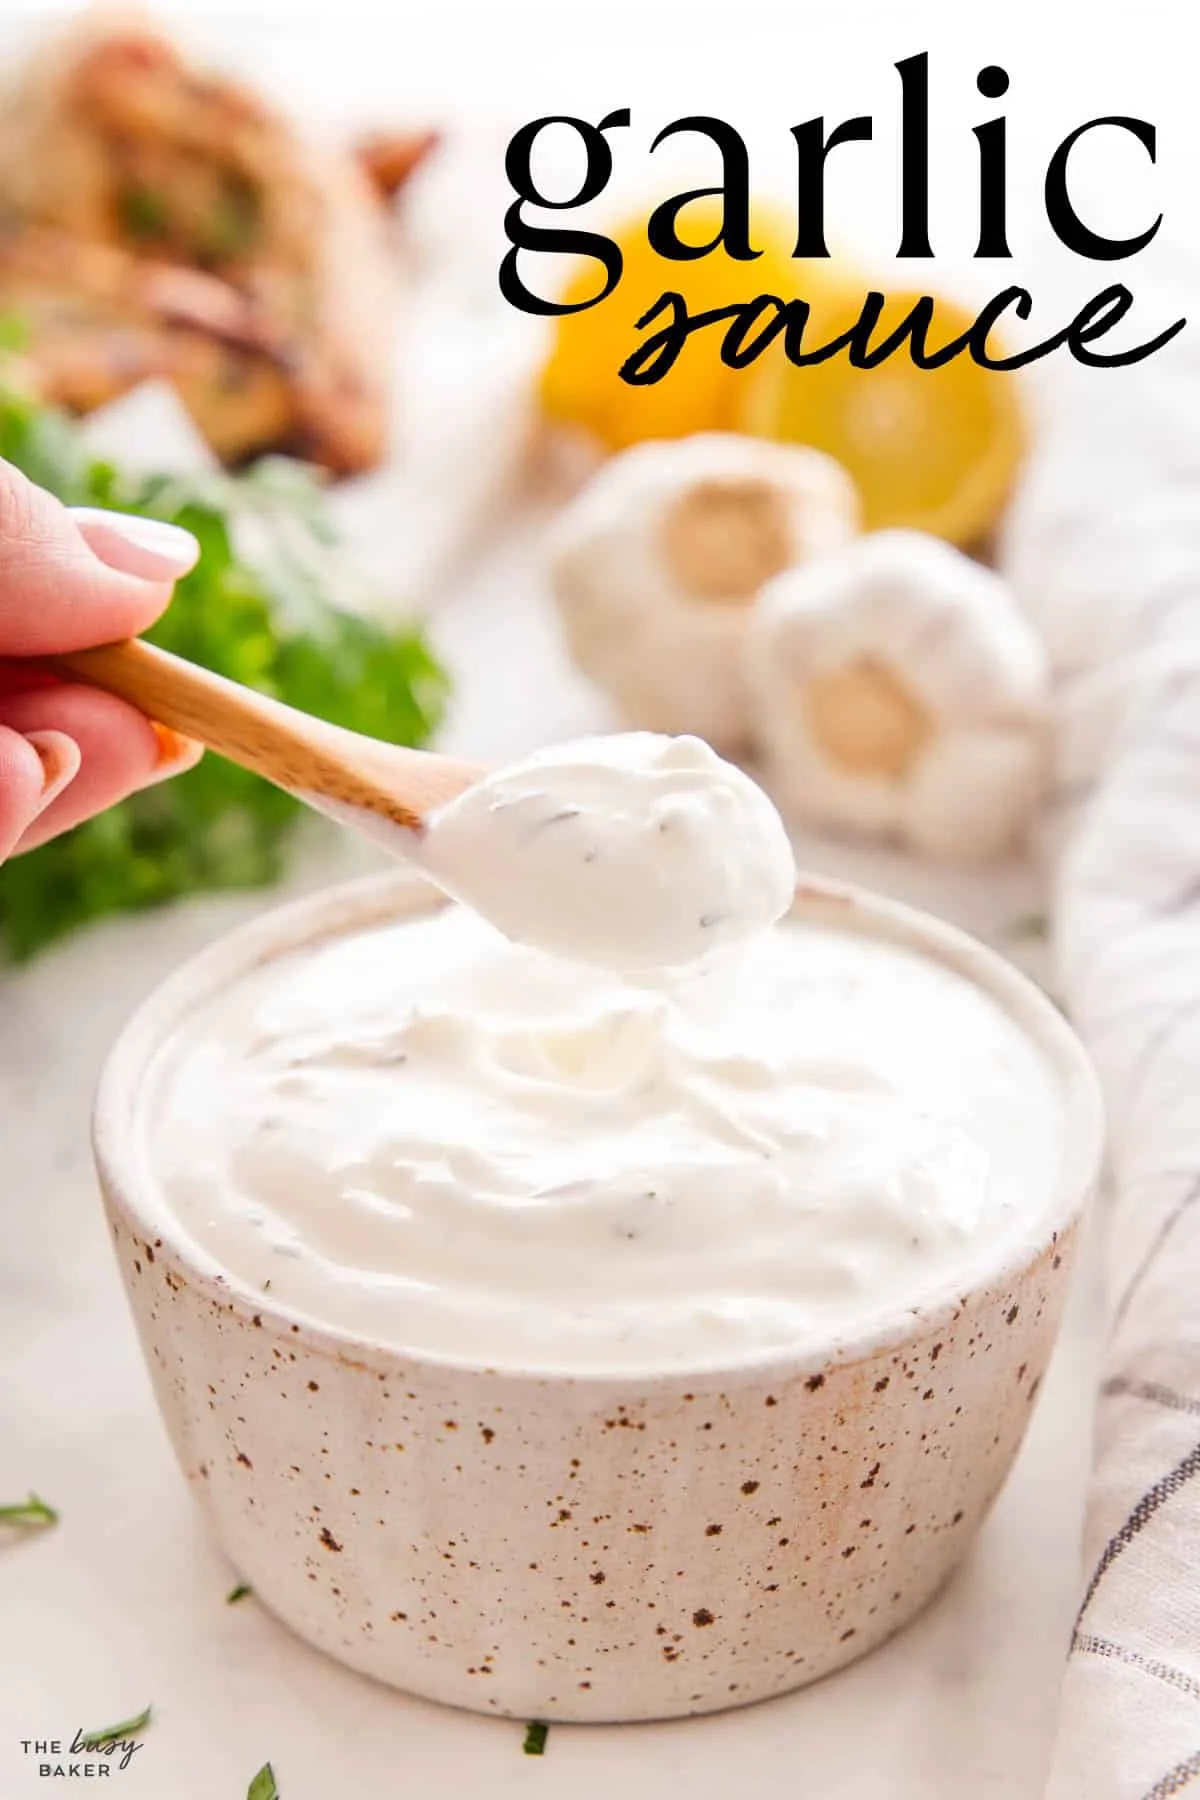
Let me start with a confession: I once tried to make garlic crème fraîche sauce for 200 people in a tiny test kitchen with a hand whisk and a prayer. It was a disaster. The sauce broke, the garlic burned, and by the time I was done, I had a splitting headache and a newfound respect for line cooks everywhere. That was back when I thought scaling a sauce was just about multiplying ingredients. Oh, how wrong I was.
Fast forward to today, and I’ve spent the last few years picking the brains of chefs, food scientists, and even a few exasperated line cooks who’ve had to bail me out more times than I care to admit. Scaling garlic crème fraîche sauce for high-volume restaurants isn’t just about bigger batches, it’s about understanding thermal dynamics, emulsion stability, ingredient ratios, and the psychology of a kitchen under pressure. It’s part science, part art, and a whole lot of trial and error. If you’re reading this, you’re probably facing a similar challenge: how do you take a sauce that’s perfect in a 1-quart batch and make it work for 50 gallons without turning it into a sad, oily mess or a flavorless glop?
Here’s the good news: it’s absolutely doable. The bad news? There’s no one-size-fits-all answer. But by the end of this article, you’ll have a scalable framework for garlic crème fraîche sauce that balances flavor, texture, and efficiency. You’ll learn how to adjust cooking methods for large batches, source ingredients that won’t break the bank, troubleshoot common problems, and even train your staff to execute it consistently. And yes, we’ll talk about the mistakes I made so you don’t have to repeat them. Ready? Let’s dive in.
The Philosophy of Scaling: Why Bigger Isn’t Always Better
Before we get into the nitty-gritty, let’s talk about why scaling is so tricky. When you make a small batch of garlic crème fraîche sauce, you’re working with a controlled environment. The heat is even, the ingredients are fresh, and you can taste as you go. But when you scale up, everything changes. The surface area-to-volume ratio shifts, the heat distribution becomes uneven, and suddenly, you’re dealing with emulsions that want to break, garlic that burns before it mellows, and crème fraîche that curdles under the stress of high heat. It’s like going from cooking for your family to cooking for a small village, except the village is hungry, impatient, and judging you.
I remember talking to a chef at a high-volume brunch spot in Nashville who put it this way: “Scaling is like conducting an orchestra. In a small batch, you’re playing a solo piano piece. It’s intimate, and you can adjust on the fly. But when you scale, you’re suddenly leading a full symphony. If one section is off, the whole thing falls apart.” That analogy stuck with me because it’s so true. When you’re scaling garlic crème fraîche sauce, you’re not just dealing with ingredients, you’re managing people, equipment, time, and temperature. And if any one of those elements is out of sync, the sauce suffers.
So, where do you start? The first step is to deconstruct the sauce. What makes garlic crème fraîche sauce special? It’s the creamy tang of the crème fraîche, the sweet, mellow depth of the garlic, and the silky texture that comes from a well-balanced emulsion. When you scale, you can’t just throw more ingredients into a bigger pot and hope for the best. You have to rethink the process to preserve those key elements. That means adjusting your cooking times, heat levels, and even the order in which you add ingredients. It’s not as simple as multiplying everything by 100. In fact, sometimes you’ll need to reduce certain ingredients or increase others to compensate for the changes that come with scaling.
Let’s take garlic, for example. In a small batch, you can sauté a few cloves in butter until they’re golden and fragrant, and then add the crème fraîche. But in a large batch, the garlic is going to release more moisture, and the heat isn’t going to distribute as evenly. If you don’t adjust, you’ll end up with burnt garlic on the bottom of the pot and raw garlic floating in the sauce. Neither is ideal. So, how do you fix it? One solution is to bloom the garlic in oil separately and then add it to the sauce at the end. Another is to use a combination of fresh and roasted garlic to balance flavor and texture. We’ll dive deeper into this later, but the point is: scaling requires creative problem-solving.
Understanding the Core Components: What Makes Garlic Crème Fraîche Sauce Tick
Before we can scale anything, we need to understand what we’re working with. Garlic crème fraîche sauce is a delicate balance of fat, acid, and aromatics. At its core, it’s an emulsion-a mixture of two liquids that don’t naturally combine, like oil and water. In this case, the fat from the crème fraîche and butter is emulsified with the liquid from the garlic and any additional dairy or stock. The key to a stable emulsion is slow incorporation and gentle heat. Too much heat, and the emulsion breaks. Too little, and the sauce won’t thicken properly. It’s a Goldilocks situation, and when you’re scaling, the margin for error gets even smaller.
Let’s break down the core components of the sauce:
- Crème Fraîche: This is the star of the show. Crème fraîche is a cultured dairy product with a higher fat content than sour cream (usually around 30-40%), which gives it a rich, tangy flavor and a thicker texture. It’s also more stable under heat than sour cream, which makes it ideal for sauces. But here’s the catch: not all crème fraîche is created equal. The quality and fat content can vary widely between brands, and that can affect your sauce. When scaling, you’ll need to test different brands to find one that works consistently in large batches.
- Garlic: Garlic is the flavor backbone of the sauce. It adds depth, sweetness, and a bit of a bite. But garlic is tricky because its flavor changes dramatically depending on how you cook it. Raw garlic is sharp and pungent, while roasted garlic is sweet and mellow. Sautéed garlic falls somewhere in between. When scaling, you’ll need to decide what kind of garlic flavor you want and adjust your cooking method accordingly. You’ll also need to consider how much garlic to use. Too little, and the sauce will taste bland. Too much, and it’ll overpower everything else.
- Butter or Oil: Fat is essential for emulsion stability and mouthfeel. Butter adds richness and a silky texture, while oil (like olive oil) can add a different kind of depth. The type of fat you use will affect the final texture and flavor of the sauce. When scaling, you’ll need to think about how the fat interacts with the other ingredients and whether it can hold up to the demands of a large batch.
- Acid: A touch of acid, like lemon juice, white wine, or vinegar, brightens the sauce and balances the richness of the crème fraîche. But acid can also destabilize the emulsion if you add too much too soon. When scaling, you’ll need to adjust the timing and amount of acid to avoid breaking the sauce.
- Seasoning: Salt and pepper are the final touches, but they’re crucial. Salt enhances the flavor of the garlic and crème fraîche, while pepper adds a subtle kick. When scaling, it’s easy to over- or under-season, so you’ll need a consistent method for tasting and adjusting.
Now, here’s where things get interesting. When you scale, each of these components behaves differently. The fat in the crème fraîche might separate more easily, the garlic might cook unevenly, and the acid might not distribute evenly. That’s why you can’t just multiply the ingredients and call it a day. You have to rethink the ratios and the process to account for these changes. For example, you might need to reduce the amount of garlic slightly in a large batch because the flavor will concentrate as the sauce reduces. Or you might need to add the acid later in the process to prevent the emulsion from breaking.
I’ll be honest: this part can feel overwhelming. There’s a lot to consider, and it’s easy to second-guess yourself. But here’s the thing: you don’t have to get it perfect on the first try. Scaling is an iterative process. You’ll make a batch, taste it, adjust, and try again. The key is to document everything so you can learn from each attempt. Which brings me to my next point: the importance of testing.
The Testing Phase: Why You Can’t Skip It (No Matter How Tempting)
If there’s one piece of advice I could give to anyone trying to scale a sauce, it’s this: test, test, test. I know, I know, testing is time-consuming, expensive, and sometimes frustrating. But skipping this step is like building a house without a blueprint. You might get lucky and end up with something that stands, but more likely, you’ll end up with a mess that collapses under pressure. And in a high-volume restaurant, pressure is the one thing you can count on.
When I first started scaling garlic crème fraîche sauce, I made the mistake of assuming that what worked in a small batch would work in a large one. Spoiler alert: it didn’t. The first large batch I made was a disaster. The sauce broke, the garlic was undercooked, and the texture was all wrong. It was a humbling experience, but it taught me the importance of systematic testing. Here’s how I approach it now:
- Start Small: Before you jump into a 50-gallon batch, test in 5-gallon increments. This allows you to make adjustments without wasting a ton of ingredients. It’s also easier to control the heat and monitor the sauce in smaller batches.
- Document Everything: Keep a detailed log of each test batch. Note the ingredients, quantities, cooking times, temperatures, and any adjustments you make along the way. Also, record the final texture, flavor, and appearance of the sauce. This will help you identify patterns and make informed adjustments for the next batch.
- Taste at Every Stage: Don’t wait until the end to taste the sauce. Taste it after each major step-after sautéing the garlic, after adding the crème fraîche, after seasoning, etc. This will help you catch issues early and make adjustments before it’s too late.
- Test Under Real Conditions: If possible, test the sauce in the actual kitchen where it will be made. This will give you a sense of how the sauce behaves under real-world conditions, including heat fluctuations, staff workflow, and equipment limitations.
- Get Feedback: Don’t rely solely on your own palate. Get feedback from chefs, line cooks, and even customers (if possible). Different people have different sensitivities to flavor and texture, and their input can help you refine the sauce.
Let me give you an example of how testing saved me from a major headache. During one of my early tests, I noticed that the sauce was separating when I added the crème fraîche too quickly. At first, I thought it was a problem with the crème fraîche itself, but after a few more tests, I realized it was a temperature issue. The crème fraîche was too cold when I added it, which caused the fat to solidify and break the emulsion. Once I started tempering the crème fraîche (bringing it to room temperature before adding it to the sauce), the problem disappeared. It was a small adjustment, but it made a huge difference.
Testing isn’t just about fixing problems, it’s also about optimizing the process. For example, during one test, I realized that blooming the garlic in oil separately and then adding it to the sauce at the end gave me a more consistent flavor and better texture. It added an extra step, but it was worth it. Testing also helped me figure out the ideal cooking time for the garlic. Too short, and the sauce tasted raw. Too long, and it tasted burnt. Finding that sweet spot took time, but it was essential for scaling successfully.
Here’s the thing about testing: it’s not glamorous. It’s tedious, repetitive, and sometimes frustrating. But it’s also the only way to ensure consistency in a high-volume setting. And consistency is what separates a good restaurant from a great one. So, embrace the process. Keep detailed notes, stay patient, and don’t be afraid to fail. Every failed batch is a step closer to success.
Choosing the Right Equipment: The Tools That Make Scaling Possible
You can have the best recipe in the world, but if you don’t have the right equipment, scaling garlic crème fraîche sauce is going to be a nightmare. The tools you use in a home kitchen, like a whisk and a saucepan, just won’t cut it in a high-volume restaurant. You need equipment that can handle large quantities, distribute heat evenly, and maintain consistent temperatures. And let’s not forget about storage and reheating, because in a busy kitchen, the sauce isn’t always going to be served fresh off the stove.
Let’s start with the most important piece of equipment: the cooking vessel. For small batches, a heavy-bottomed saucepan is fine. But for large batches, you’ll need something with better heat distribution and more capacity. Here are a few options:
- Steam Jacketed Kettles: These are the gold standard for scaling sauces. A steam-jacketed kettle uses indirect heat (steam circulating in a jacket around the pot) to cook the sauce evenly and gently. This is crucial for emulsion stability and preventing scorching. They come in a variety of sizes, from 10 gallons to 100 gallons or more, and many have agitators to keep the sauce moving and prevent separation. The downside? They’re expensive and take up a lot of space. But if you’re serious about scaling, they’re worth the investment.
- Tilting Skillets: A tilting skillet is a versatile piece of equipment that can be used for everything from sautéing to braising to making sauces. It’s essentially a large, flat-bottomed pan with a tilting mechanism that makes it easy to pour out the sauce. The advantage of a tilting skillet is that it can handle high heat and large quantities, but the downside is that the heat isn’t as even as a steam-jacketed kettle. This can lead to hot spots and uneven cooking, which is a problem for delicate sauces like garlic crème fraîche. If you go this route, you’ll need to stir constantly and monitor the temperature closely.
- Braising Pans: Similar to tilting skillets, braising pans are large, shallow pans with a lid. They’re great for browning meats and reducing sauces, but they’re not ideal for delicate emulsions. The heat can be too intense, and the lack of an agitator means you’ll have to stir constantly to prevent scorching. That said, if you’re working with limited space or budget, a braising pan can be a decent alternative to a steam-jacketed kettle.
- Stock Pots with Induction Burners: If you’re on a tight budget, you can use a large stock pot on an induction burner. Induction burners provide even heat and precise temperature control, which is essential for scaling sauces. The downside is that you’ll have to stir constantly to prevent scorching, and the capacity is limited compared to a steam-jacketed kettle. But if you’re just starting out, this can be a cost-effective solution.
Now, let’s talk about agitators. If you’re making a large batch of garlic crème fraîche sauce, you’re going to need some way to keep the sauce moving and prevent separation. In a small batch, a whisk is fine. But in a large batch, you’ll need something more powerful. Here are a few options:
- Handheld Immersion Blenders: These are great for small to medium batches (up to 20 gallons). They’re portable, easy to use, and can blend the sauce directly in the pot. The downside is that they can be tiring to use for extended periods, and they’re not as powerful as a countertop blender. If you go this route, make sure to blend in short bursts to avoid overheating the sauce.
- Countertop Blenders: If you’re making a medium-sized batch (up to 10 gallons), a high-powered countertop blender can work well. The advantage is that it’s fast and efficient, and it can create a smooth, stable emulsion. The downside is that you’ll have to transfer the sauce to the blender, which can be messy and time-consuming. You’ll also need to blend in batches, which can lead to inconsistencies in texture and flavor.
- Industrial Mixers: For large batches (20 gallons or more), an industrial mixer with a whisk attachment is your best bet. These mixers are powerful, consistent, and can handle large quantities without overheating. They’re also easier on the arms than a handheld immersion blender. The downside? They’re expensive and take up a lot of space. But if you’re scaling regularly, they’re worth the investment.
Don’t forget about storage and reheating. In a high-volume restaurant, you’re not always going to serve the sauce fresh off the stove. You’ll need to store it and reheat it without breaking the emulsion or compromising the flavor. Here’s what you’ll need:
- Stainless Steel Containers: These are durable, easy to clean, and non-reactive, which makes them ideal for storing sauces. Look for containers with tight-fitting lids to prevent contamination and airtight seals to preserve freshness. You’ll also want to label them with the date and contents to avoid mix-ups.
- Hot Holding Equipment: If you’re serving the sauce over an extended period, you’ll need a way to keep it hot without overcooking it. A steam table or bain-marie is perfect for this. These units use indirect heat to maintain a consistent temperature, which is crucial for emulsion stability. Just make sure to stir the sauce occasionally to prevent separation.
- Reheating Equipment: If you’re reheating the sauce, you’ll need to do it gently to avoid breaking the emulsion. A steam-jacketed kettle or double boiler is ideal for this. Avoid using a microwave or direct heat, as these can cause the sauce to separate or scorch.
Finally, let’s talk about temperature control. Garlic crème fraîche sauce is sensitive to heat, and even a few degrees can make the difference between a silky, stable emulsion and a broken, oily mess. That’s why you’ll need a reliable thermometer to monitor the temperature throughout the cooking process. Here are a few options:
- Instant-Read Thermometers: These are fast, accurate, and easy to use. They’re great for spot-checking the temperature of the sauce, but they’re not ideal for continuous monitoring.
- Digital Probe Thermometers: These thermometers have a probe that you can leave in the sauce to monitor the temperature continuously. They’re more expensive than instant-read thermometers, but they’re invaluable for scaling sauces.
- Infrared Thermometers: These thermometers measure the surface temperature of the sauce without touching it. They’re fast and convenient, but they’re not as accurate as probe thermometers, especially for thick sauces like garlic crème fraîche.
I’ll be honest: investing in the right equipment can feel overwhelming, especially if you’re on a tight budget. But here’s the thing: the right tools will save you time, money, and headaches in the long run. They’ll also help you maintain consistency, which is crucial for a high-volume restaurant. So, take the time to research your options, talk to other chefs, and invest in equipment that fits your needs and budget. It’s not just about scaling, it’s about scaling smart.
Adjusting the Recipe: How to Scale Ingredients Without Losing Flavor
Alright, let’s get into the nitty-gritty: how to actually scale the recipe. This is where things get tricky because, as I’ve mentioned before, scaling isn’t just about multiplying ingredients. You have to adjust the ratios, rethink the process, and compensate for the changes that come with larger batches. It’s a bit like baking a cake in a giant pan, you can’t just multiply the ingredients and expect it to turn out the same. The heat distribution, cooking time, and moisture levels are all different, and you have to account for that.
Let’s start with the base recipe. Here’s a simple version of garlic crème fraîche sauce that works well for small batches:
- 1 cup (240ml) crème fraîche
- 4 cloves garlic, minced
- 2 tbsp (30g) unsalted butter
- 1 tbsp (15ml) lemon juice
- Salt and pepper to taste
This recipe is simple, balanced, and delicious. But if you try to scale it directly to 50 gallons, you’re going to run into problems. The garlic will overpower the sauce, the emulsion will break, and the flavor will be inconsistent. So, how do you adjust it? Here’s what I’ve learned through trial and error:
1. Crème Fraîche: The Heart of the Sauce
Crème fraîche is the star of the show, so it’s crucial to get this right. When scaling, you’ll need to adjust the quantity to account for evaporation and reduction. In a small batch, you might not notice much evaporation, but in a large batch, the sauce will reduce significantly as it cooks. This can lead to a thicker, more concentrated sauce than you intended. To compensate, you’ll need to increase the amount of crème fraîche slightly. Here’s a rough guideline:
- Small Batch (1 quart): 1 cup (240ml) crème fraîche
- Medium Batch (5 gallons): 6.5 cups (1.56 liters) crème fraîche
- Large Batch (50 gallons): 65 cups (15.6 liters) crème fraîche
But here’s the catch: not all crème fraîche is the same. The fat content and acidity can vary between brands, and that can affect the texture and flavor of the sauce. When scaling, you’ll need to test different brands to find one that works consistently in large batches. I’ve found that higher-fat crème fraîche (35-40%) tends to hold up better in large batches because it’s more stable under heat. Lower-fat crème fraîche (20-30%) can separate more easily, especially if the sauce is reheated.
Another thing to consider is temperature. Crème fraîche is sensitive to heat, and if you add it to the sauce too quickly or at too high a temperature, it can curdle. To prevent this, you’ll need to temper the crème fraîche by bringing it to room temperature before adding it to the sauce. You can also add it in stages, starting with a small amount and gradually increasing the heat to acclimate the crème fraîche to the temperature of the sauce.
2. Garlic: The Flavor Backbone
Garlic is tricky because its flavor changes dramatically depending on how you cook it. In a small batch, you can sauté a few cloves in butter until they’re golden and fragrant, and then add the crème fraîche. But in a large batch, the heat isn’t as even, and the garlic can cook unevenly. This can lead to burnt garlic on the bottom of the pot and raw garlic floating in the sauce. Neither is ideal.
So, how do you scale garlic? Here are a few approaches:
- Bloom in Oil: Instead of sautéing the garlic directly in the pot, bloom it in oil separately and then add it to the sauce at the end. This gives you more control over the cooking process and ensures that the garlic is evenly cooked. To do this, heat a small amount of oil in a pan, add the minced garlic, and cook it low and slow until it’s golden and fragrant. Then, transfer the garlic and oil to the sauce and stir to combine. This method works well for large batches because it prevents the garlic from burning and gives you a more consistent flavor.
- Roast the Garlic: Roasting garlic mellows its flavor and adds a sweet, caramelized depth to the sauce. To roast garlic, slice the tops off whole heads, drizzle them with olive oil, wrap them in foil, and roast them in the oven at 350°F (175°C) for 45-60 minutes, or until the cloves are soft and golden. Once roasted, you can squeeze the cloves out of the skins and mash them into a paste. This paste can then be added to the sauce. Roasted garlic works well in large batches because it’s more forgiving than raw garlic and adds a rich, complex flavor.
- Use a Combination: For the best of both worlds, you can use a combination of fresh and roasted garlic. This gives you the bright, pungent flavor of fresh garlic and the sweet, mellow depth of roasted garlic. To do this, roast half the garlic and sauté the other half in oil. Then, combine them in the sauce. This method works well for large batches because it balances flavor and texture.
When scaling garlic, you’ll also need to adjust the quantity. In a small batch, 4 cloves of garlic might be perfect. But in a large batch, that same ratio can overpower the sauce. Here’s a rough guideline for scaling garlic:
- Small Batch (1 quart): 4 cloves garlic
- Medium Batch (5 gallons): 20 cloves garlic (about 4 heads)
- Large Batch (50 gallons): 200 cloves garlic (about 40 heads)
But remember: this is just a starting point. The type of garlic, cooking method, and personal preference will all affect the final flavor. You’ll need to taste as you go and adjust accordingly. And don’t be afraid to experiment-sometimes the best results come from unexpected combinations.
3. Butter or Oil: The Emulsion Stabilizer
Butter or oil is essential for emulsion stability and mouthfeel. In a small batch, 2 tablespoons of butter might be enough to create a silky, stable sauce. But in a large batch, you’ll need more fat to compensate for the increased volume and longer cooking time. Here’s a rough guideline for scaling butter or oil:
- Small Batch (1 quart): 2 tbsp (30g) butter or oil
- Medium Batch (5 gallons): 1 cup (240ml) butter or oil
- Large Batch (50 gallons): 10 cups (2.4 liters) butter or oil
But here’s the thing: not all fats are created equal. Butter adds richness and a silky texture, while oil (like olive oil) adds a different kind of depth. The type of fat you use will affect the final flavor and texture of the sauce. When scaling, you’ll need to test different fats to find one that works best for your needs.
Another thing to consider is how you add the fat. In a small batch, you can melt the butter and whisk it into the sauce. But in a large batch, you’ll need a more efficient method. Here are a few options:
- Melt the Butter Separately: Melt the butter in a separate pot and then slowly whisk it into the sauce. This gives you more control over the emulsion and prevents the sauce from breaking.
- Use an Emulsifier: If you’re having trouble with the emulsion, you can add a small amount of emulsifier, like mustard or egg yolk, to help stabilize the sauce. Just be careful not to add too much, as this can alter the flavor.
- Blend the Sauce: After adding the fat, blend the sauce with an immersion blender or countertop blender to create a smooth, stable emulsion. This works well for large batches because it incorporates the fat evenly and prevents separation.
4. Acid: The Brightening Agent
A touch of acid, like lemon juice, white wine, or vinegar, brightens the sauce and balances the richness of the crème fraîche. But acid can also destabilize the emulsion if you add too much too soon. In a small batch, 1 tablespoon of lemon juice might be perfect. But in a large batch, that same ratio can overpower the sauce or cause it to break. Here’s a rough guideline for scaling acid:
- Small Batch (1 quart): 1 tbsp (15ml) lemon juice or white wine
- Medium Batch (5 gallons): 1/2 cup (120ml) lemon juice or white wine
- Large Batch (50 gallons): 5 cups (1.2 liters) lemon juice or white wine
But remember: this is just a starting point. The type of acid, timing, and personal preference will all affect the final flavor. When scaling, you’ll need to taste as you go and adjust accordingly. Here are a few tips for adding acid to large batches:
- Add It Late: To prevent the emulsion from breaking, add the acid late in the cooking process, after the sauce has thickened. This gives the acid less time to interact with the other ingredients and reduces the risk of separation.
- Dilute It: If you’re using a strong acid, like vinegar, you can dilute it with water before adding it to the sauce. This reduces the intensity of the acid and makes it easier to control the flavor.
- Use a Combination: For a more complex flavor, you can use a combination of acids, like lemon juice and white wine. This adds depth and brightness to the sauce without overpowering it.
5. Seasoning: The Final Touch
Seasoning is the final touch that brings the sauce together. In a small batch, you can taste as you go and adjust the salt and pepper to your liking. But in a large batch, it’s easy to over- or under-season. Here’s a rough guideline for scaling seasoning:
- Small Batch (1 quart): 1/2 tsp salt, 1/4 tsp pepper
- Medium Batch (5 gallons): 2 tbsp salt, 1 tbsp pepper
- Large Batch (50 gallons): 1 cup salt, 1/2 cup pepper
But remember: this is just a starting point. The type of salt, personal preference, and other ingredients will all affect the final flavor. When scaling, you’ll need to taste as you go and adjust accordingly. Here are a few tips for seasoning large batches:
- Season in Stages: Instead of adding all the salt at once, season in stages. Start with a small amount, taste, and then add more as needed. This gives you more control over the final flavor.
- Use a Seasoning Blend: For a more complex flavor, you can use a seasoning blend, like herbs de Provence or garlic powder. This adds depth and complexity to the sauce without overpowering it.
- Taste as You Go: This might seem obvious, but it’s easy to forget when you’re making a large batch. Taste the sauce at every stage-after adding the garlic, after adding the crème fraîche, after seasoning, etc. This will help you catch issues early and make adjustments before it’s too late.
The Step-by-Step Process: How to Scale Garlic Crème Fraîche Sauce Like a Pro
Alright, now that we’ve covered the ingredients and equipment, let’s get into the step-by-step process for scaling garlic crème fraîche sauce. This is where the rubber meets the road, and it’s where most people run into trouble. But if you follow these steps, you’ll be well on your way to a smooth, stable, and delicious sauce that works in a high-volume setting.
Step 1: Prep the Ingredients
Before you start cooking, you’ll need to prep all your ingredients. This might seem obvious, but it’s easy to overlook when you’re making a large batch. Here’s what you’ll need to do:
- Crème Fraîche: Measure out the correct amount of crème fraîche and let it come to room temperature. This will prevent it from curdling when you add it to the sauce.
- Garlic: Peel and mince the garlic (or roast it, if you’re using that method). If you’re blooming the garlic in oil, measure out the correct amount of oil and set it aside.
- Butter or Oil: Measure out the correct amount of butter or oil. If you’re using butter, cut it into small pieces so it melts evenly.
- Acid: Measure out the correct amount of lemon juice, white wine, or vinegar. If you’re using a strong acid, dilute it with water to reduce the intensity.
- Seasoning: Measure out the correct amount of salt and pepper. If you’re using a seasoning blend, measure that out as well.
Pro tip: Label everything. When you’re making a large batch, it’s easy to lose track of what’s what. Labeling your ingredients will save you time and prevent mistakes.
Step 2: Cook the Garlic
Now it’s time to cook the garlic. This is where things can go wrong if you’re not careful. Here’s how to do it:
- Bloom in Oil: Heat a small amount of oil in a pan over low heat. Add the minced garlic and cook it low and slow until it’s golden and fragrant. This should take about 5-10 minutes. Be careful not to burn it, burnt garlic will make the sauce bitter.
- Roast the Garlic: If you’re using roasted garlic, squeeze the cloves out of the skins and mash them into a paste. Set the paste aside until you’re ready to add it to the sauce.
- Combination Method: If you’re using a combination of fresh and roasted garlic, bloom the fresh garlic in oil and then mix it with the roasted garlic paste. This gives you the best of both worlds-bright, pungent flavor from the fresh garlic and sweet, mellow depth from the roasted garlic.
Pro tip: Don’t rush this step. Garlic cooks quickly, and it’s easy to burn it if you’re not paying attention. Keep the heat low and stir constantly to ensure even cooking.
Step 3: Melt the Butter or Heat the Oil
Next, you’ll need to melt the butter or heat the oil. This is where the fat comes into play, and it’s crucial for emulsion stability. Here’s how to do it:
- Butter: Melt the butter in a separate pot over low heat. Be careful not to burn it, burnt butter will make the sauce bitter. Once the butter is melted, set it aside until you’re ready to add it to the sauce.
- Oil: Heat the oil in a separate pot over low heat. Once the oil is hot, set it aside until you’re ready to add it to the sauce.
Pro tip: Use clarified butter if you’re making a large batch. Clarified butter has the milk solids removed, which makes it more stable under heat and less likely to burn. It’s also easier to store and reheat than regular butter.
Step 4: Combine the Ingredients
Now it’s time to combine the ingredients. This is where the emulsion comes together, and it’s crucial to get it right. Here’s how to do it:
- Start with the Garlic: Add the cooked garlic (and oil, if you bloomed it separately) to the main cooking vessel. If you’re using a steam-jacketed kettle, set the heat to low. If you’re using a tilting skillet or braising pan, keep the heat low and even.
- Add the Butter or Oil: Slowly whisk in the melted butter or heated oil. This will help stabilize the emulsion and create a smooth, silky texture.
- Add the Crème Fraîche: Slowly whisk in the room-temperature crème fraîche. This is where things can go wrong if you’re not careful. If you add the crème fraîche too quickly or at too high a temperature, it can curdle. To prevent this, whisk constantly and keep the heat low.
- Blend the Sauce: Once all the ingredients are combined, blend the sauce with an immersion blender or countertop blender. This will help create a smooth, stable emulsion and prevent separation. If you’re using an immersion blender, blend in short bursts to avoid overheating the sauce.
Pro tip: Don’t walk away. This step requires constant attention. If you walk away, the sauce can separate or scorch. Stay with it until the emulsion is stable.
Step 5: Season the Sauce
Now it’s time to season the sauce. This is where you’ll balance the flavors and bring everything together. Here’s how to do it:
- Start with Salt: Add a small amount of salt and taste the sauce. Remember, you can always add more, but you can’t take it out. Keep adding salt a little at a time until the sauce is well-seasoned.
- Add Pepper: Once the salt is balanced, add a small amount of pepper. Again, taste as you go and adjust as needed.
- Add Acid: Finally, add the lemon juice, white wine, or vinegar. This will brighten the sauce and balance the richness of the crème fraîche. Be careful not to add too much, acid can destabilize the emulsion if you’re not careful.
Pro tip: Taste as you go. This is the most important step in the process. Taste the sauce after each addition and adjust as needed. If you’re making a large batch, use a clean spoon each time you taste to avoid contamination.
Step 6: Adjust the Texture
At this point, the sauce should be smooth, creamy, and well-seasoned. But you might need to adjust the texture. Here’s how to do it:
- Too Thick? If the sauce is too thick, you can thin it out with a little water, stock, or milk. Add it a little at a time and whisk constantly to prevent the emulsion from breaking.
- Too Thin? If the sauce is too thin, you can thicken it by simmering it low and slow. This will reduce the sauce and concentrate the flavors. Be careful not to over-reduce it, or the sauce will become too thick and gloppy.
- Broken Emulsion? If the emulsion breaks, don’t panic. You can fix it by blending the sauce with an immersion blender or countertop blender. If that doesn’t work, you can start over with a small amount of fresh crème fraîche and slowly whisk in the broken sauce.
Pro tip: Be patient. Adjusting the texture takes time, and it’s easy to overcorrect. Make small adjustments and taste as you go.
Step 7: Store or Serve the Sauce
Once the sauce is perfect, it’s time to store it or serve it. Here’s how to do it:
- Serving Immediately: If you’re serving the sauce immediately, transfer it to a steam table or bain-marie to keep it hot. Stir it occasionally to prevent separation.
- Storing for Later: If you’re storing the sauce for later, transfer it to a stainless steel container and let it cool to room temperature. Once it’s cool, cover it tightly and refrigerate it. The sauce will thicken as it cools, so you might need to thin it out with a little water or milk when you reheat it.
- Reheating: To reheat the sauce, transfer it to a steam-jacketed kettle or double boiler and heat it gently. Stir it constantly to prevent separation. If the sauce is too thick, thin it out with a little water or milk.
Pro tip: Label and date the sauce. This will help you track freshness and prevent waste. Most garlic crème fraîche sauce will keep for 3-5 days in the refrigerator, but it’s best to use it within 48 hours for optimal flavor and texture.
Troubleshooting Common Problems: What to Do When Things Go Wrong
No matter how careful you are, things can go wrong when you’re scaling garlic crème fraîche sauce. The sauce can break, the garlic can burn, the texture can be off, or the flavor can be unbalanced. But don’t panic, most problems are fixable if you know what to do. Here’s a troubleshooting guide for common issues:
Problem 1: The Sauce Breaks
Symptoms: The sauce looks oily or separated, with fat floating on top and a watery layer underneath.
Causes:
- The crème fraîche was too cold when you added it to the sauce.
- The heat was too high, causing the emulsion to break.
- You added the ingredients too quickly, without whisking constantly.
- The sauce was overheated during blending.
Solutions:
- Fix It: If the sauce breaks, you can fix it by blending it with an immersion blender or countertop blender. If that doesn’t work, you can start over with a small amount of fresh crème fraîche and slowly whisk in the broken sauce.
- Prevent It: To prevent the sauce from breaking, temper the crème fraîche by bringing it to room temperature before adding it to the sauce. Also, keep the heat low and whisk constantly when combining the ingredients. Finally, blend in short bursts to avoid overheating the sauce.
Problem 2: The Garlic Burns
Symptoms: The sauce tastes bitter or acrid, and the garlic looks dark brown or black.
Causes:
- The heat was too high when you cooked the garlic.
- You didn’t stir the garlic enough, causing it to burn on the bottom of the pot.
- You cooked the garlic for too long, causing it to overcaramelize.
Solutions:
- Fix It: If the garlic burns, you’ll need to start over with fresh garlic. There’s no way to salvage burnt garlic, it will make the sauce bitter.
- Prevent It: To prevent the garlic from burning, cook it low and slow over low heat. Stir it constantly to ensure even cooking, and remove it from the heat as soon as it’s golden and fragrant. If you’re making a large batch, bloom the garlic in oil separately and then add it to the sauce at the end.
Problem 3: The Sauce Is Too Thin
Symptoms: The sauce is watery and lacks body.
Causes:
- You didn’t reduce the sauce enough.
- You added too much liquid (like water or stock) to thin it out.
- The crème fraîche was too thin to begin with.
Solutions:
- Fix It: If the sauce is too thin, you can thicken it by simmering it low and slow. This will reduce the sauce and concentrate the flavors. Be careful not to over-reduce it, or the sauce will become too thick and gloppy.
- Prevent It: To prevent the sauce from becoming too thin, measure your ingredients carefully and reduce the sauce until it reaches the desired consistency. If you need to thin it out, add liquid a little at a time and whisk constantly.
Problem 4: The Sauce Is Too Thick
Symptoms: The sauce is gloppy and hard to pour.
Causes:
- You reduced the sauce too much.
- You didn’t add enough liquid (like water or stock) to thin it out.
- The crème fraîche was too thick to begin with.
Solutions:
- Fix It: If the sauce is too thick, you can thin it out with a little water, stock, or milk. Add it a little at a time and whisk constantly to prevent the emulsion from breaking.
- Prevent It: To prevent the sauce from becoming too thick, monitor the reduction closely and add liquid as needed to maintain the desired consistency. If you’re storing the sauce for later, thin it out slightly before refrigerating it, as it will thicken as it cools.
Problem 5: The Flavor Is Unbalanced
Symptoms: The sauce tastes too garlicky, too tangy, too rich, or bland.
Causes:
- You added too much or too little garlic.
- You added too much or too little acid.
- You over- or under-seasoned the sauce.
- The ingredients weren’t fresh or were of poor quality.
Solutions:
- Fix It: If the flavor is unbalanced, you can adjust it by adding more of the missing element. For example, if the sauce is too garlicky, you can add more crème fraîche to balance it out. If it’s too tangy, you can add a little sugar or honey to mellow it. If it’s bland, you can add more salt, acid, or garlic to brighten it up.
- Prevent It: To prevent flavor imbalances, taste as you go and adjust the seasoning gradually. Use fresh, high-quality ingredients, and measure carefully to ensure the right ratios. If you’re making a large batch, test a small amount before committing to the full batch.
Training Your Staff: How to Ensure Consistency in a High-Volume Kitchen
You’ve perfected the recipe, tested the process, and invested in the right equipment. But there’s one more hurdle to overcome: training your staff. In a high-volume kitchen, consistency is everything. If your line cooks don’t know how to make the sauce properly, all your hard work will go to waste. So, how do you train your staff to execute garlic crème fraîche sauce consistently? Here’s what I’ve learned:
1. Start with the Basics
Before you dive into the recipe, make sure your staff understands the basics of sauce-making. This includes:
- Emulsions: What they are, why they matter, and how to stabilize them.
- Heat Control: How to adjust the heat to prevent scorching or breaking.
- Seasoning: How to taste and adjust the seasoning properly.
- Knife Skills: How to mince garlic quickly and evenly.
You can cover these basics in a short training session or hands-on workshop. The key is to make sure everyone is on the same page before you move on to the recipe.
2. Demonstrate the Recipe
Once your staff understands the basics, demonstrate the recipe step by step. Walk them through the entire process, from prepping the ingredients to storing the sauce. Here’s how to do it:
- Show, Don’t Tell: Instead of just explaining the steps, show them how to do it. Demonstrate the proper technique for mincing garlic, blooming it in oil, and whisking in the crème fraîche.
- Explain the Why: Don’t just tell them what to do-explain why they’re doing it. For example, explain why it’s important to temper the crème fraîche or why you bloom the garlic in oil separately. This will help them understand the process and make better decisions on the fly.
- Answer Questions: Encourage your staff to ask questions and voice concerns. This will help you identify potential issues and clarify any confusion.
3. Let Them Practice
After you’ve demonstrated the recipe, let your staff practice. Start with small batches and gradually increase the size as they gain confidence. Here’s how to do it:
- Supervise Closely: Watch them as they practice and offer feedback in real time. If they make a mistake, correct it immediately and explain why it’s a problem.
- Encourage Tasting: Remind them to taste as they go and adjust the seasoning as needed. This will help them develop their palate and understand the importance of balance.
- Provide Written Instructions: Give them a written copy of the recipe to refer to as they practice. This will help them stay on track and remember the steps.
4. Test Their Knowledge
Once your staff has practiced a few times, test their knowledge. Ask them to make the sauce on their own and evaluate the results. Here’s how to do it:
- Taste the Sauce: Taste the sauce and evaluate the flavor, texture, and appearance. Is it balanced? Is the emulsion stable? Does it look appetizing?
- Ask Questions: Ask them why they made certain decisions and how they would fix common problems. This will help you gauge their understanding of the process.
- Provide Feedback: Offer constructive feedback and suggestions for improvement. If they made a mistake, explain why it happened and how to prevent it in the future.
5. Create a Standard Operating Procedure (SOP)
Once your staff is comfortable with the recipe, create a Standard Operating Procedure (SOP). This is a detailed, step-by-step guide that outlines the entire process, from prepping the ingredients to storing the sauce. Here’s what to include:
- Ingredients: List the ingredients, quantities, and brands (if applicable).
- Equipment: List the equipment needed, including cooking vessels, blenders, and thermometers.
- Steps: Outline the step-by-step process, including cooking times, temperatures, and techniques.
- Troubleshooting: Include a troubleshooting guide for common problems, like broken emulsions or burnt garlic.
- Safety Guidelines: Include safety guidelines, like how to handle hot liquids and how to store the sauce properly.
Post the SOP in a visible location in the kitchen, and review it regularly with your staff. This will help ensure consistency and prevent mistakes.
6. Foster a Culture of Feedback
Finally, foster a culture of feedback in your kitchen. Encourage your staff to share their thoughts and suggest improvements. Here’s how to do it:
- Hold Regular Meetings: Hold regular meetings to discuss the sauce and address any issues. Encourage your staff to share their experiences and offer suggestions.
- Encourage Experimentation: Encourage your staff to experiment with the recipe and try new techniques. This will help them develop their skills and find new ways to improve the sauce.
- Reward Good Work: Recognize and reward your staff for good work. This will motivate them to take pride in their craft and strive for consistency.
Training your staff isn’t a one-time event, it’s an ongoing process. The more you invest in your team, the better the results will be. And remember: consistency is key. If your staff knows how to make the sauce properly, your customers will keep coming back for more.
Final Thoughts: The Art and Science of Scaling
Scaling garlic crème fraîche sauce for high-volume restaurants is equal parts art and science. It’s about understanding the chemistry of emulsions, the dynamics of heat, and the psychology of a kitchen under pressure. But it’s also about trusting your instincts, embracing experimentation, and learning from your mistakes. There’s no one-size-fits-all solution, and what works for one restaurant might not work for another. But if you follow the framework I’ve outlined here-testing, adjusting, investing in the right equipment, and training your staff-you’ll be well on your way to a smooth, stable, and delicious sauce that works in even the busiest kitchens.
I’ll leave you with one final thought: scaling is a journey, not a destination. You’ll never reach a point where you’ve perfected the process and can stop learning. There will always be new challenges, new techniques, and new ways to improve. But that’s what makes it so rewarding. Every batch is an opportunity to refine your craft, push your limits, and create something truly special. So, embrace the process. Stay curious. And most importantly, keep cooking.
Now, go forth and scale that sauce. And if you run into trouble, remember: I’ve been there. We all have. The difference between success and failure isn’t avoiding mistakes, it’s learning from them.
FAQ
Q: Can I use sour cream instead of crème fraîche for this sauce?
A: You can, but it’s not ideal. Sour cream has a lower fat content than crème fraîche, which makes it less stable under heat. It’s also more likely to curdle if you add it to the sauce too quickly or at too high a temperature. If you must use sour cream, temper it by bringing it to room temperature before adding it to the sauce, and whisk constantly to prevent curdling. You can also stabilize it with a little cornstarch or flour, but this will alter the texture and flavor of the sauce. For the best results, stick with crème fraîche.
Q: How do I prevent the sauce from breaking when reheating it?
A: Reheating garlic crème fraîche sauce can be tricky because the emulsion is sensitive to heat. To prevent it from breaking, reheat it gently over low heat in a steam-jacketed kettle or double boiler. Stir it constantly to distribute the heat evenly and prevent scorching. If the sauce starts to separate, blend it with an immersion blender or countertop blender to re-emulsify it. You can also add a small amount of fresh crème fraîche and whisk it in to help stabilize the emulsion. Avoid using a microwave or direct heat, as these can cause the sauce to separate or scorch.
Q: Can I make this sauce ahead of time and store it?
A: Yes, you can make garlic crème fraîche sauce ahead of time and store it, but there are a few things to keep in mind. First, let the sauce cool to room temperature before storing it. This will prevent condensation from forming in the container, which can dilute the sauce and promote bacterial growth. Once it’s cool, transfer it to a stainless steel container with a tight-fitting lid and refrigerate it. The sauce will thicken as it cools, so you might need to thin it out with a little water or milk when you reheat it. Most garlic crème fraîche sauce will keep for 3-5 days in the refrigerator, but it’s best to use it within 48 hours for optimal flavor and texture. If you need to store it for longer, you can freeze it for up to 3 months, but the texture might change slightly when you thaw it.
Q: What’s the best way to thin out the sauce if it’s too thick?
A: If the sauce is too thick, you can thin it out with a little water, stock, or milk. Add it a little at a time and whisk constantly to prevent the emulsion from breaking. Start with 1-2 tablespoons and adjust as needed. If you’re using water or stock, make sure it’s warm (not cold) to prevent shocking the sauce. If you’re using milk, use whole milk for the best results, as it has a higher fat content and will blend more smoothly into the sauce. Avoid using cream or half-and-half, as these can alter the flavor and make the sauce too rich. If the sauce is gloppy or separated, you can blend it with an immersion blender or countertop blender to smooth it out before thinning it.
@article{how-to-scale-garlic-creme-fraiche-sauce-for-high-volume-restaurants-without-losing-flavor-or-sanity,
    title   = {How to Scale Garlic Crème Fraîche Sauce for High-Volume Restaurants Without Losing Flavor or Sanity},
    author  = {Chef's icon},
    year    = {2026},
    journal = {Chef's Icon},
    url     = {https://chefsicon.com/how-to-scale-garlic-creme-fraiche-sauce-for-high-volume-restaurants/}
}